My Unity6 Won't Connect to WiFi. What Can I Do to Fix This?
On the rare occasion that this happens, please follow the instructions below to restart your Unity6.
Step 1: Make sure to remove 9v Dc power from the Unity6.
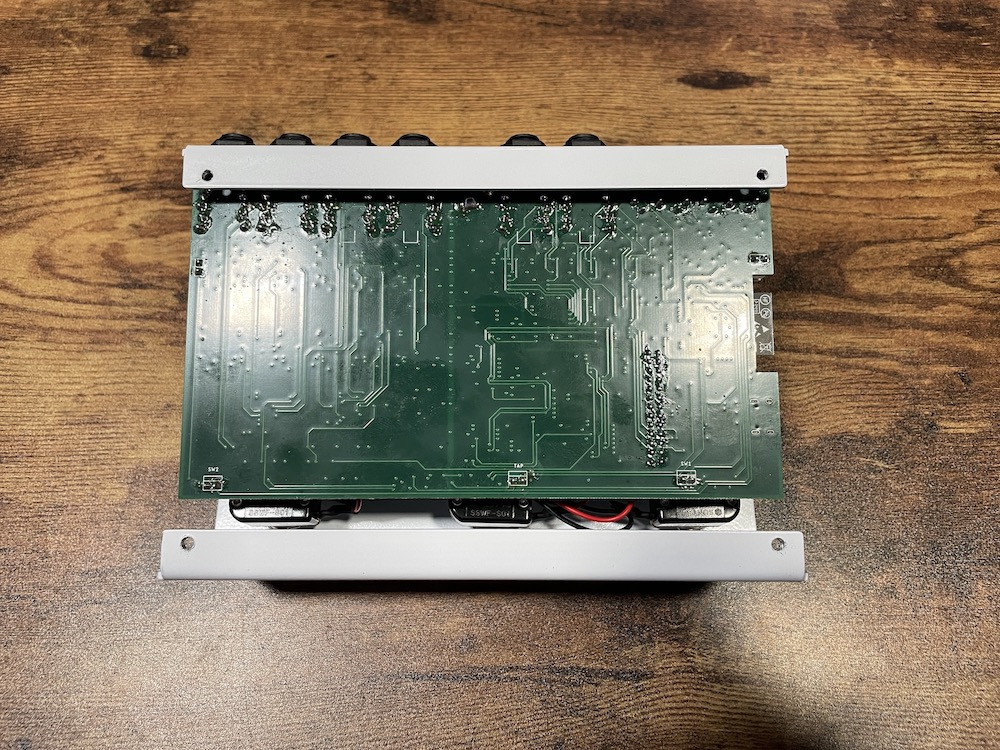
Step 2: To update the Unity6 you will need to gain access to the USB port inside the pedal. Start by removing the 4 screws on the back of the Unity6 and slide off the backplate:
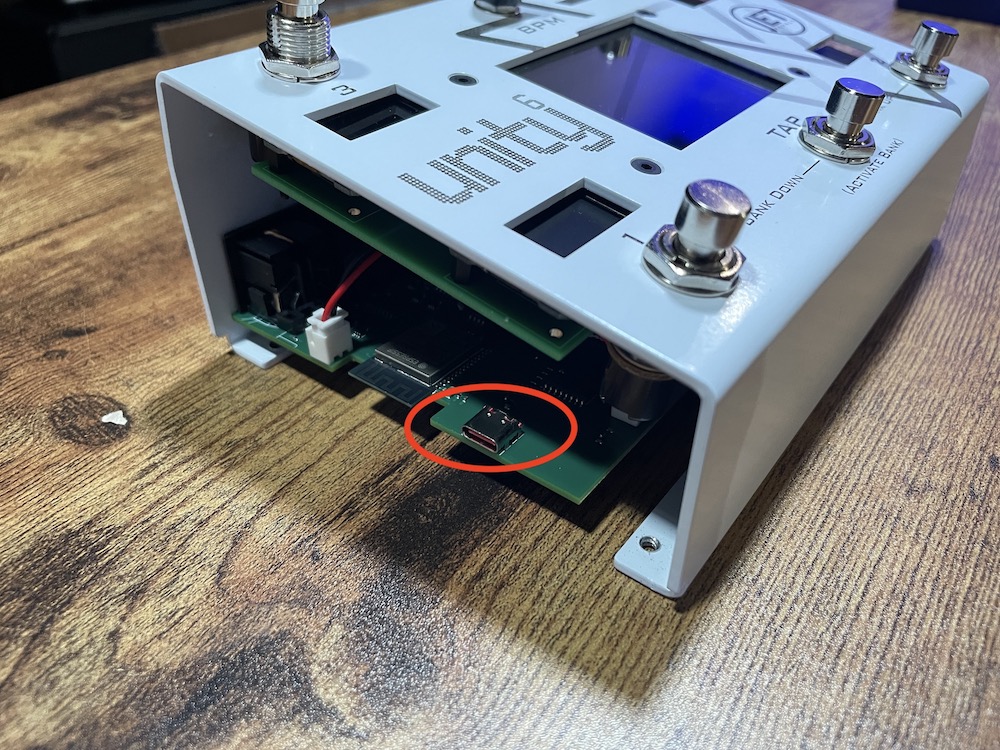
The USB C port is located on the left side of the Unity6:
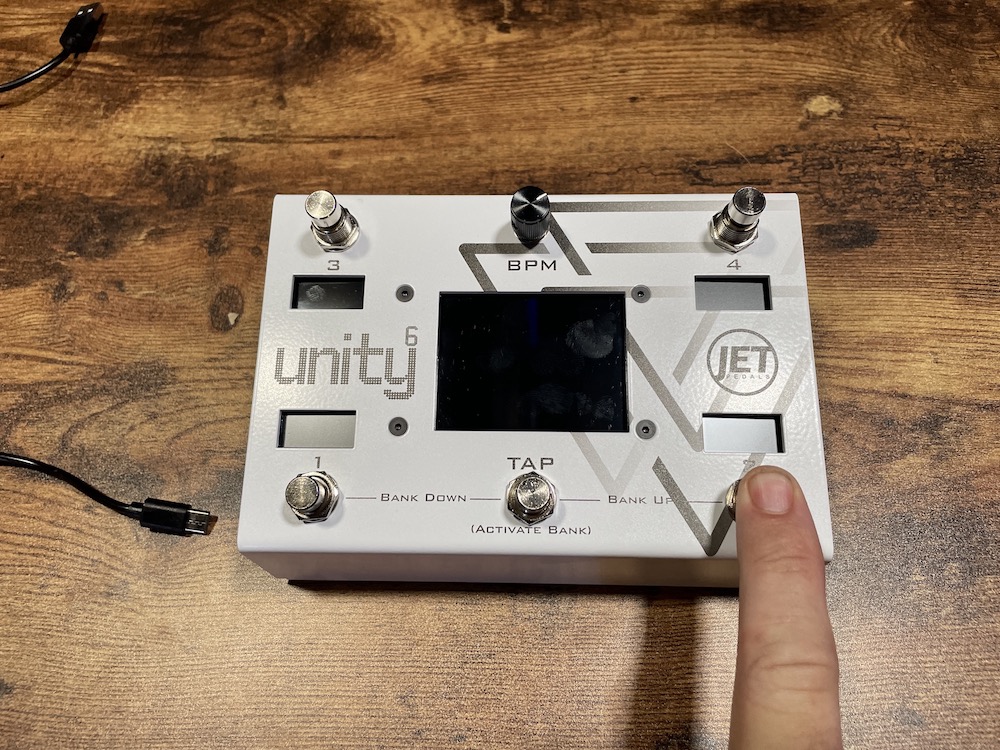
Step 3: Plug in a USB type C cable into your computer and leave the other end of the USB cable unplugged for now. Next hold down Switch 2 on the Unity6 and keep it held down while plugging the USB type C cable into the Unity6.
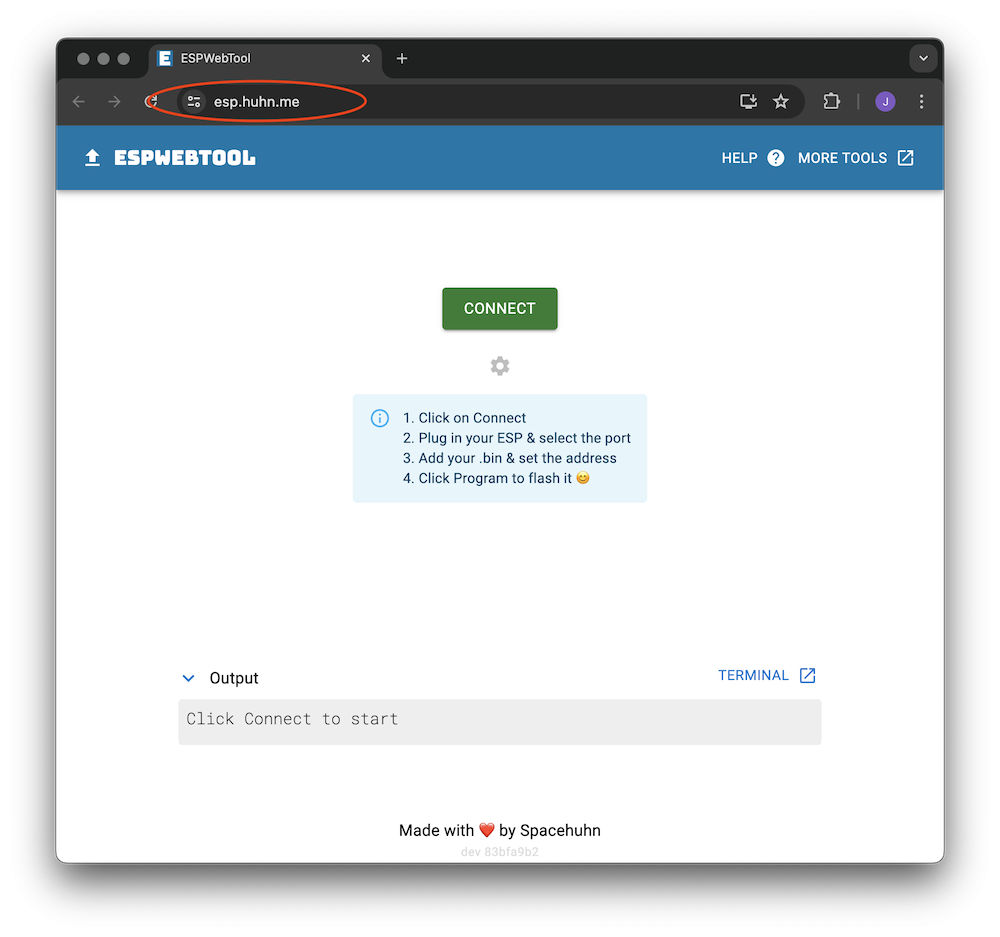
Step 4: After the USB cable is plugged in, release switch 2. Open Google Chrome and navigate to the following url: https://esp.huhn.me/ You will see the following webpage:
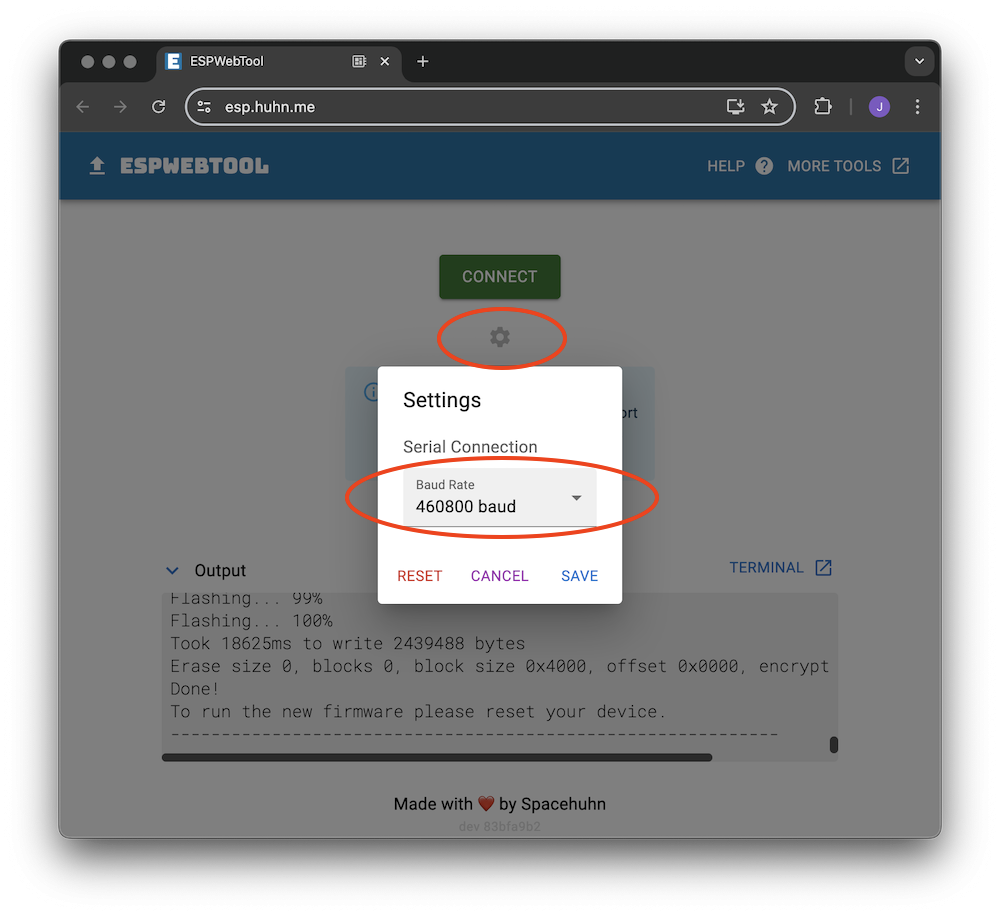
Step 5: Click the settings icon just below the Connect button and change the baud rate to 460800 baud and hit SAVE
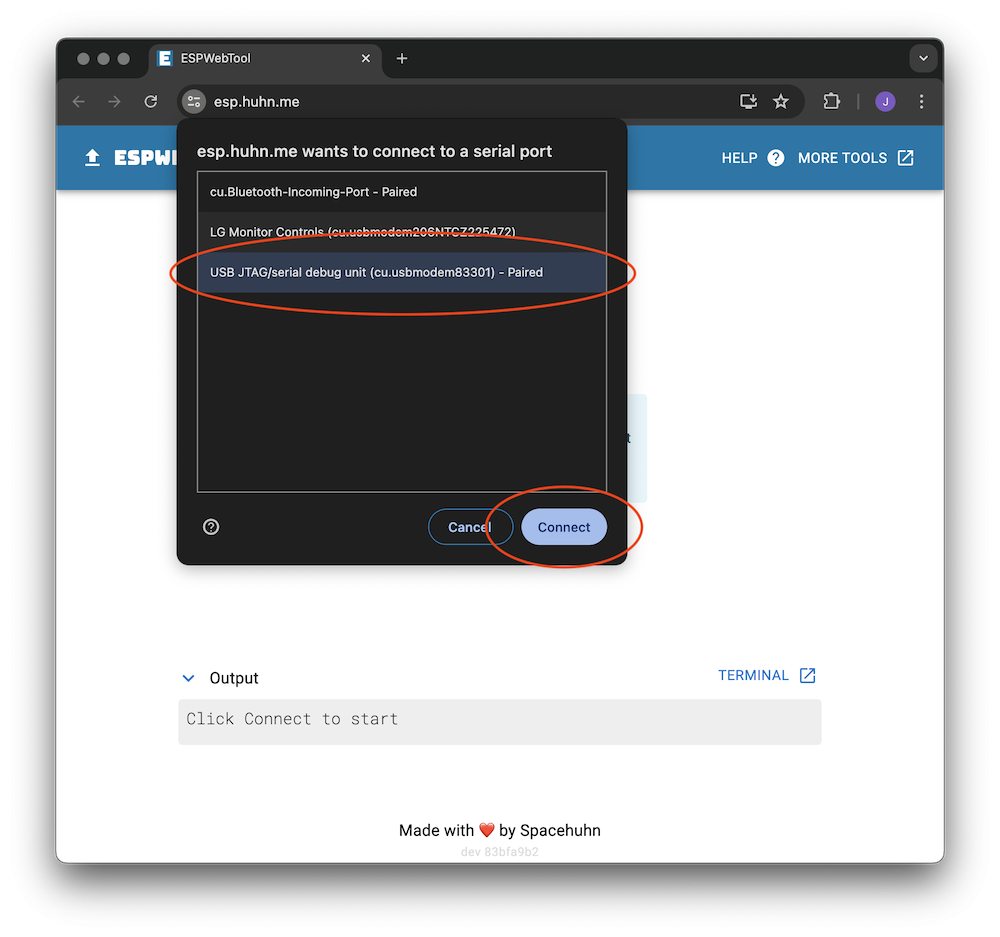
Step 6: Click the connect button and select the device that starts with USB JTAG/serial debug unit then click the Connect button
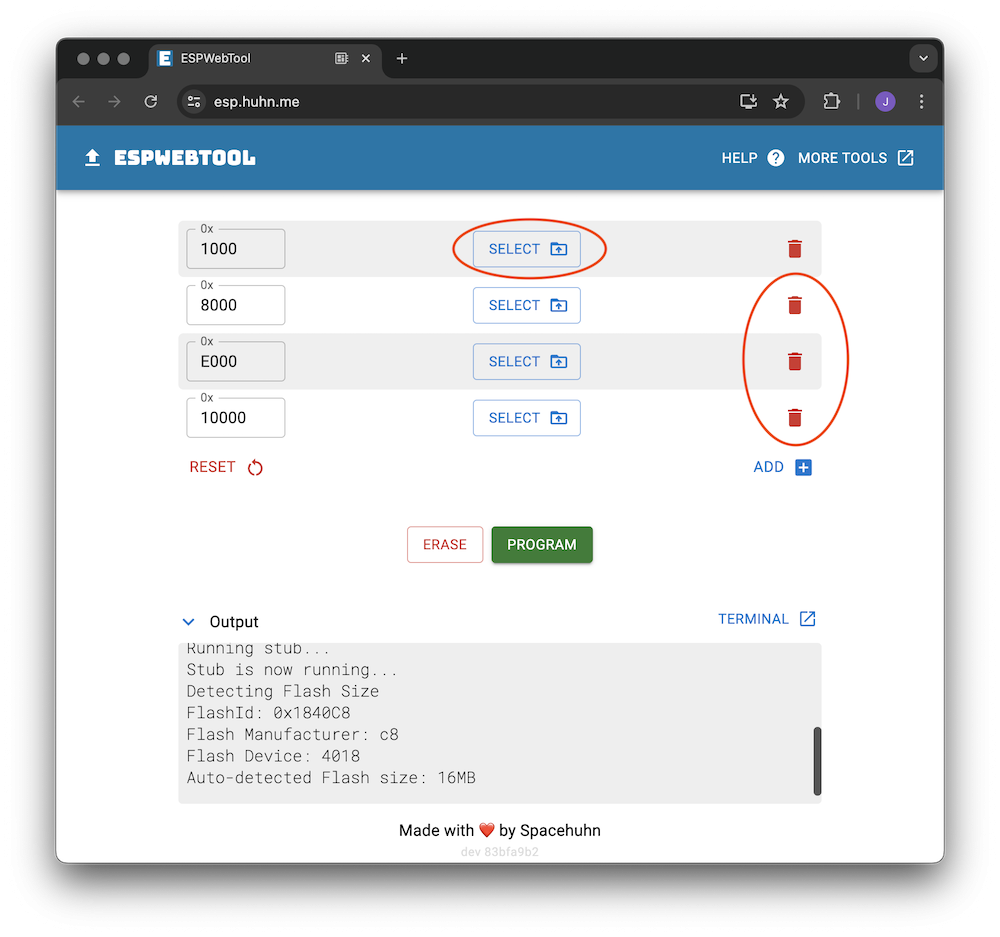
Step 7 - Updating Unity6 Firmware: Download the most recent Unity6 firmware update from our website found here: https://jetpedals.com/pages/unity6-firmware-updates Make sure to unzip the downloaded folder and make sure to save the .bin file to a location on your computer that is easily accessible (desktop). Click on the upload file button and select the .bin files saved to your desktop. Then delete the 3 other lines as they are not needed.
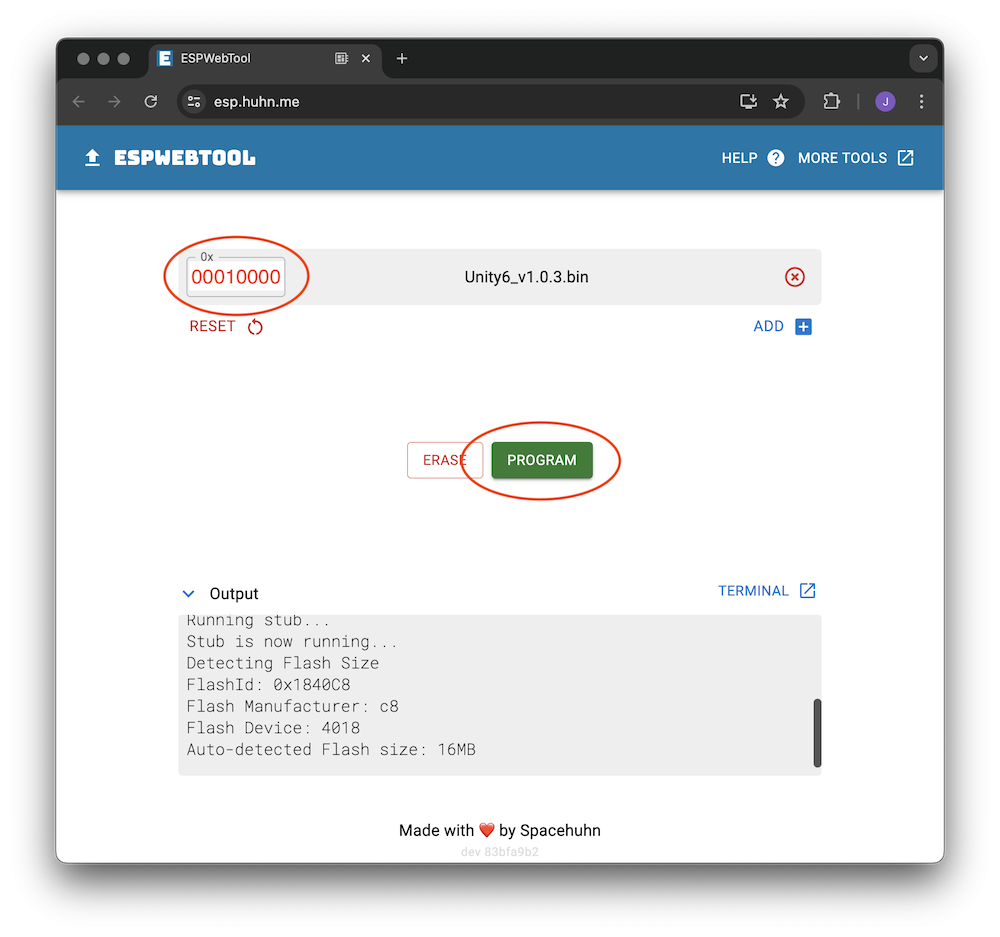
Step 8: Make sure to type in the following numbers into the input box at the top left: 00010000 Then click the Program button
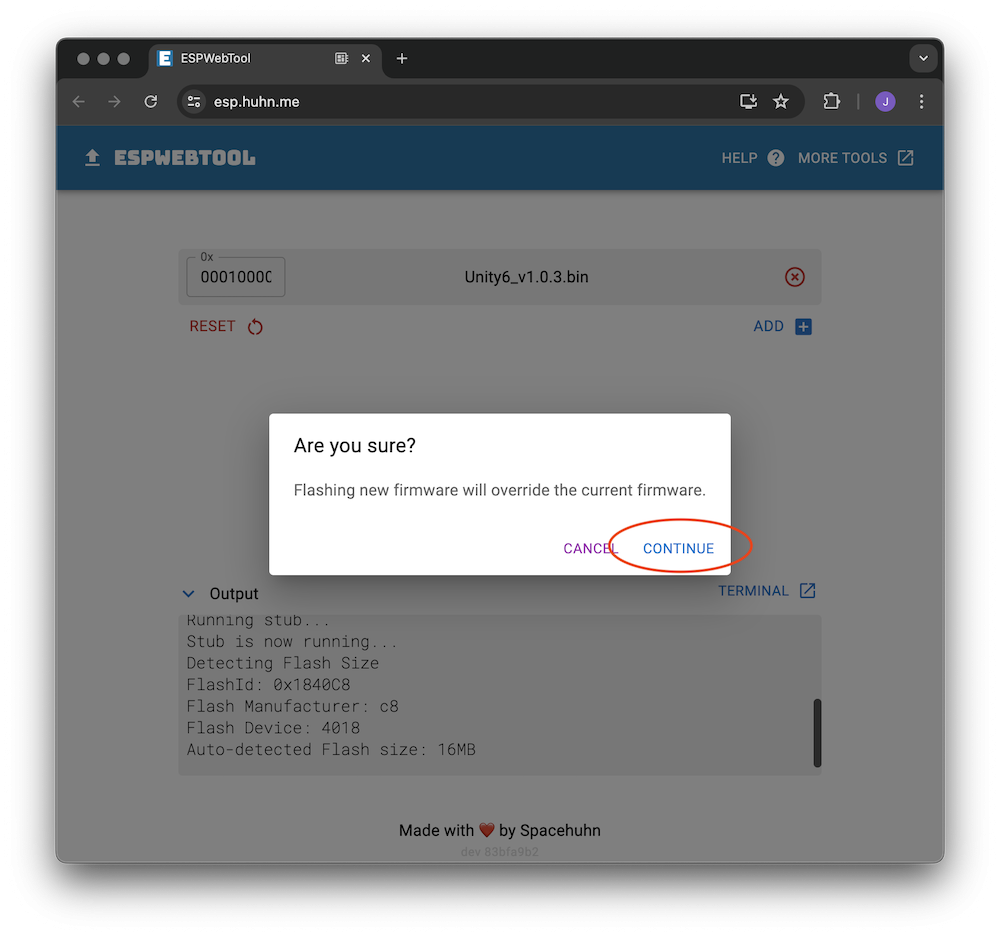
Step 9: Click the Continue button when prompted.
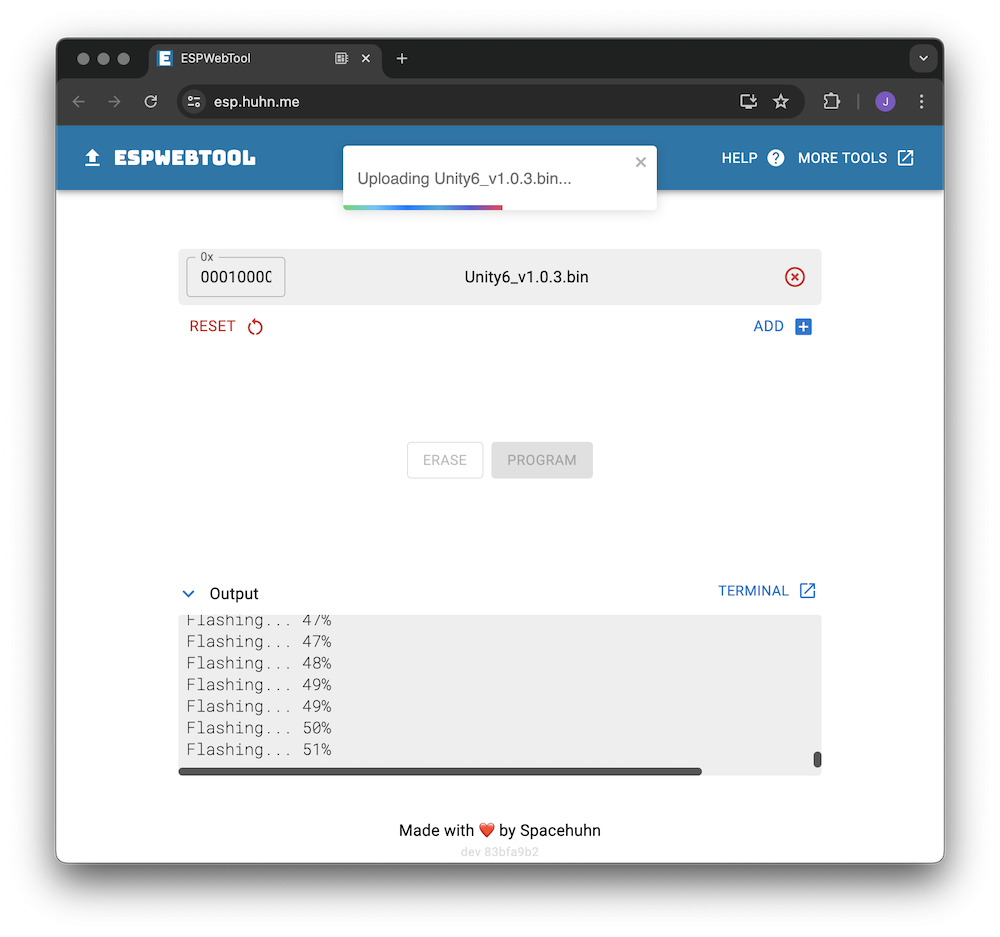
Once clicked, the upload will begin and you can see the progress in the output terminal as shown here
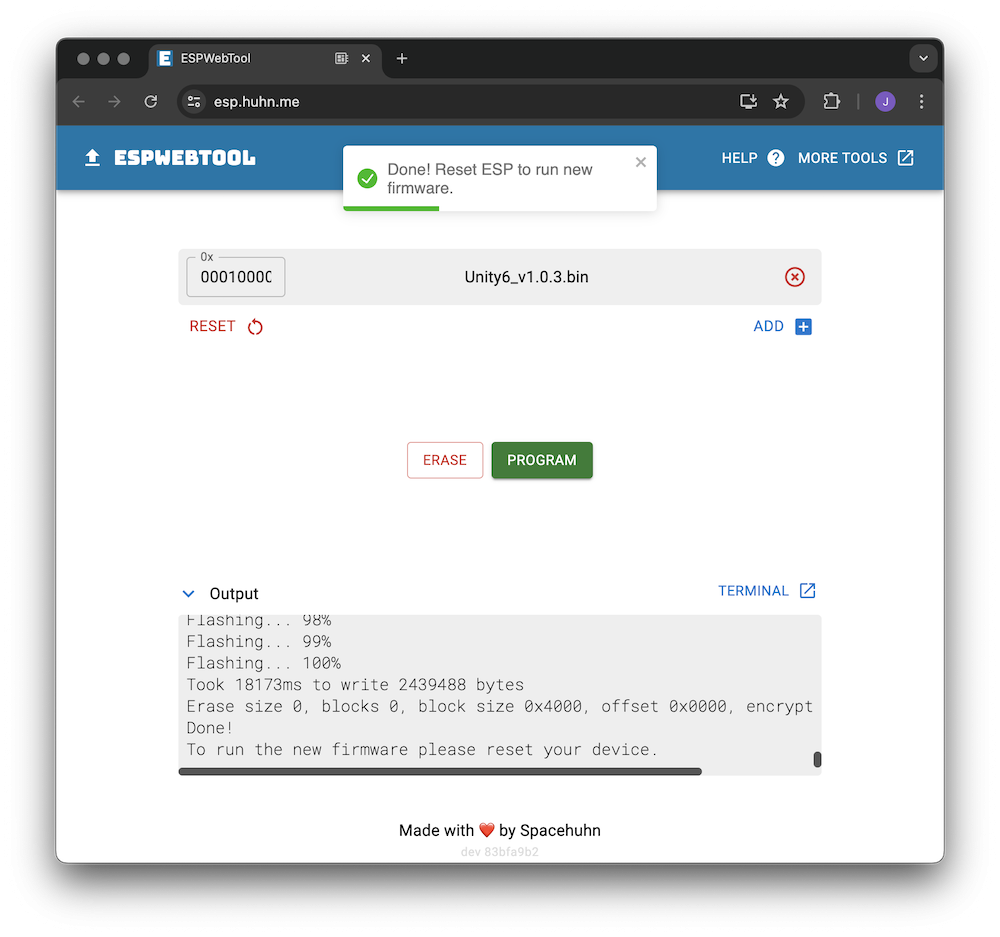
Step 10: Once the upload has finished you will see the following screen prompting you to restart the device. At this point you can unplug the USB cable, hold down switch 2 and then plug the USB cable back into the Unity6. This is the same procedure as Step 3 from above.
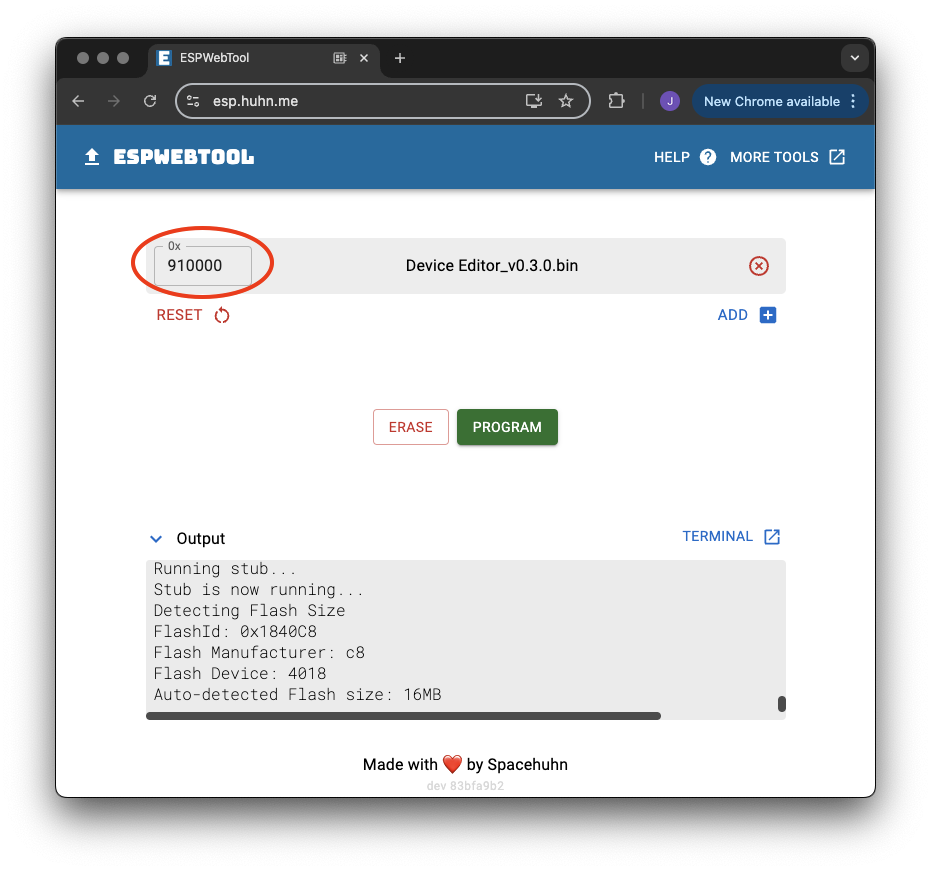
Step 11 - Updating Device Editor Firmware: Download the most recent Device Editor firmware update from our website found here: https://jetpedals.com/pages/unity6-firmware-updates Make sure to unzip the downloaded folder and make sure to save the .bin file to a location on your compute that is easily accessible (desktop). Click on the "X" icon then click the Upload File button and select the .bin file saved to your desktop. Make sure to change the number circled in red to 910000 and then hit the Program button.
Step 12: Once the upload has finished you will see the following screen prompting you to restart the device. At this point you can unplug the USB cable and plug 9v Dc power back into the Unity6. That is it, your device should have been reset and you should be able to connect to the Unity6's WiFi now.
Step 13: Once the Unity6 has reset and everything is working, remove power from the Unity6, replace the back plate and install the 4 screws.
.png)
