Can I Update the Software on my Old Micro?
Yes, currently we only have a solution for Windows users, however please check back as we are working on a solution for Mac users.
In order to update your Micro please follow these steps below:
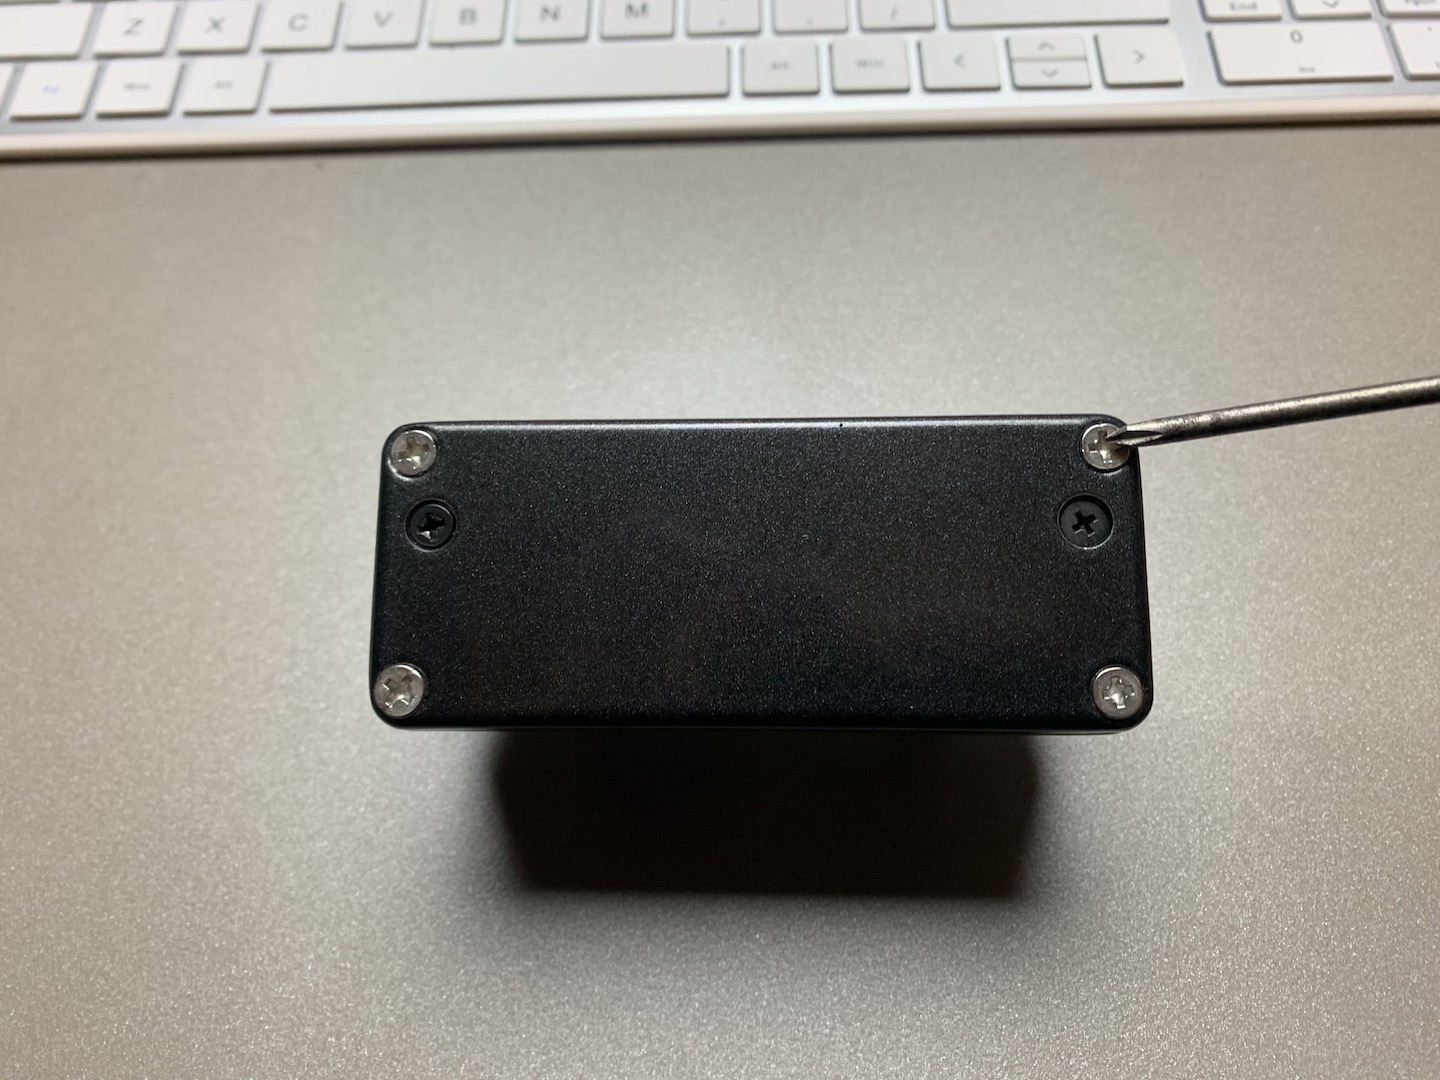
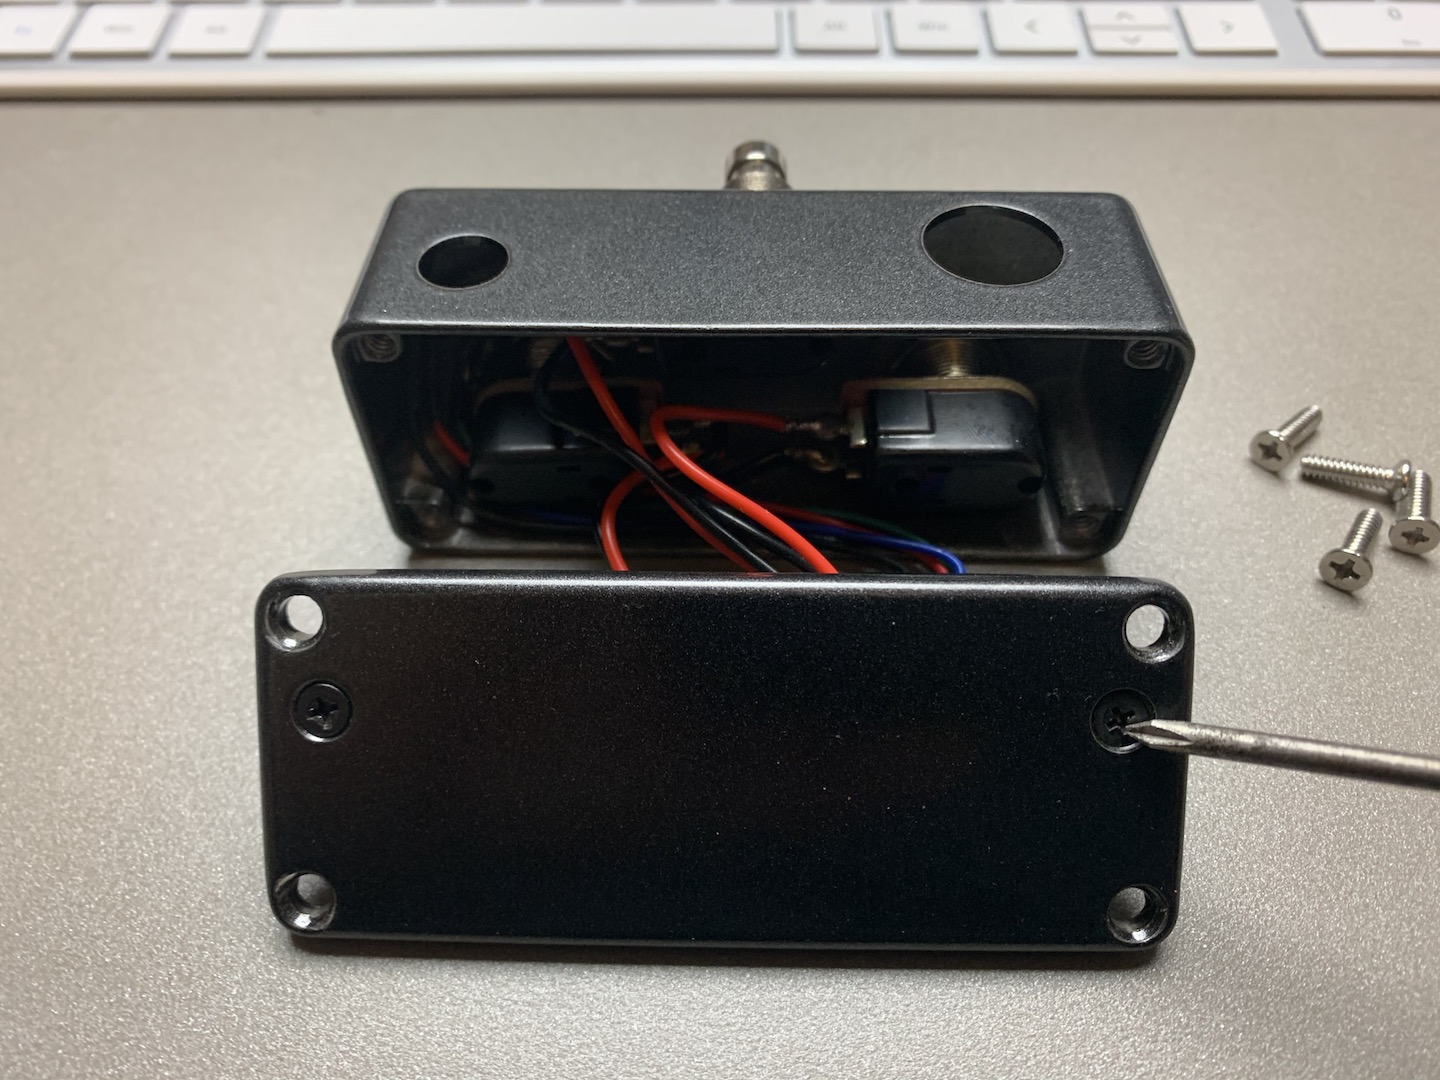
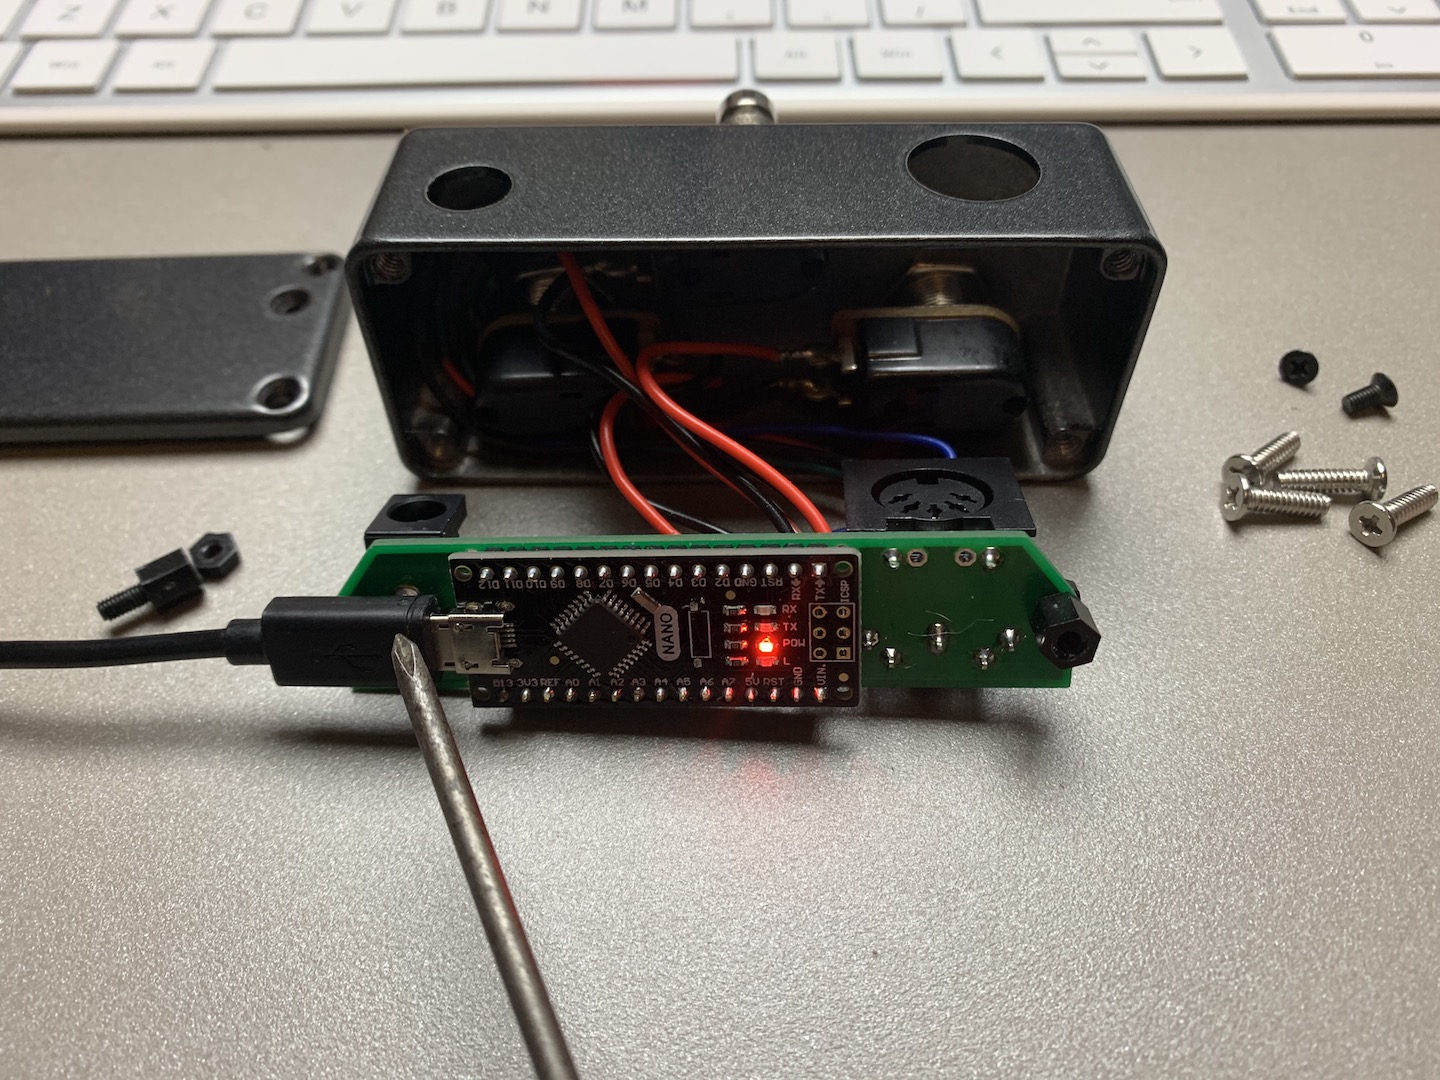
- Remove the backplate by removing the four silver screws holding it into place.

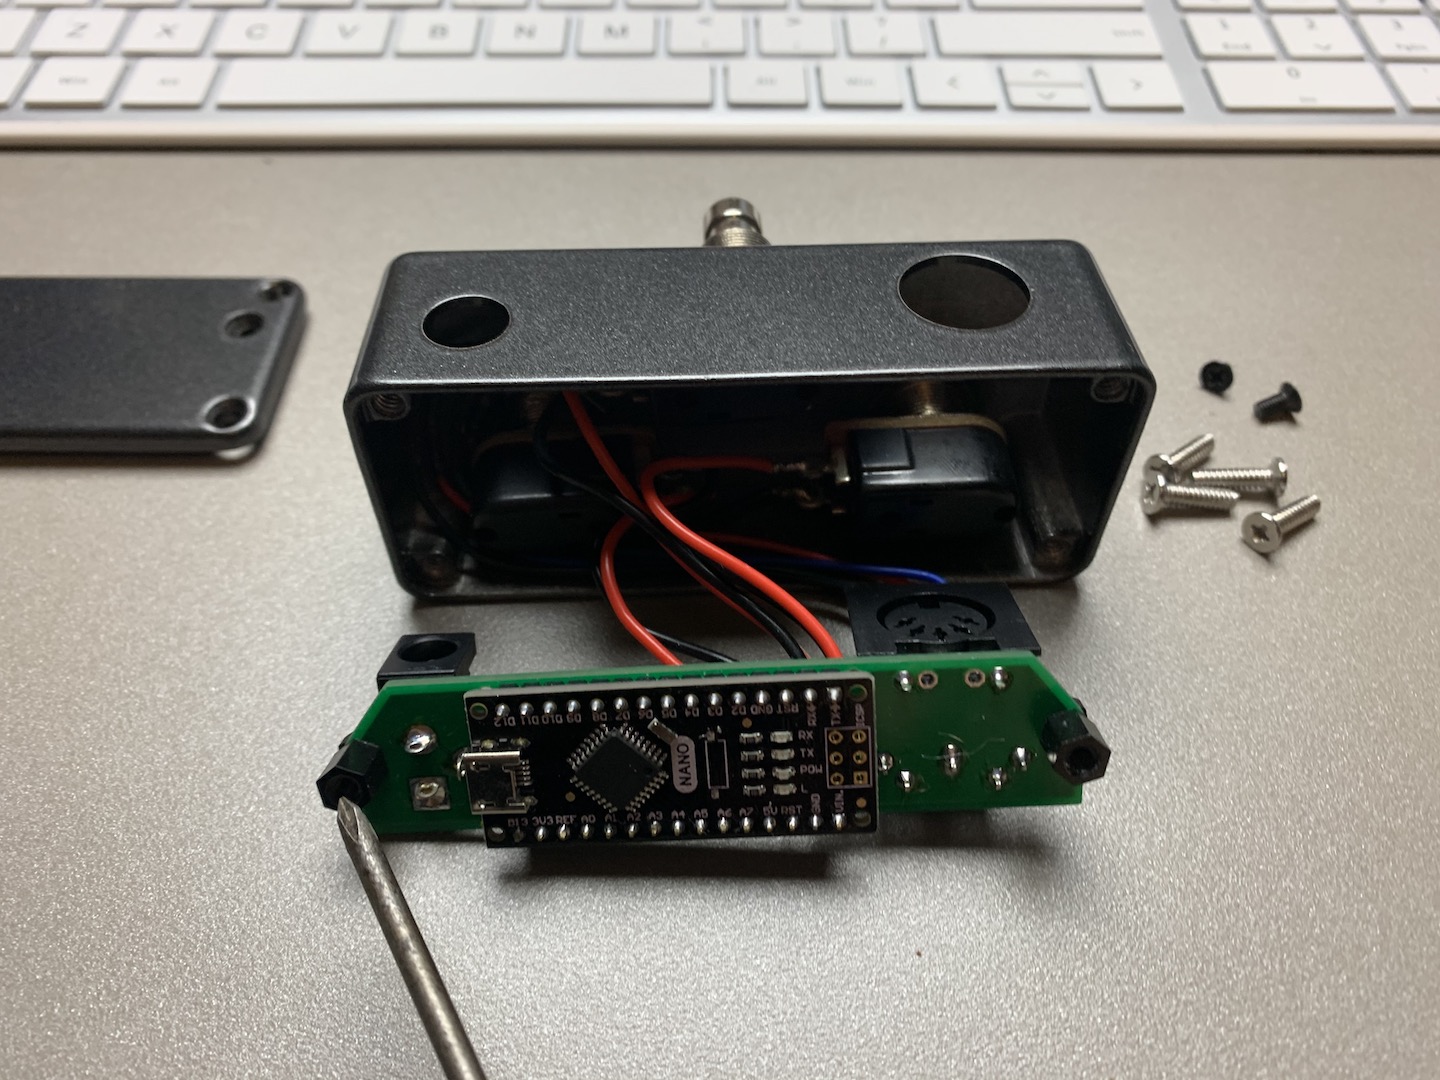
- Remove the backplate from the PCB by removing the two black screws.

- Remove the stand-off located next to the USB port.

- Plug a micro USB into the usb port. Once plugged into your computer, your computer should recognize the device.
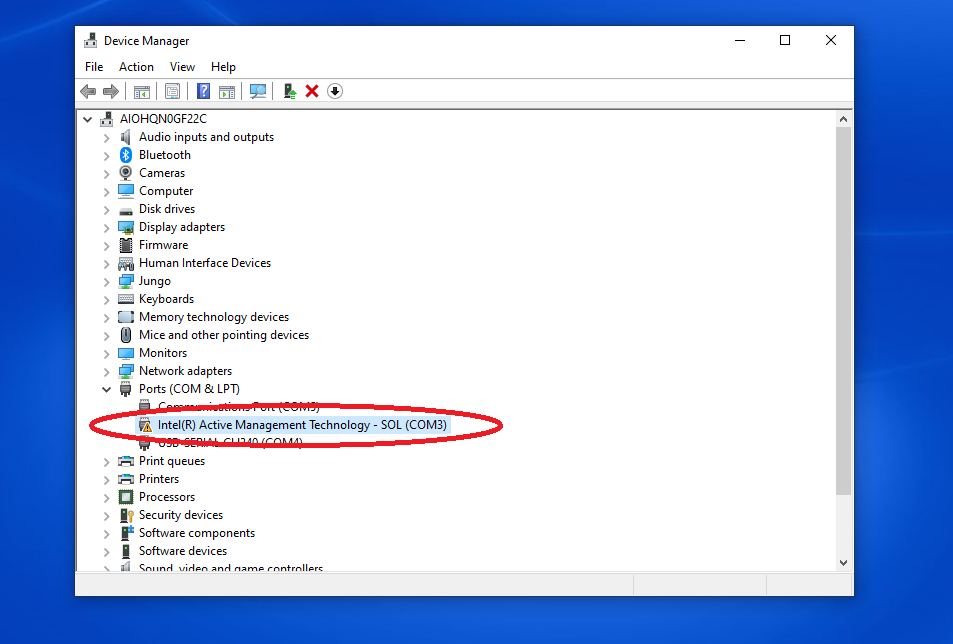
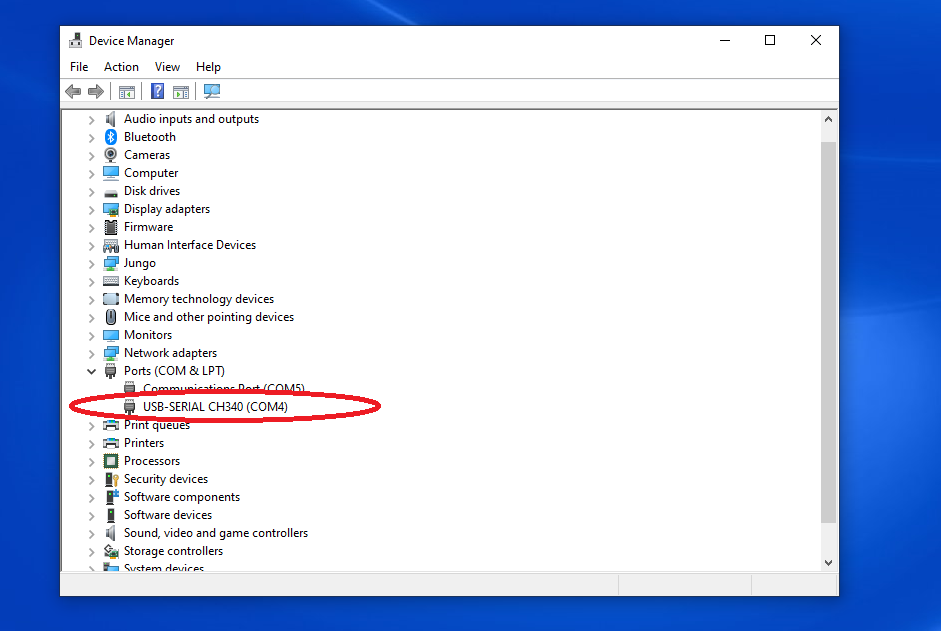
Some Windows 10 users may experience issues with bad drivers for the Micro, to make sure your computer can talk to the Micro open the Device Manager and see if there is a Yellow warning sign next the device (see pictures below).
If you have the Yellow warning sign, just double click the device and click the Uninstall Device button in the next dialog window.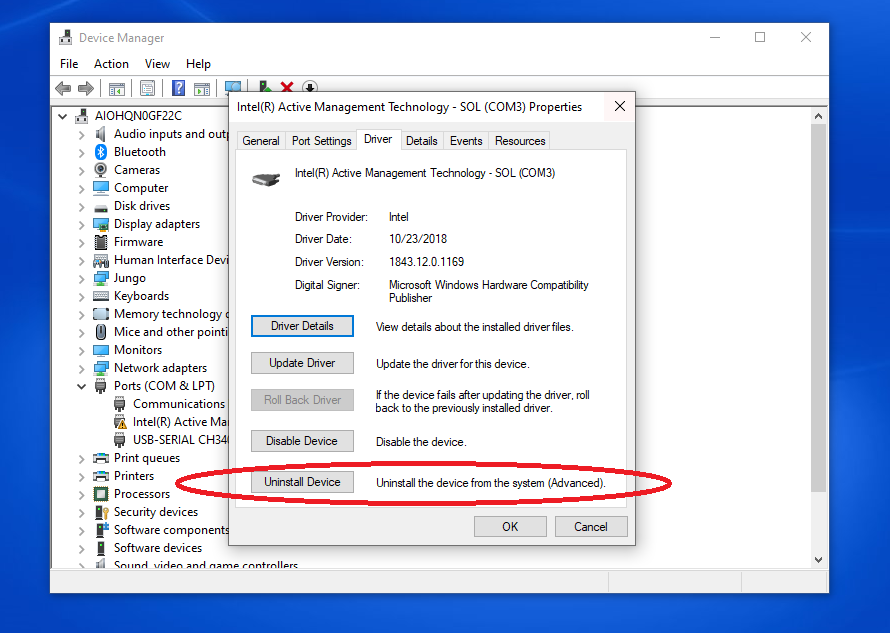
From here make sure you check the box that says to delete the driver software for this device and then click the Uninstall button.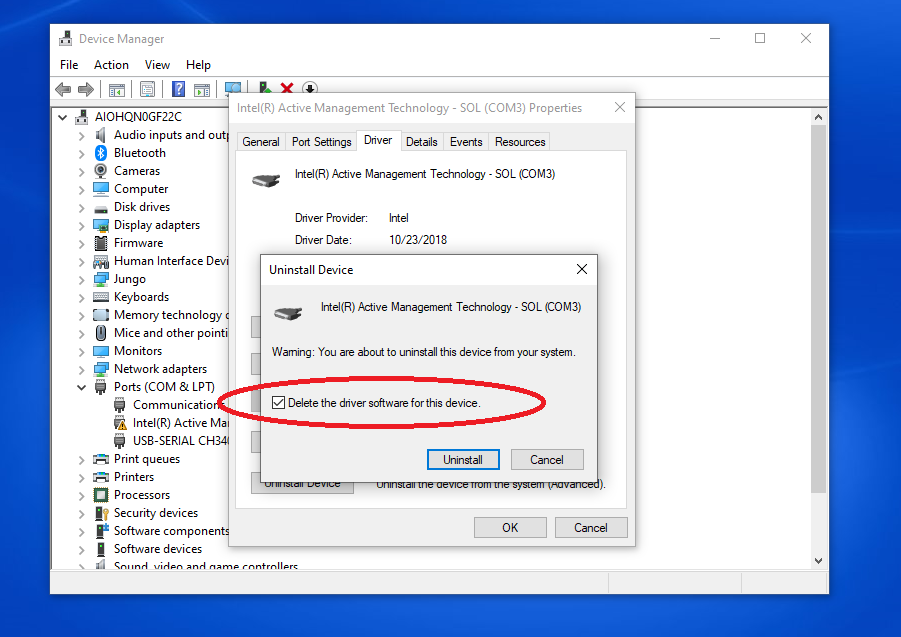
Once this is finished, unplug the Micro from your computer and then plug it back it. Have a look at the Device manager to confirm your Micro is showing up with now warning signs, if there are no warning signs you are good to continue to the next step.
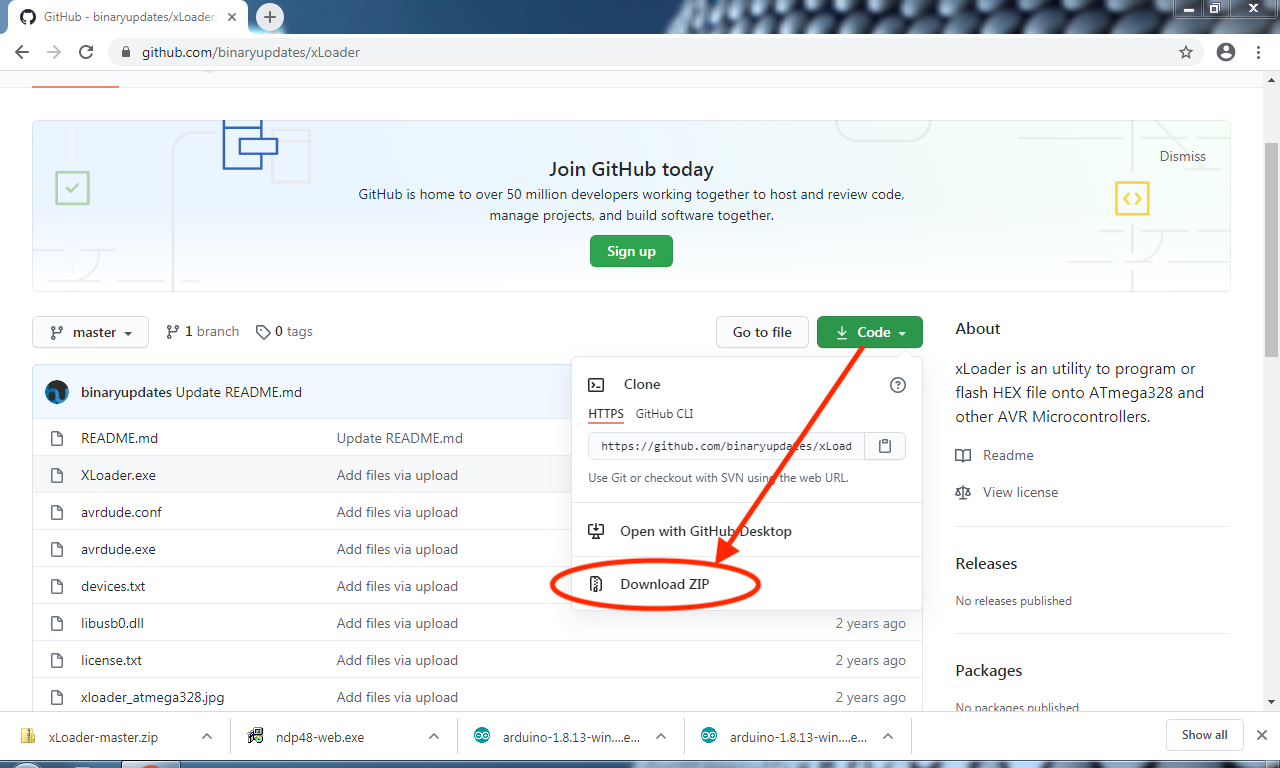
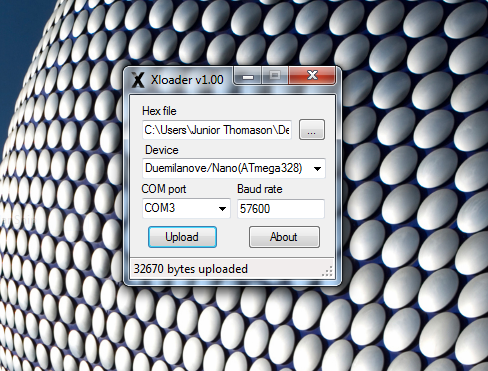
- Using your web browser go to: github.com/binaryupdates/xLoader to download the free software XLoader. Hit the green "Code" button and select Download ZIP.

- Once you've downloaded XLoader, run the installer file and install the application to your computer.
- Download the .hex and save it to your Desktop, download link is found here: JET Micro HX3.11.hex
- Open the XLoader application and upload the .hex file downloaded from the previous step. Choose Duemilanove/Nano(ATmega328) as the Device and select the COM port your Micro is plugged into. Please note that your COM port may vary depending on your computer, if you noticed in step 4 it was COM port 4 but below on a different computer it is COM port 3. Then hit the "Upload" button, once the software has finished loading, your Micro should be all set to use the new features!
- Repeat steps 1 - 3 in the reverse order to close back up your Micro. Pay close attention to not pinch any wires when closing everything back up.