JET MCX User Manual
Overview, Features, and how to use the JET Pedals MCX MIDI controller
- Overview
- Web Editor
- MIDI Type Glossary
- Empty Message
- Control Change
- Control Change Toggle
- Program Change
- Program Change Toggle
- Control Change Press-N-Release
- Program Change Press-N-Release
- Strymon Bank Change
- MIDI Clock Tap Tempo
- Stop MIDI Clock
- MIDI Clock BPM
- Decrement BPM
- Increment BPM
- Decrement PC
- Increment PC
- Decrement MCX Bank Number
- Increment MCX Bank Number
- Jump to MCX Bank
- Delay (ms)
- FAQ
Overview
Basic Features & Overview of Functions
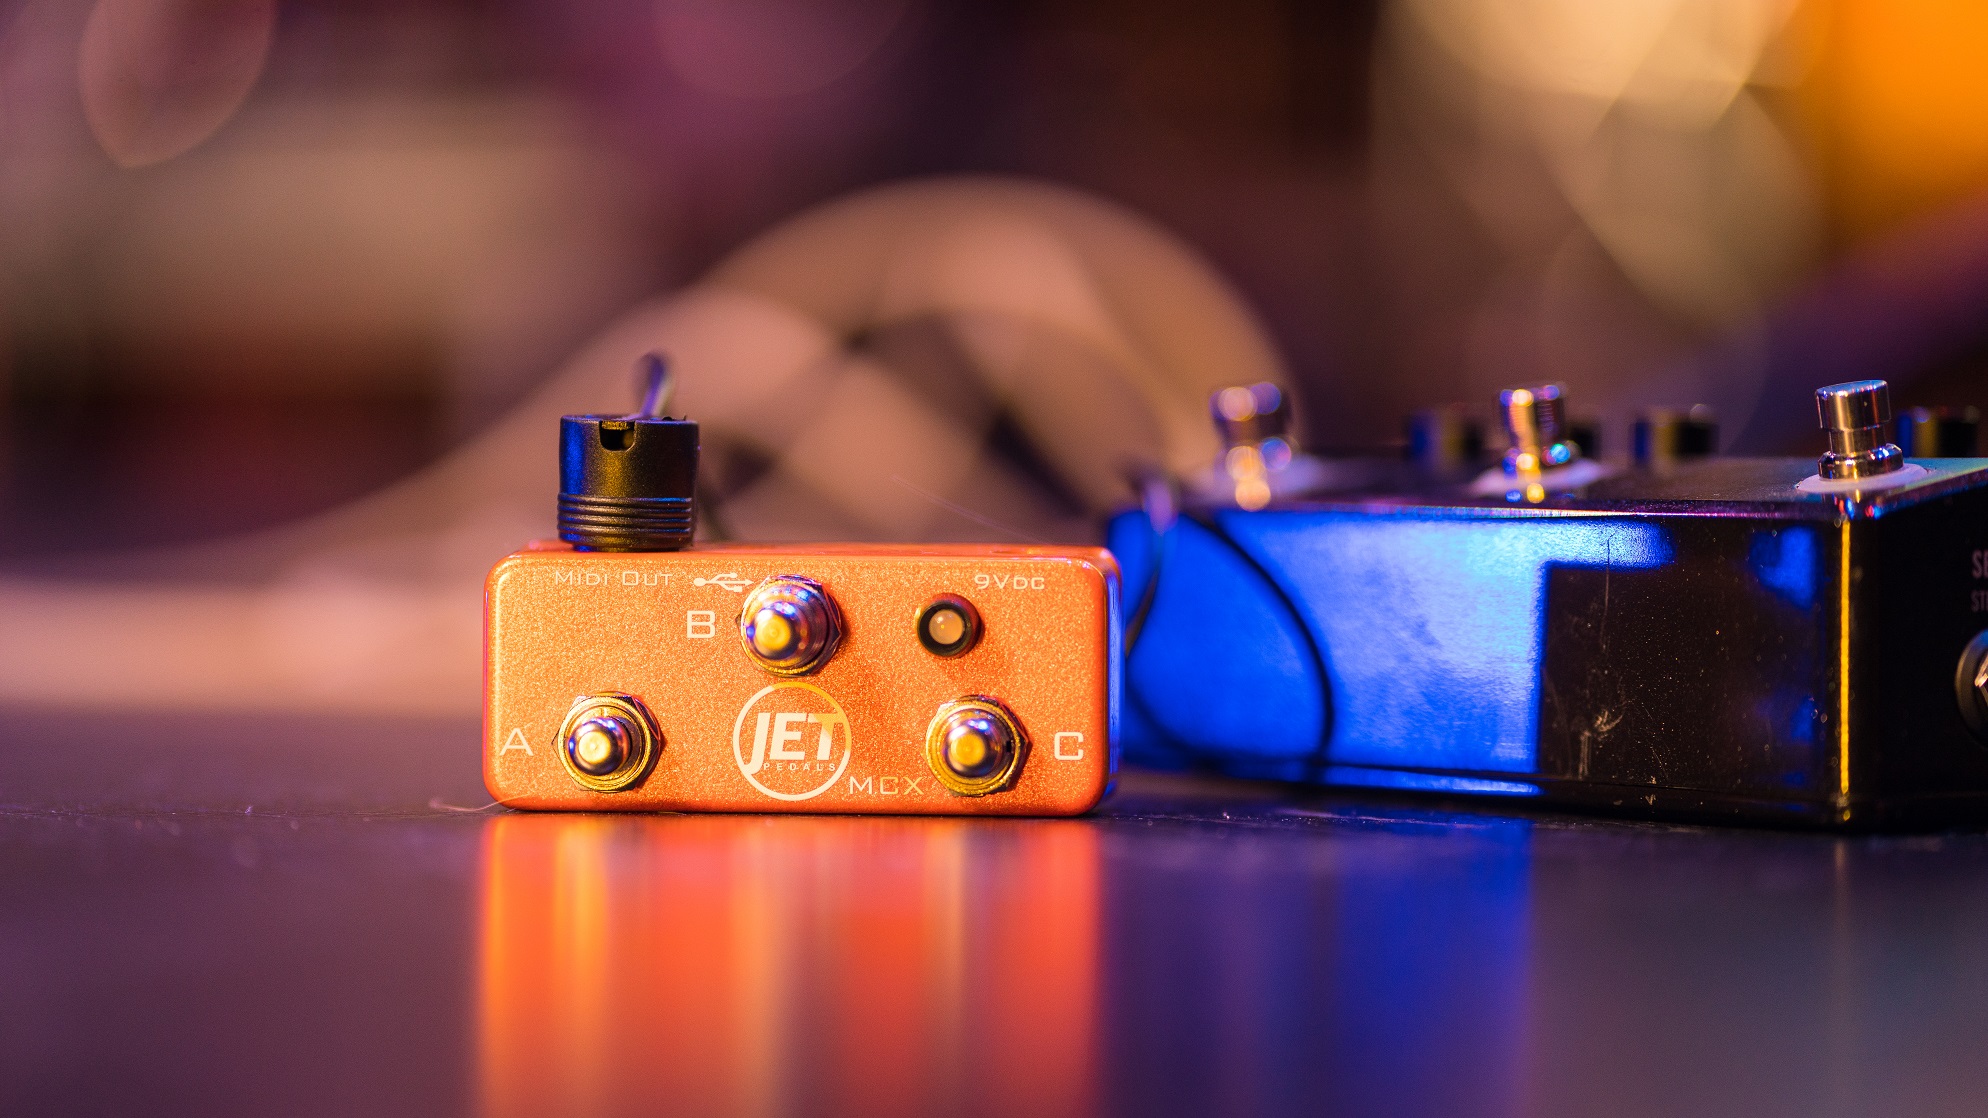
MIDI Controller
The JET MCX is a three button fully editable midi controller designed to be used in conjunction with our user friendly web editor for sending and saving data to your controller.
The architecture is based around 8 banks of controls, uniquely identified by a single color changing LED. Each bank has three buttons (A, B, & C) which can be pressed individually or as a 2-button press (AB or BC) and provide the end user a total of 5 unique button combinations per bank . Each button, and 2-button press, also have two unique press actions defined as a short press and a long press. Each press action / preset can send 16 simultaneous MIDI messages each with their own MIDI type on their own individual MIDI channel. We offer 18 different MIDI types to choose from, such as Control Change, Program Change, etc. See our MIDI Glossary for detailed information on each MID type.
This breaks down to 16 Messages for each press action, 10 press actions per bank, and 8 banks for a total of 1,280 unique MIDI messages that can be sent from the MCX.
The MCX also has one other press action however it does not send midi messages but is used to navigate the 8 different banks. A three button press (ABC) will bank up one bank and a three button hold will fast scroll up through the banks. When you’ve reached the last bank, the MCX will cycle back to the first bank and start the process all over again. We understand that most will not need all 8 banks and would rather not have to cycle through all 8 if fewer are needed. This is why we allow the user to set the number of banks they wish to cycle through within the Global Settings.
USB Class Compliant Controller
The MCX is a USB class compliant MIDI controller that can be powered via the USB buss or with a standard 9V negative tip power supply.
Use the MCX to send messages to your favorite DAW, software plugin, Mac or PC. It can even receive CC & PC messages and relay them through the MCX to the 5-pin MIDI output jack. This can be useful to let software such as Ableton Live completely automate your pedal board and be completely in sync with your backing tracks.
* In order to send MIDI clock from your Mac/PC you'll need to send a CC message to the MCX. Send CC #127 with a Value equal to your BPM on Channel #16 (example: CC #127 Value #72 Channel #16 equals 72 BPM). This will start the MIDI clock on the MCX. In order to stop the clock, send CC #127 Value #0 on Channel #16.

Global Settings
Used to set specific parameters within the MCX.
The MCX has two features / options that can be toggled on/off via the global settings.
-
-
- Auto Stop Clock - starts an internal timer every time the MIDI clock starts. After 5 seconds the timer will expire and the MIDI clock will stop. 5 seconds should be plenty of time for all of your devices to sync up, by chance this isn't long enough you can disable this feature.
- Number of Banks - this sets the number of banks the MCX will scroll through when pressing or holding down all three buttons. The MCX has 8 banks of presets, if you do not want to scroll through all 8 banks, follow the steps below to select the desired number of banks.
-
To enter the global settings menu, simply hold down button A while the MCX is in startup mode (flashing LED's). While continuing to hold down button A, the following buttons will toggle the values for each feature.
To exit the global settings, simply release button A, the MCX will flash it's LED's and store your global settings into permanent memory.
Web Editor
Features & Overview | How to Use the MCX Web Editor
System Requirements
Our easy to use web editor is available for use on Mac, Windows, and Android devices
We use the Web Serial API protocol to connect, communicate, and send/store messages to the MCX. At the time of writing this manual, you must use the Google Chrome web browser (version 80 or above).
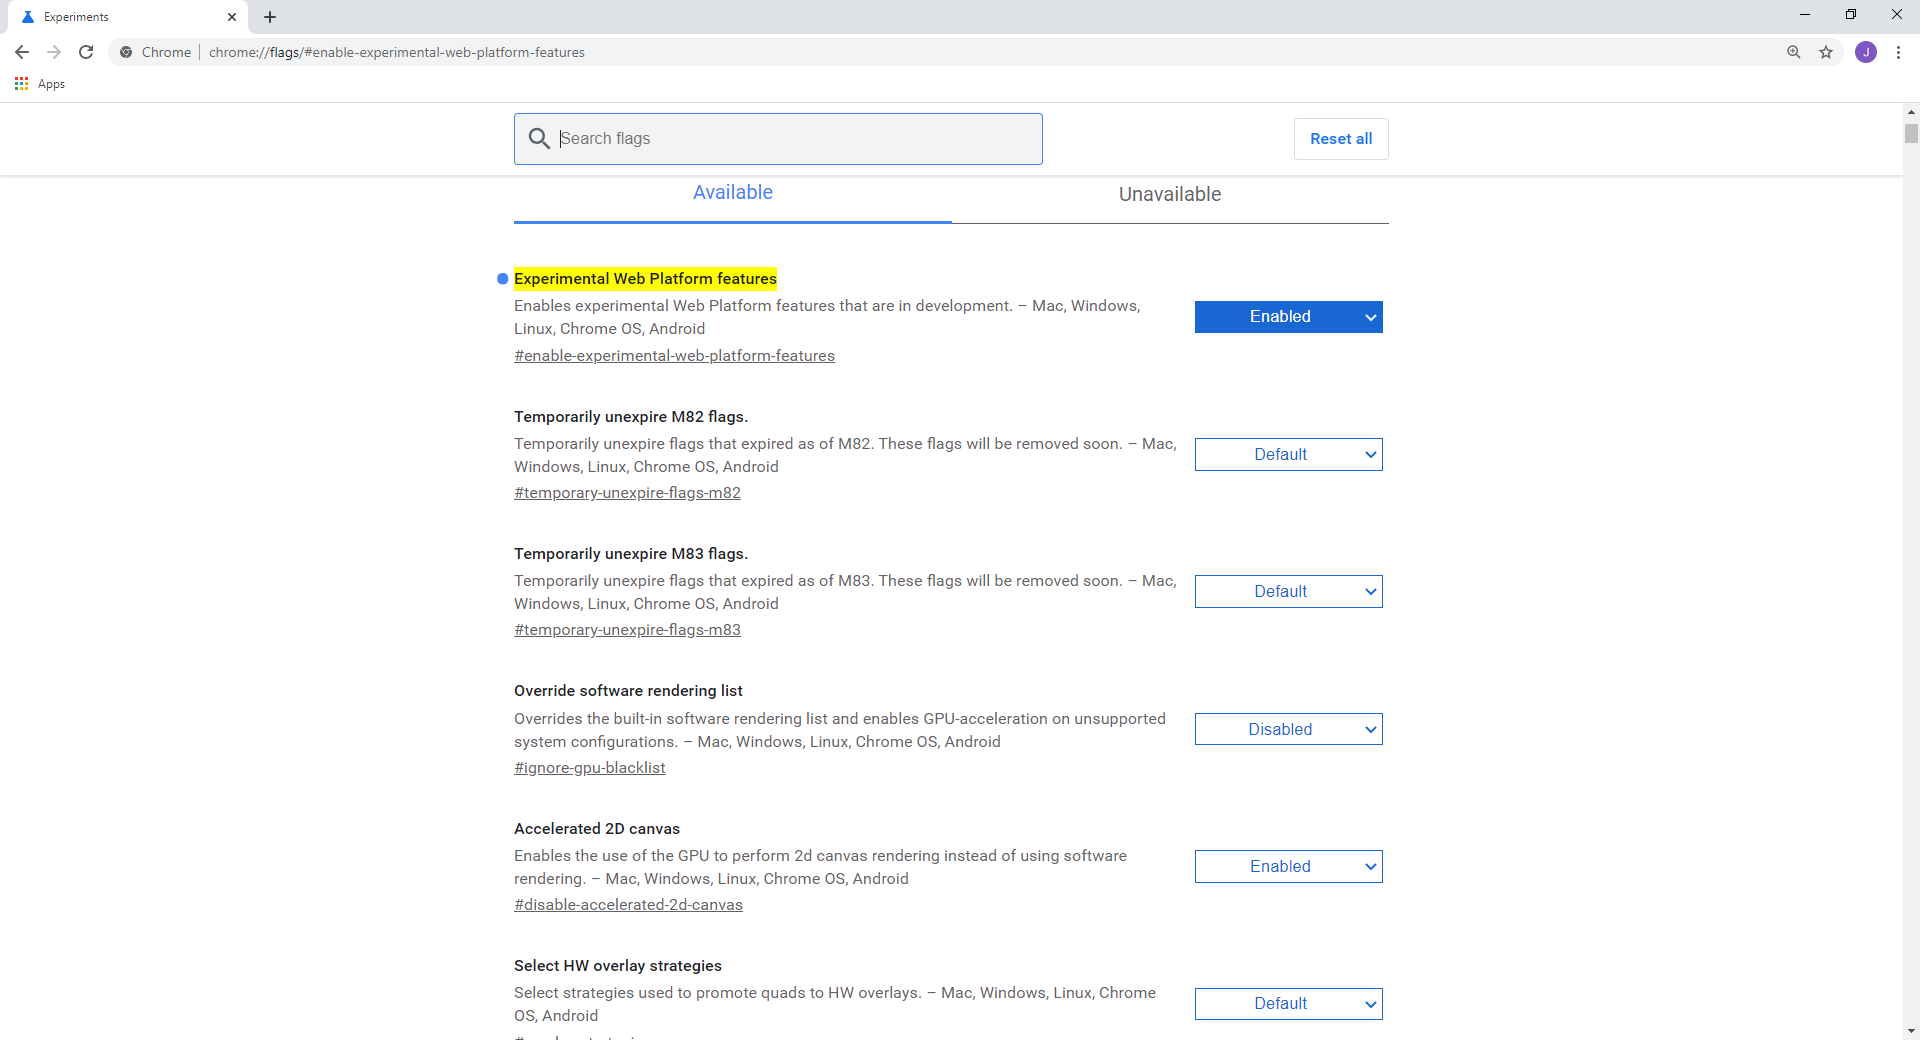
*There will be a one time setup you will need to do to avoid connection issues. You must follow this link to enable the Experimental Web Platform features: chrome://flags/#enable-experimental-web-platform-features Once this is done, you will be able to connect to the MCX and start programming your pedal.
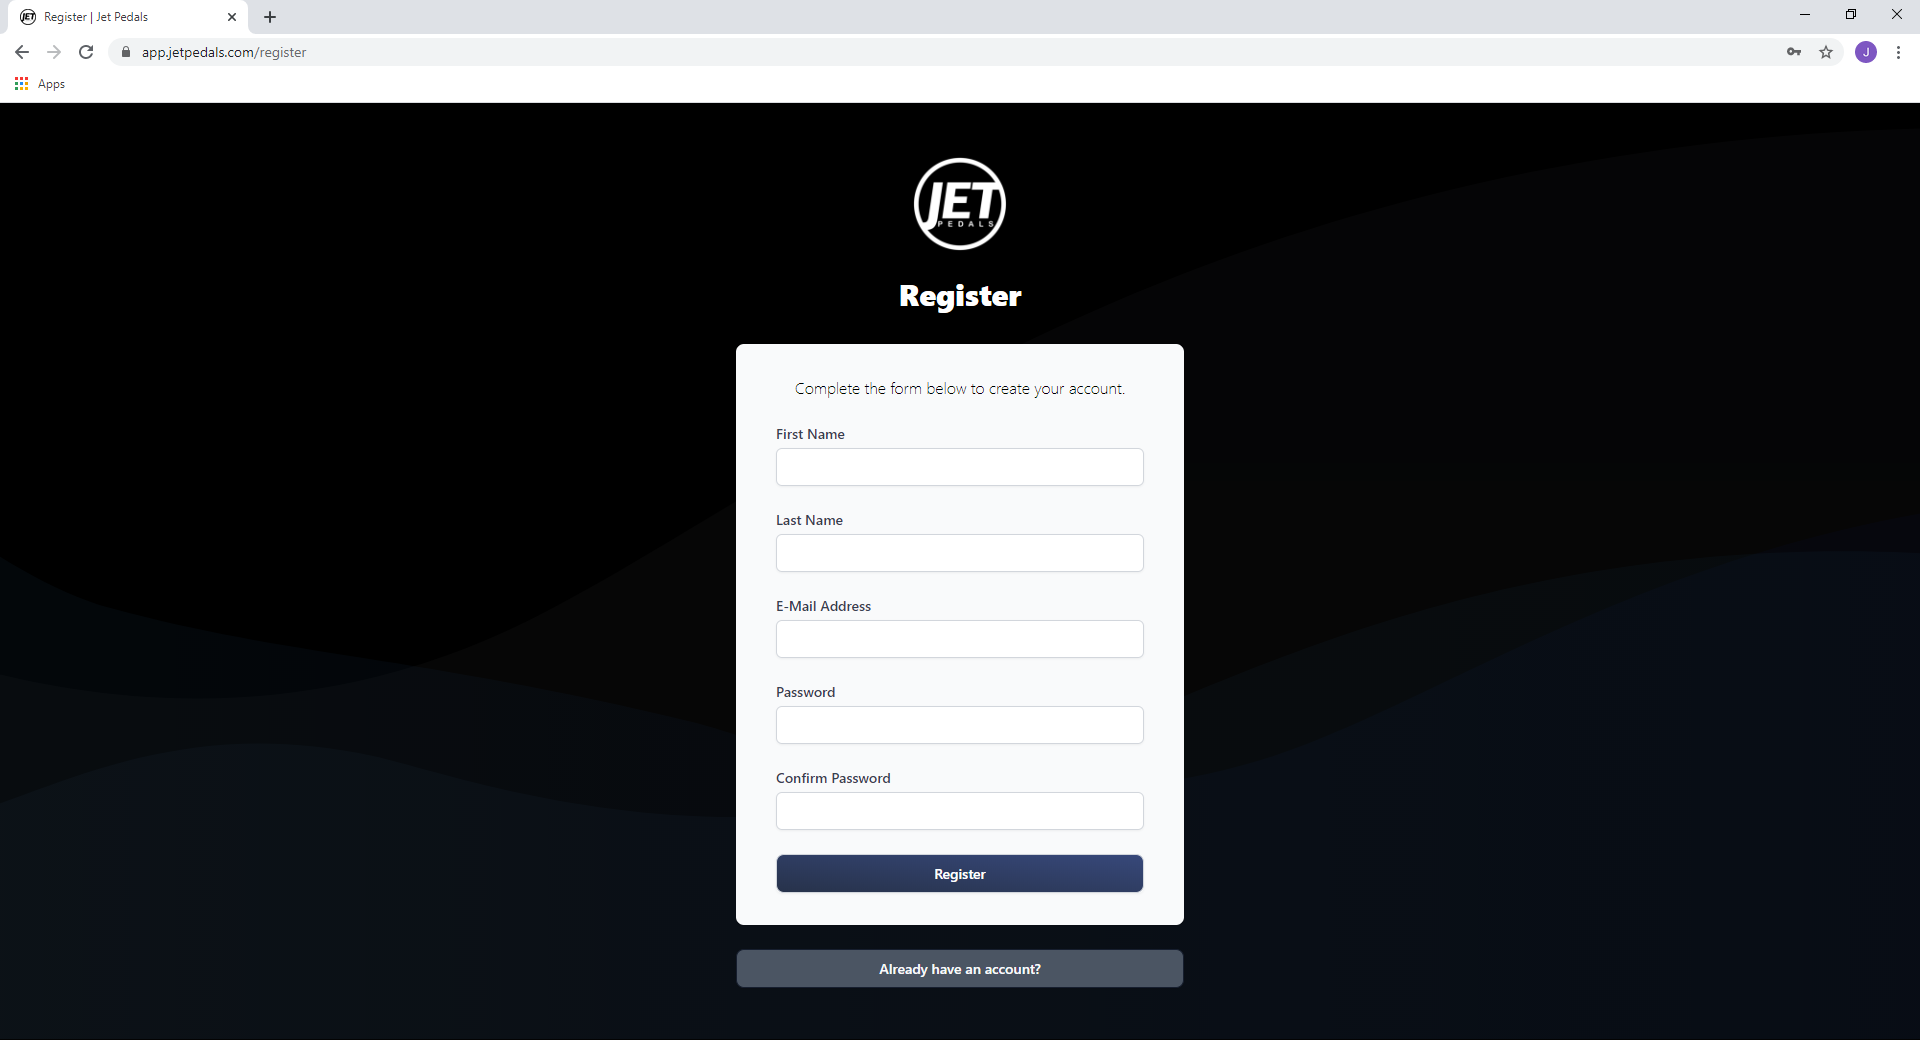
URL and Setting Up an Account
It's easy and free to use the JET MCX Web Editor to program your MCX. In order to use the web editor, you must sign up for a free account. Go to https://app.jetpedals.com/ and click on "Create Account" in the top right navigation menu. From there, follow the steps to register for your account.
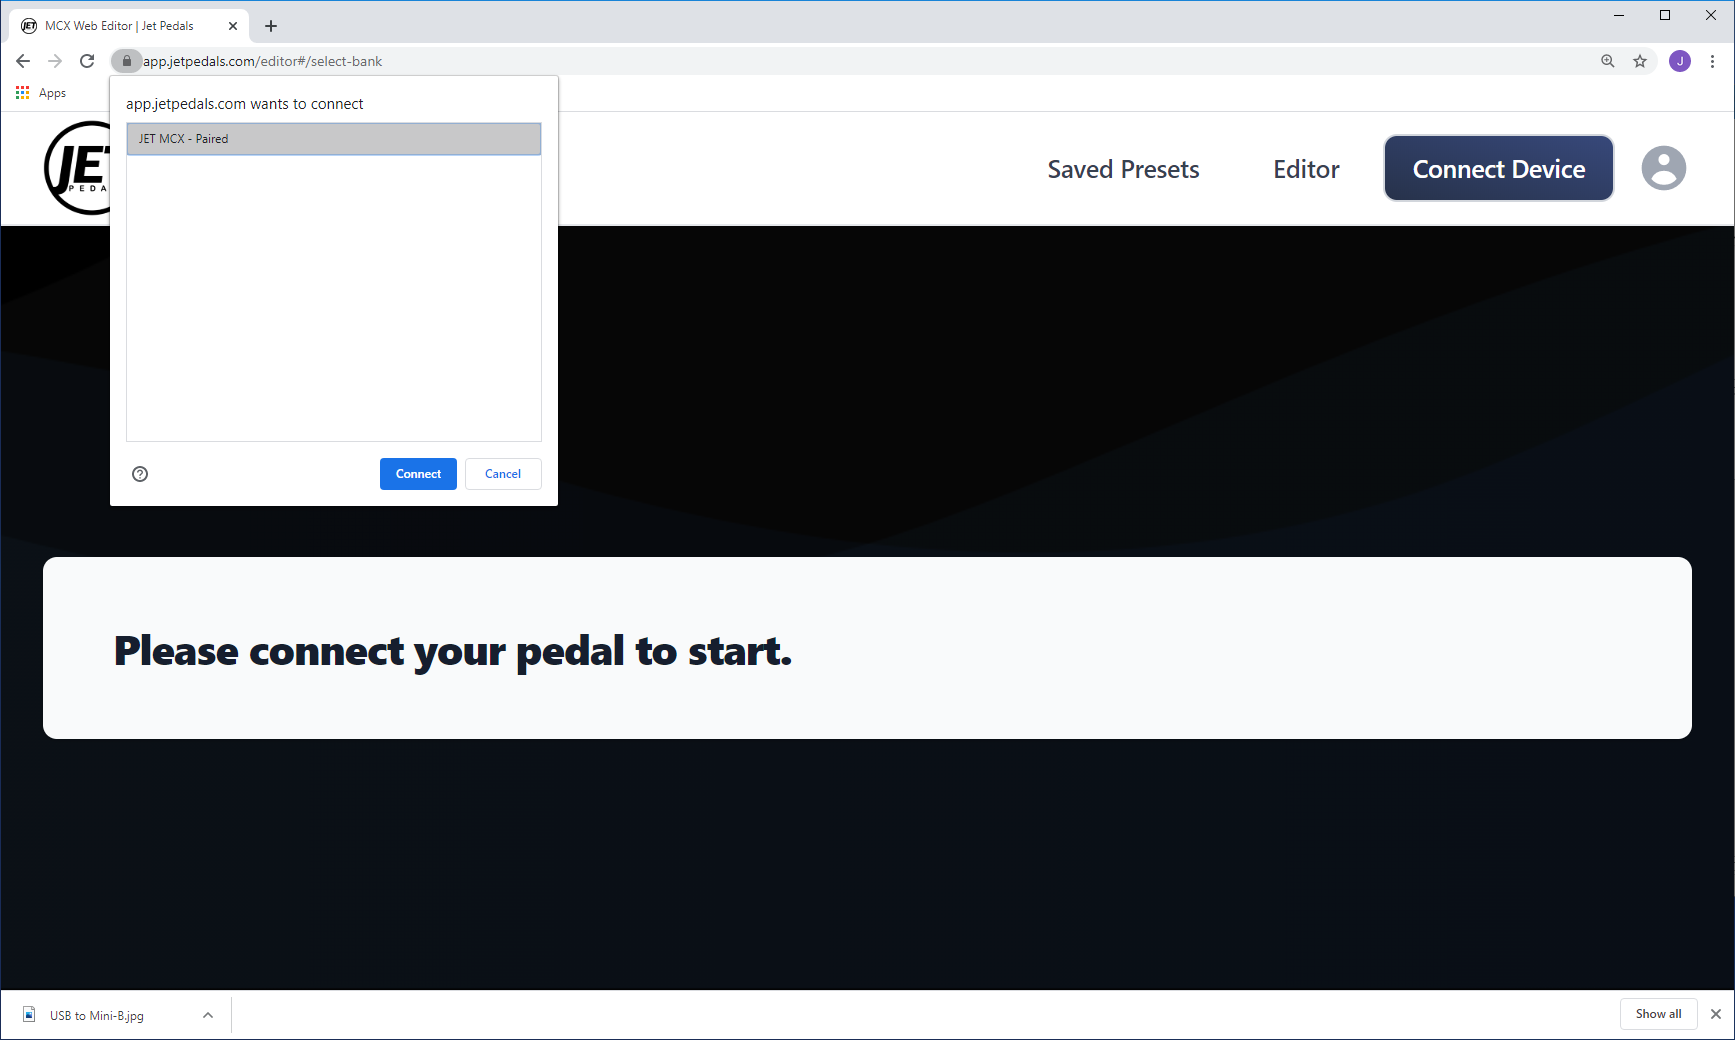
Connecting Your MCX
The MCX connects to your Mac/PC with a USB 2.0 to Mini-B cable
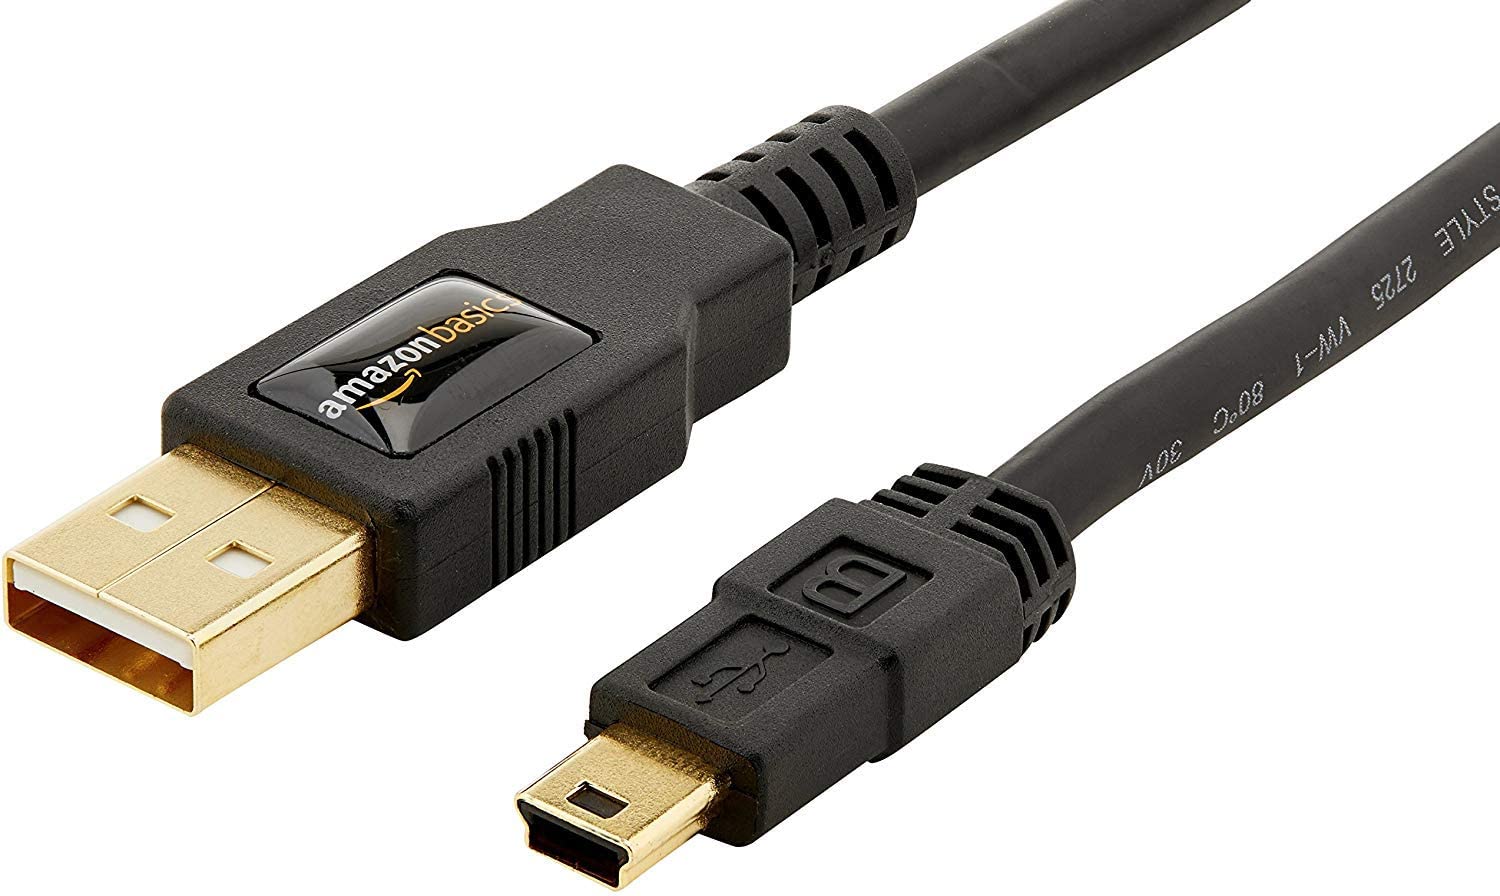
Open the web app and plug the MCX into one of your Mac/PC's USB port. Click the "Connect Device" button on the top right of the web app and follow the pop up window prompting to connect to the MCX, once connected the "Connect Device" button will turn from blue to green showing the status of the connected pedal.
Programming the MCX
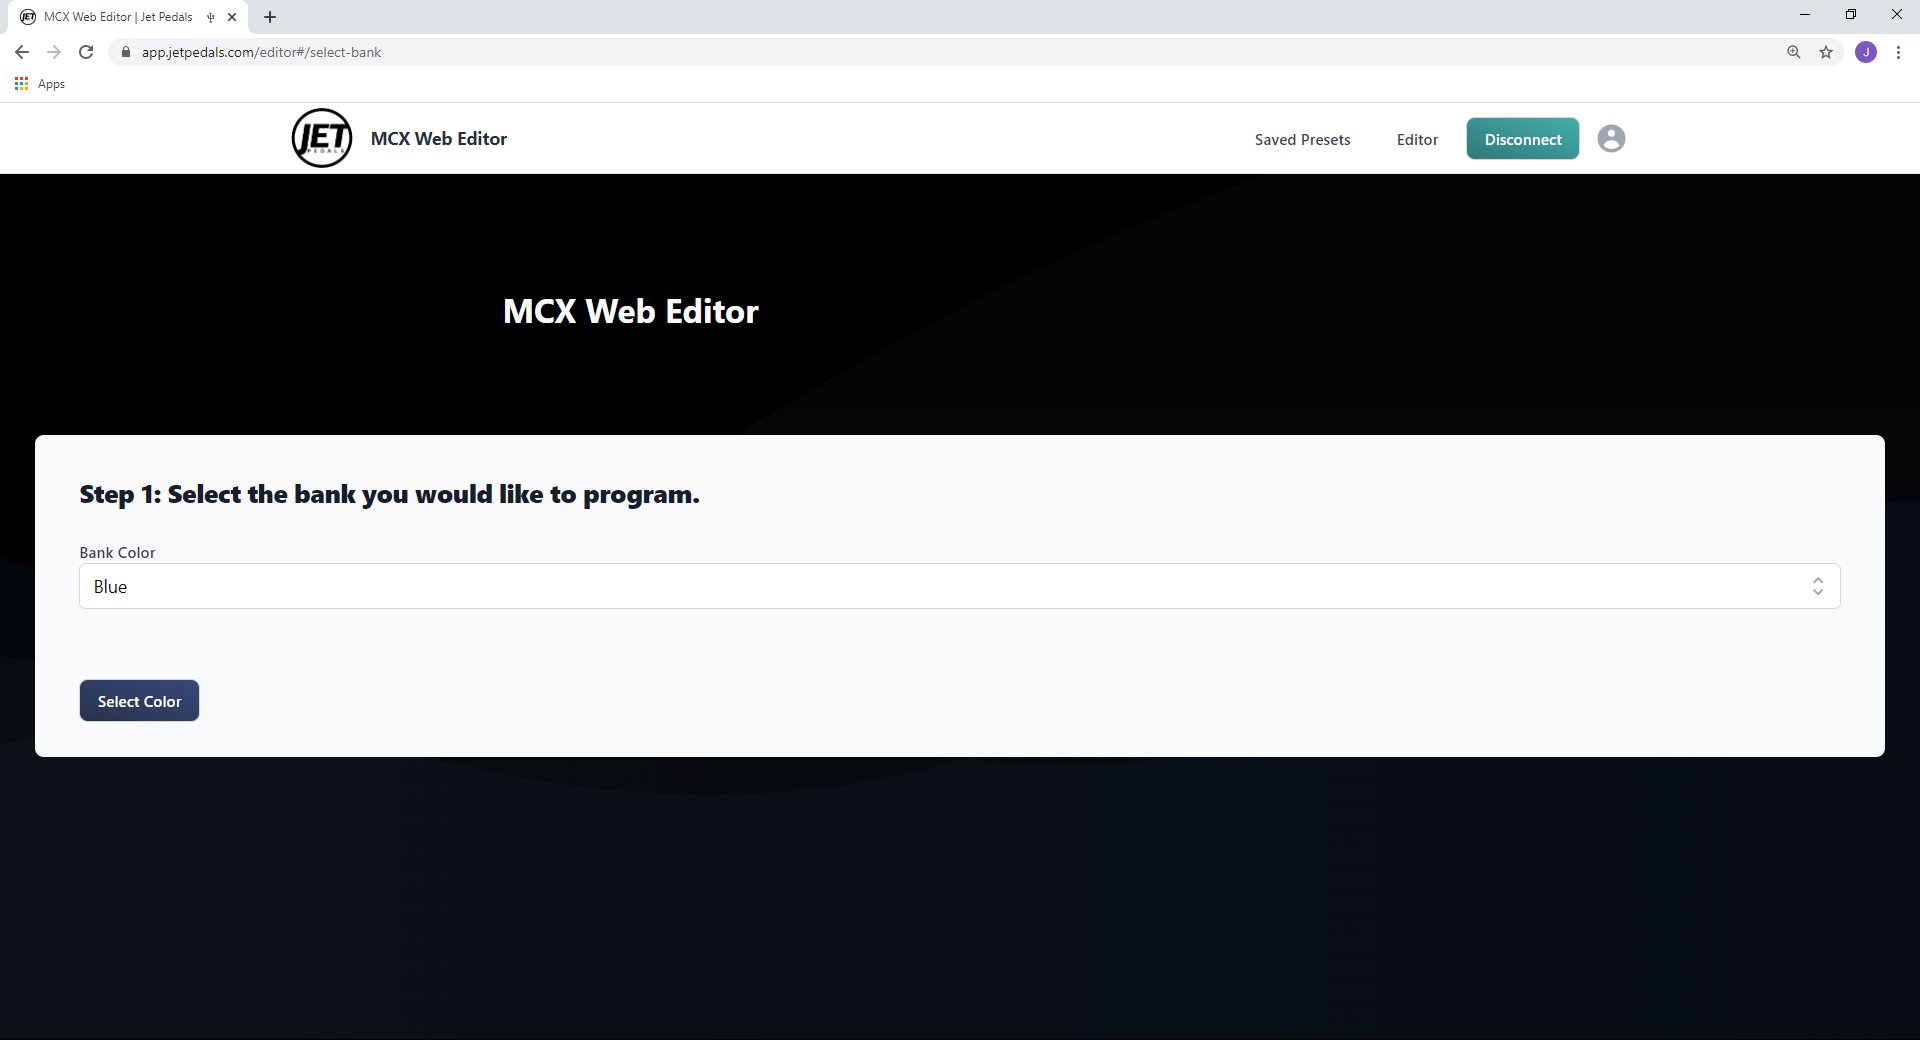
Step 1: Select the bank you would like to program.
The MCX has 8 completely independent banks in which to save MIDI commands. Each bank is defined by the multi-colored LED on the pedal and can store/send up to 160 MIDI messages per bank or a total of 1,280 MIDI messages for all 8 banks. Select the color you wish to start programming and then hit the “Select Color” button to proceed to Step 2.
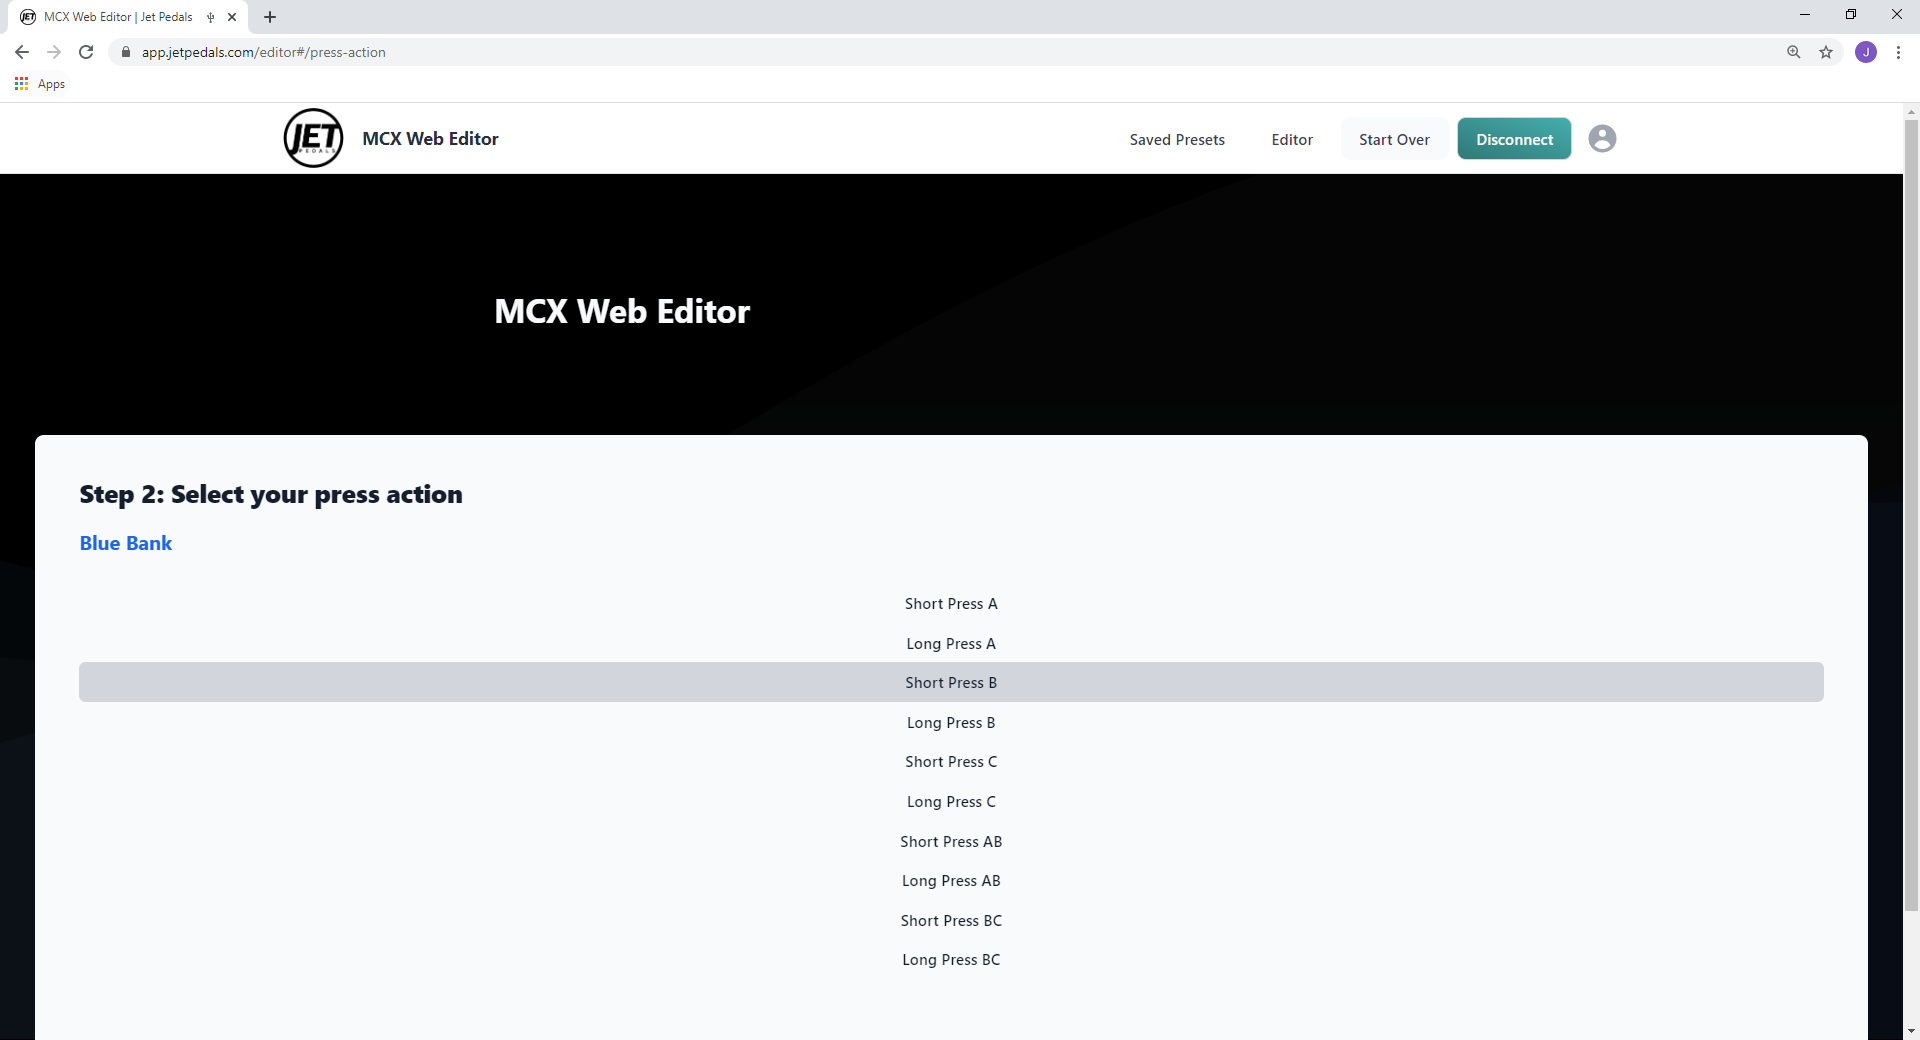
Step 2: Select your press action.
What is a press action? Each button, and 2-button press on the MCX have multiple press actions which can send a different set of MIDI commands per action. These are defined as “Short Press” and “Long Press.” MIDI messages assigned to a short press will execute once you press _and release_ the button, as long as you do not hold the button down for longer than half a second. MIDI messages assigned to the long press of a button will only execute on the release of the button, as long as you hold that button down for at least a half a second or longer.
The MCX has 10 unique press actions per bank, each press action can send up to 16 simultaneous MIDI messages. Select the press action you wish to program and hit the “Select Action” button to proceed to Step 3.
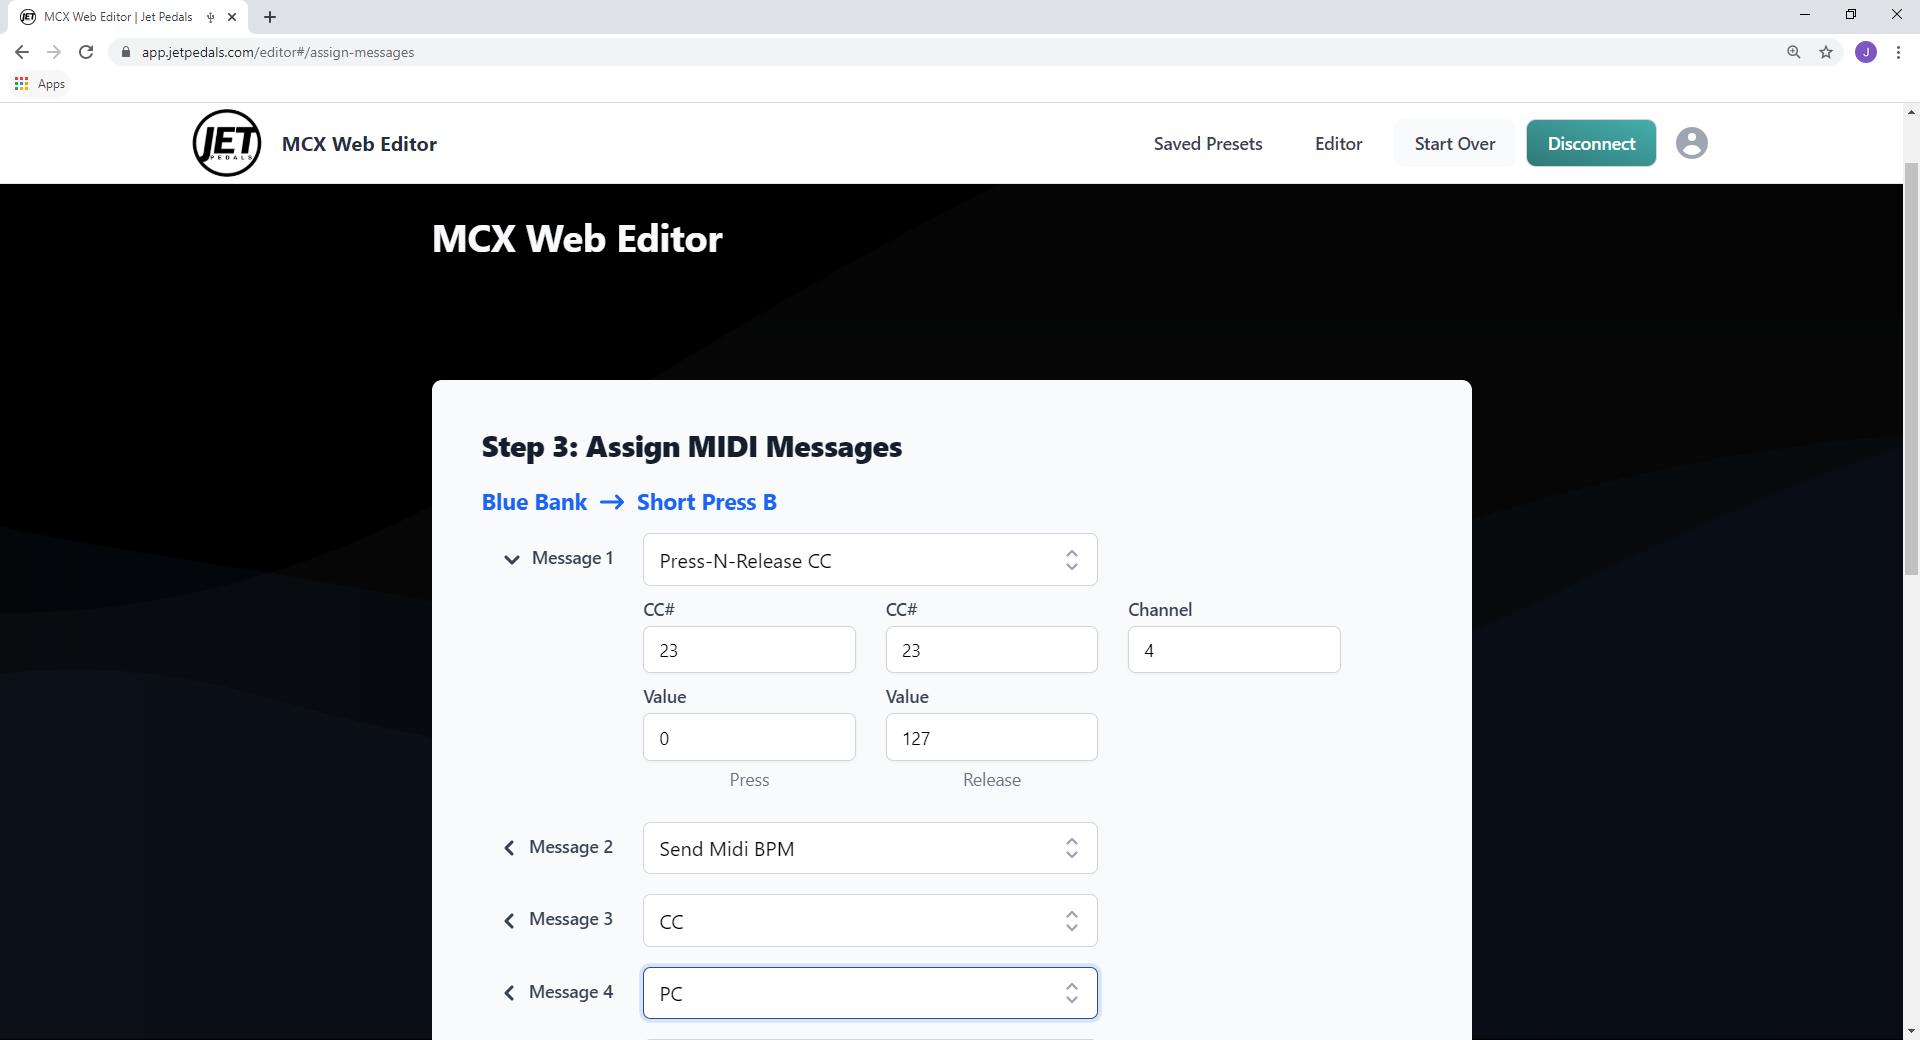
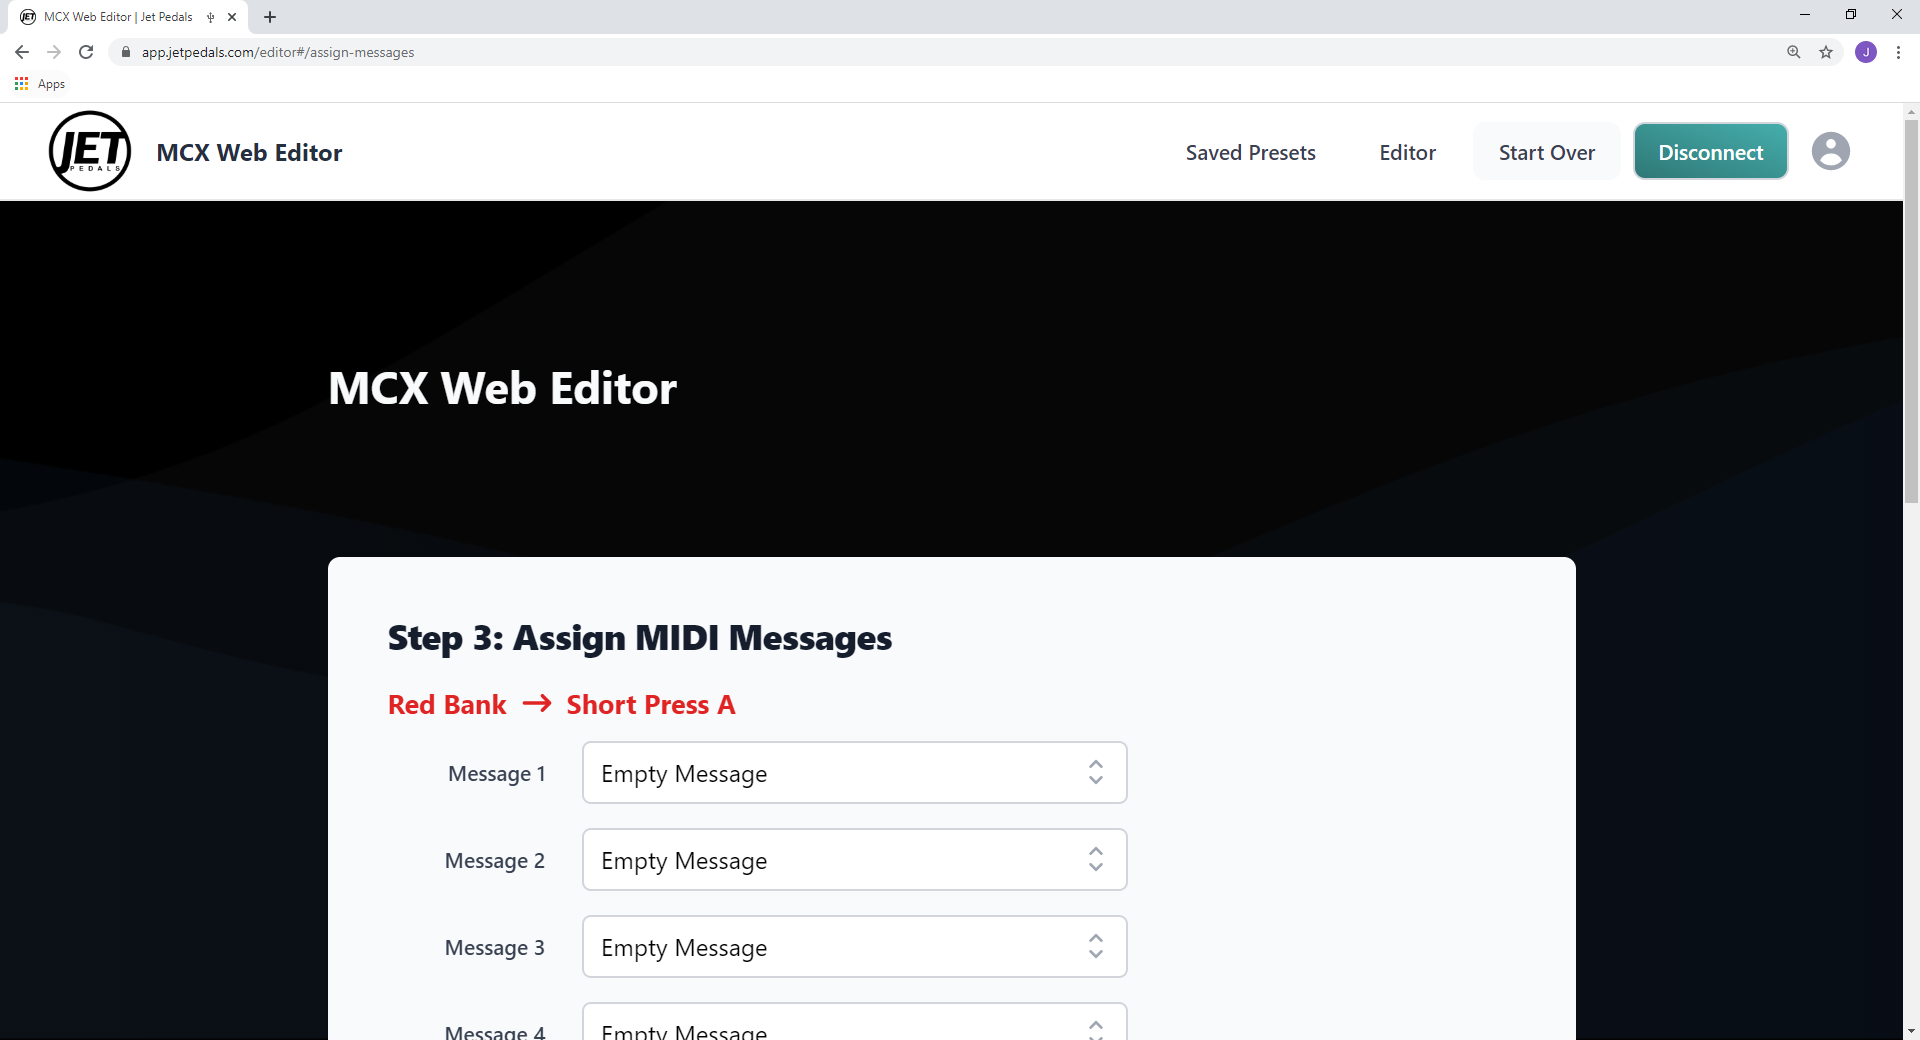
Step 3: Assign MIDI Messages.
This is where we get down to business! In each of the 16 messages you can choose from one of the 18 different message types that will get executed each time this button is pressed. Message types range from various MIDI messages like CC, PC, Toggle, MIDI Clock as well as messages that control the MCX such as increment/decrement bank number/color or jump to a specific bank number/color. See our MIDI Type Glossary for detailed information on each type.
Once you’ve filled out all of the messages needed for this press action, select the “Send All To Pedal” button. The LED on the MCX will flash green confirming the data has been saved. From here just repeat the process for each press action until you are satisfied with programming this bank.
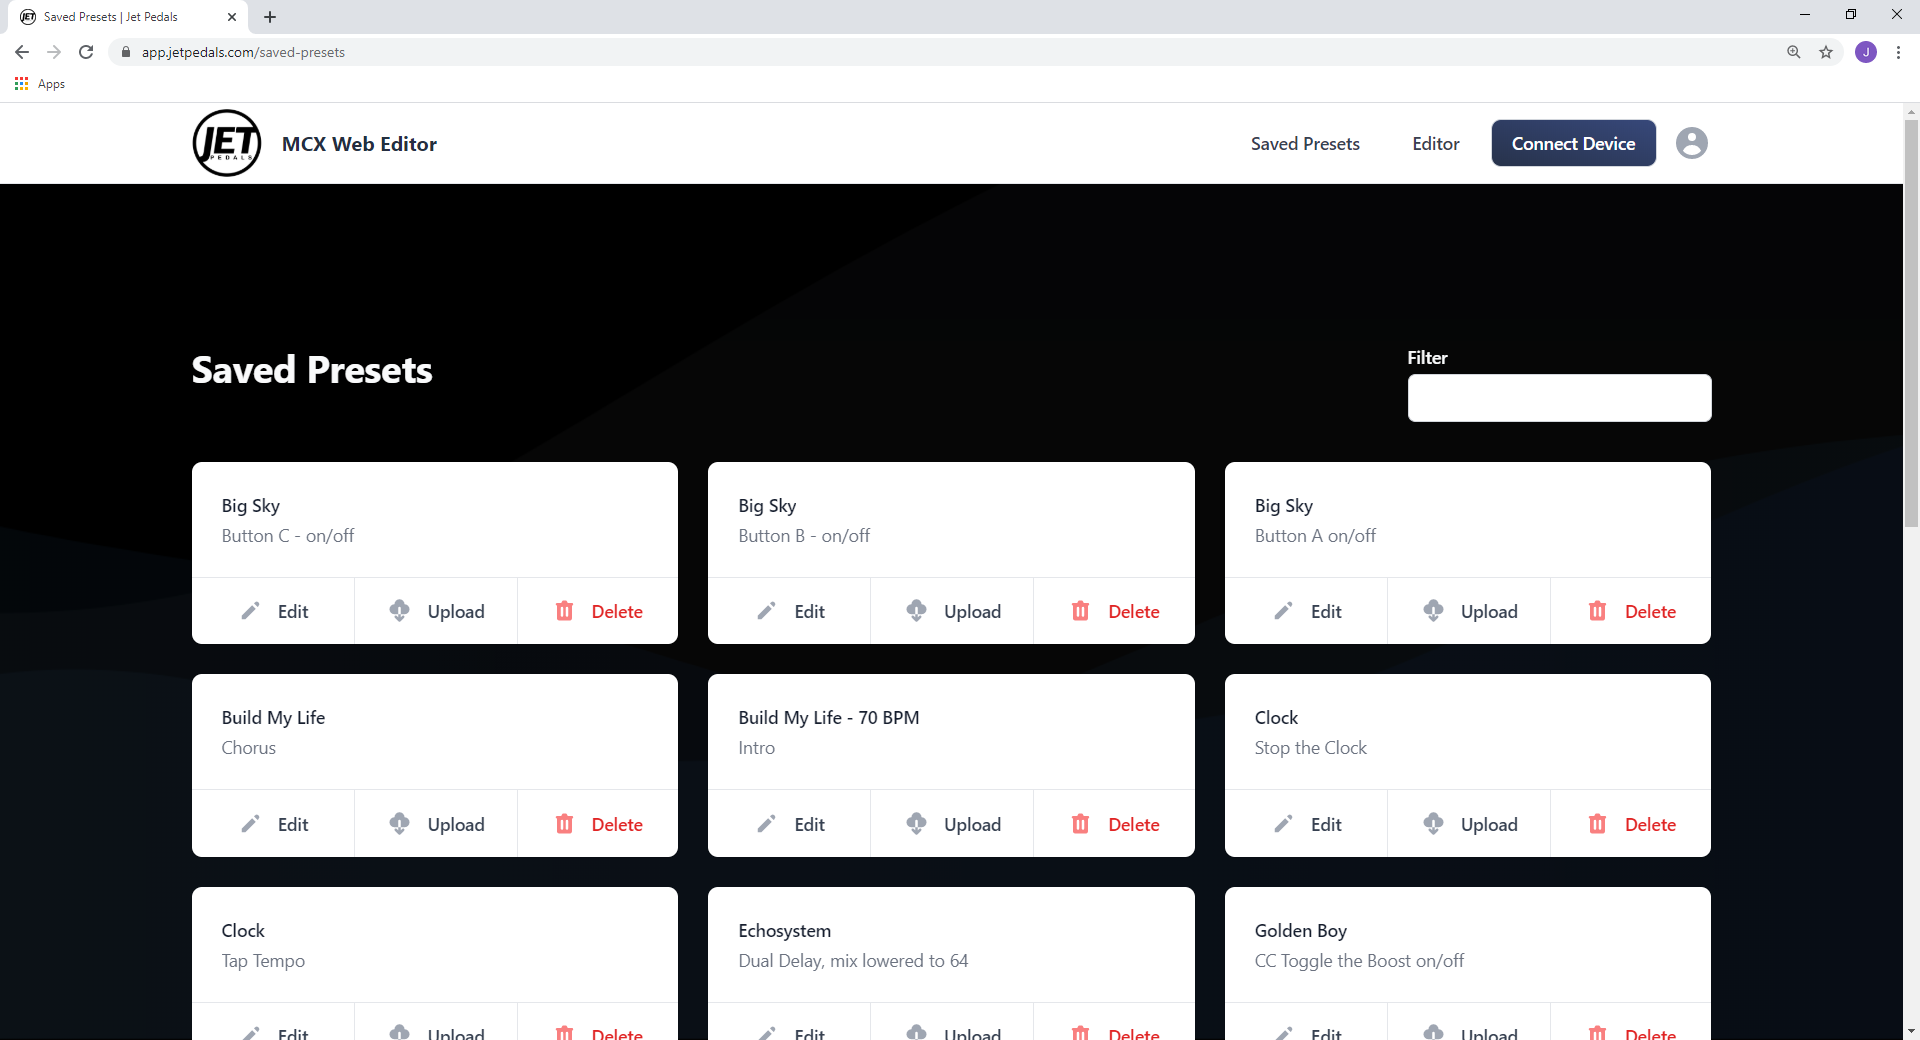
Step 4: Saving Presets or Programming Additional Press Actions
Once you've sent the messages to the pedal a pop up window will ask if you'd like to Make Changes, Save as Preset, or Start Over. Selecting Make Changes will allow you to edit the current Press Action. Selecting Save as Preset will allow you to save this group of message for later use. Simply give your preset a Name and Description, we suggest the Name to be either a song name and description could be Verse 1, Chorus, etc. or a pedal name like Time Line and description Dual Delay. Selecting Start Over will take you back to Step 2 to select a different Press Action within the same Bank.
MIDI Type Glossary
The JET Pedals MCX has 18 different MIDI types to choose from. Select from the individual pages below for detailed information on each type as well as the data required for each type.
Empty Message
When selected no MIDI information will be sent within this message slot
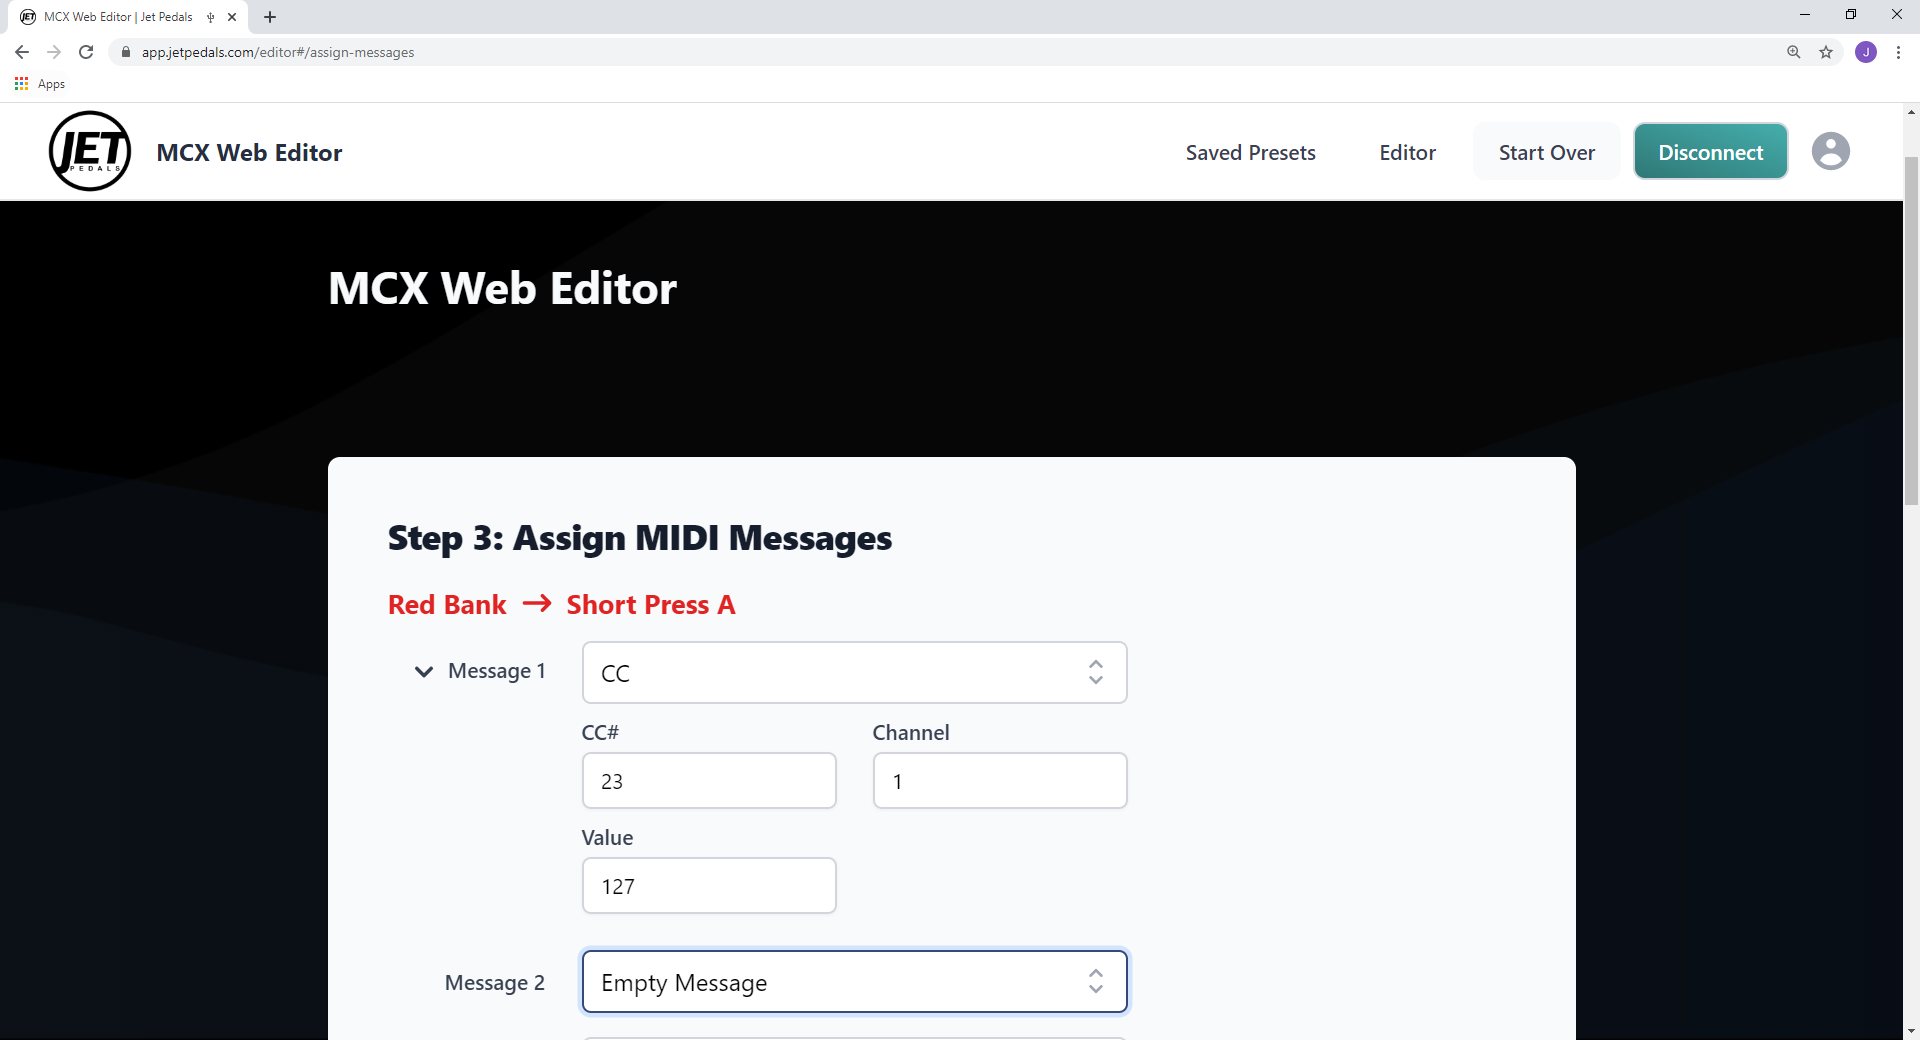
Control Change
Generally used to control individual functions within your Midi device
Enter the CC#, Value, and Channel for which to send your message
Control Change Toggle
Used to toggle between two separate CC values
Enter the CC#'s, Values, and Channel for which to send your message.
When pressing the button associated with this Midi type, the CC# and Value above Max/On will be sent fist then the CC# and value above Min/Off will be sent on the second press, this process will repeat each time the button is pressed. Switching banks will reset the counter and Max/On will be sent with the first button press.

Program Change
Generally used to recall presets on your Midi device
Enter the PC# and Channel for which to send your message

Program Change Toggle
Used to toggle between two separate PC numbers
Enter the PC#'s and Channel for which to send your message.
When pressing the button associated with this Midi type, the PC# above Max/On will be sent fist then the PC# above Min/Off will be sent on the second press, this process will repeat each time the button is pressed. Switching banks will reset the counter and the PC# above Max/On will be sent with the first button press.

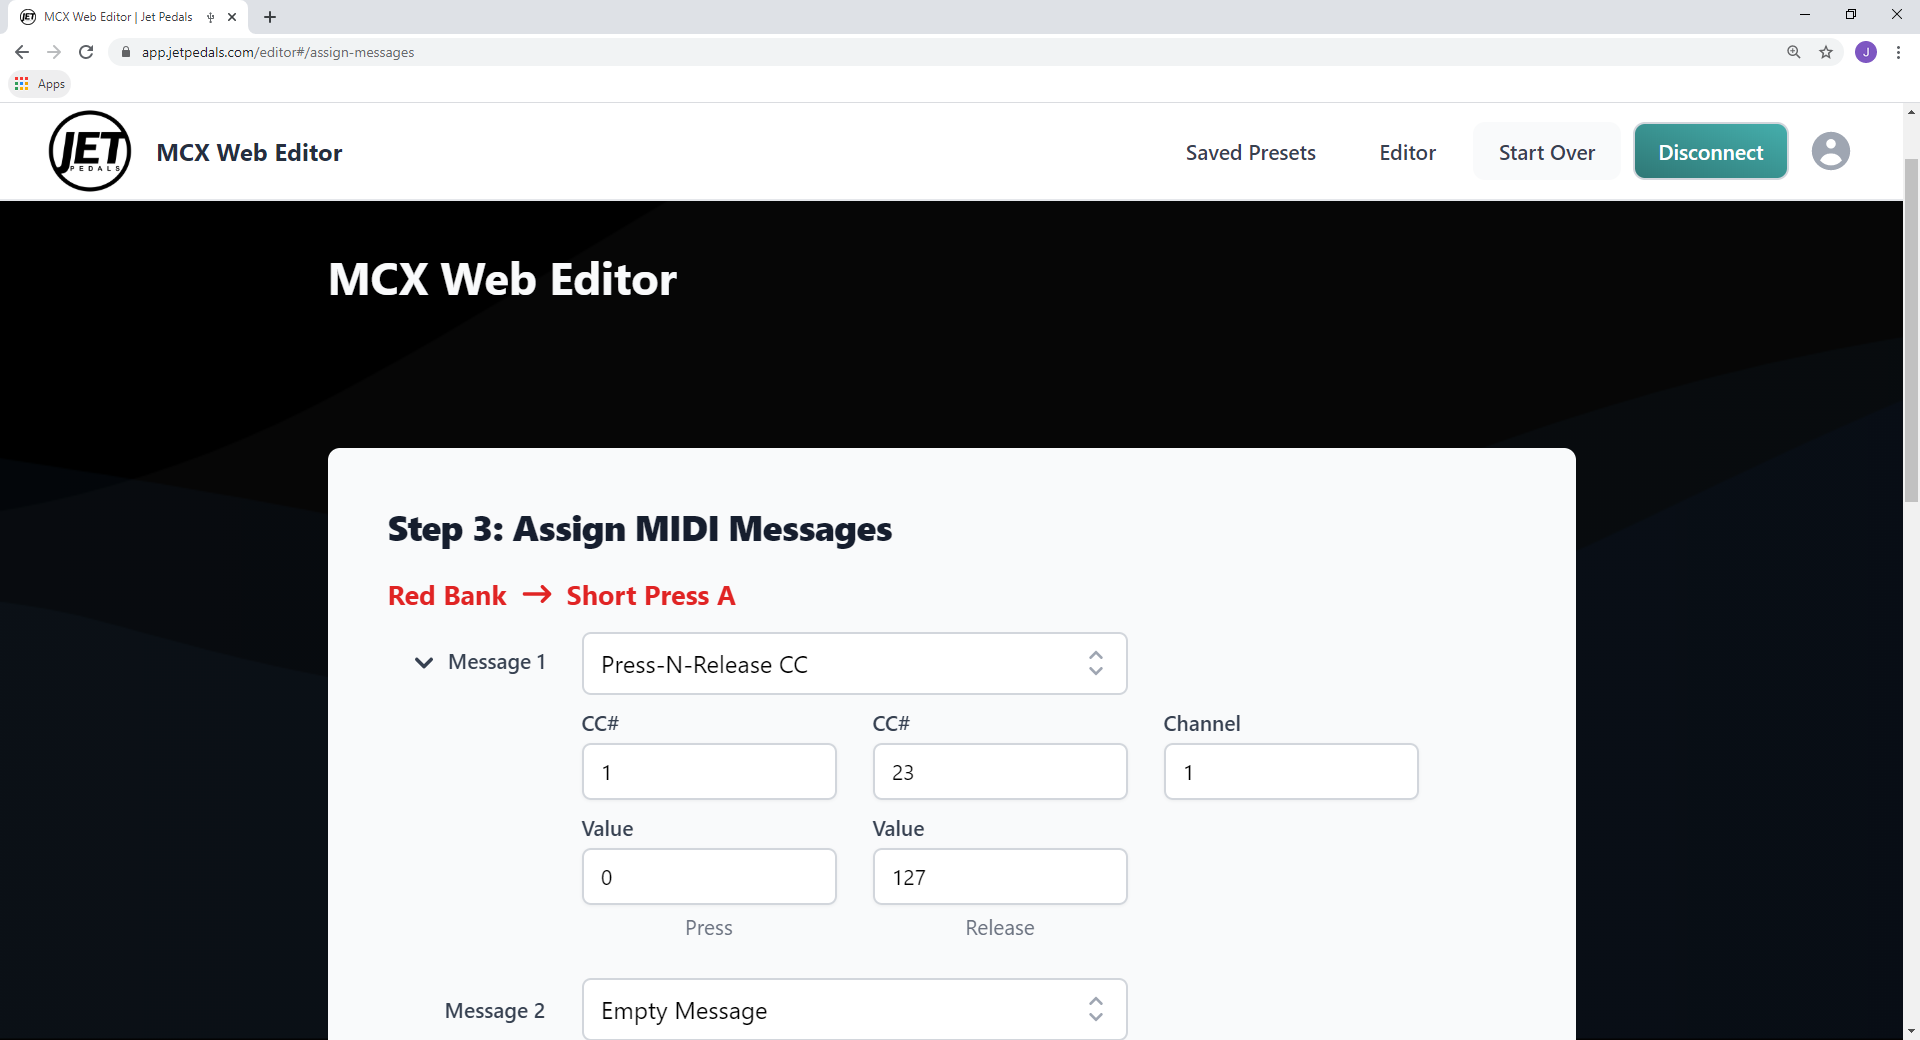
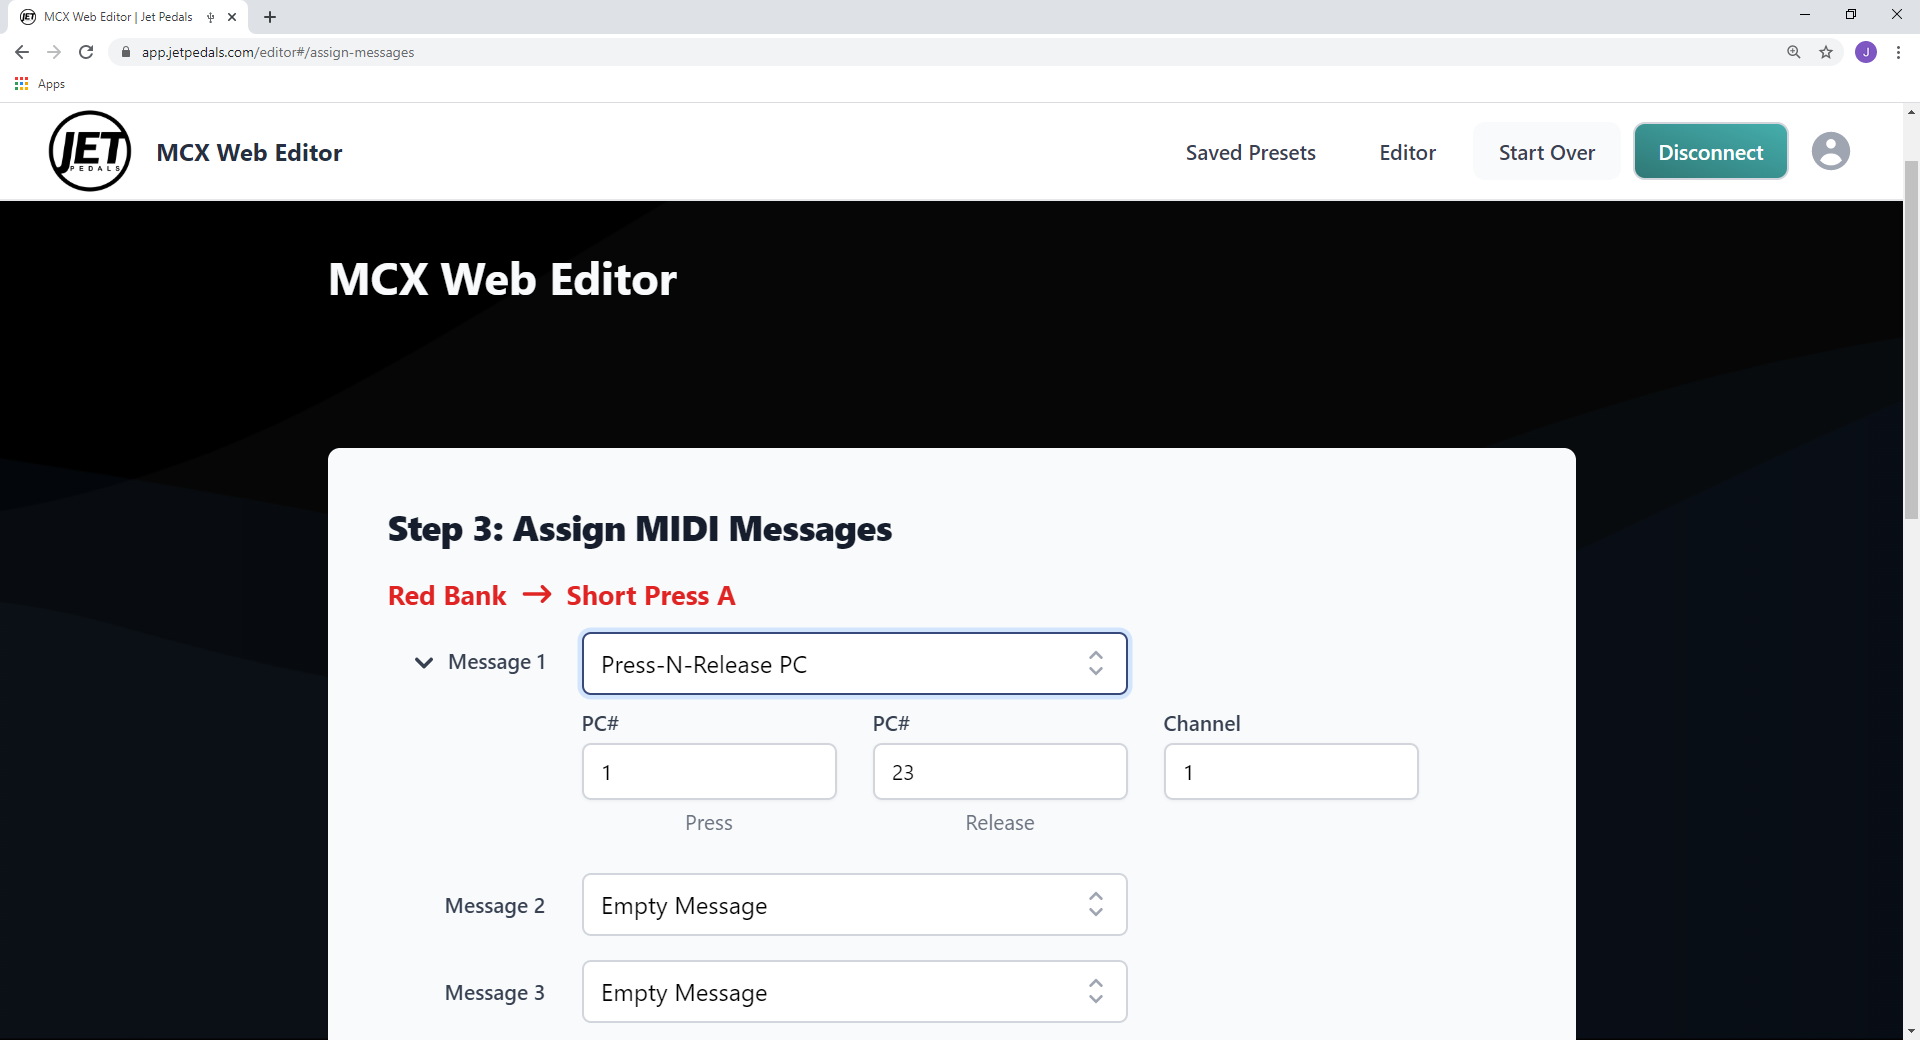
Control Change Press-N-Release
Similar to CC Toggle but operates in a momentary fashion
Enter the CC#'s, Values, and Channel for which to send your message.
This feature works in a momentary fashion, when pressing (and holding) the button associated with this Midi type, the CC# and Value above Press will be sent. When releasing the button associated with this Midi type, the CC# and Value above Release will be sent.
This Midi type can be used to temporarily jump to one setting, such as 100% wet mix or max decay time, and then quickly return back to your desired setting. This can also be used to engage or bypass a button on a Strymon pedal as they require one CC# and Value to be sent on the press and another Value sent on the release.
* When using this Midi type and you expect to hold the button down for longer than a half of a second. Both the short press and long press of the same button must be assigned to this Midi type and must also use the same values, if not, the desired result may not be as expected.
Program Change Press-N-Release
Similar to PC Toggle but operates in a momentary fashion
Enter the PC#'s and Channel for which to send your message.
This feature works in a momentary fashion, when pressing (and holding) the button associated with this Midi type, the PC# above Press will be sent. When releasing the button associated with this Midi type, the PC# above Release will be sent.
This Midi type can be used to temporarily jump to one preset, such as a preset set for large swells, and then quickly return back to your original preset.
* When using this Midi type and you expect to hold the button down for longer than a half of a second. Both the short press and long press of the same button must be assigned to this Midi type and must also use the same values, if not, the desired result may not be as expected.
Strymon Bank Change
Used to bank up or down on a Strymon pedal
This is similar to CC Press-N-Release where one value is sent on the press and another on the release of the button however to bank up or down, Strymon requires two simultaneous CC#’s to be sent when pressed and released.
To bank down, enter CC#80 and Value 0 in the slots above Press. Also enter CC#82 and Value 127 in the slot above Release.
To bank up, enter CC#81 and Value 0 in the slot above Press. Also enter CC#82 and Value 127 in the slot above Release.
* When using this Midi type and you expect to hold the button down for longer than a half of a second. Both the short press and long press of the same button must be assigned to this Midi type and must also use the same values, if not, the desired result may not be as expected.

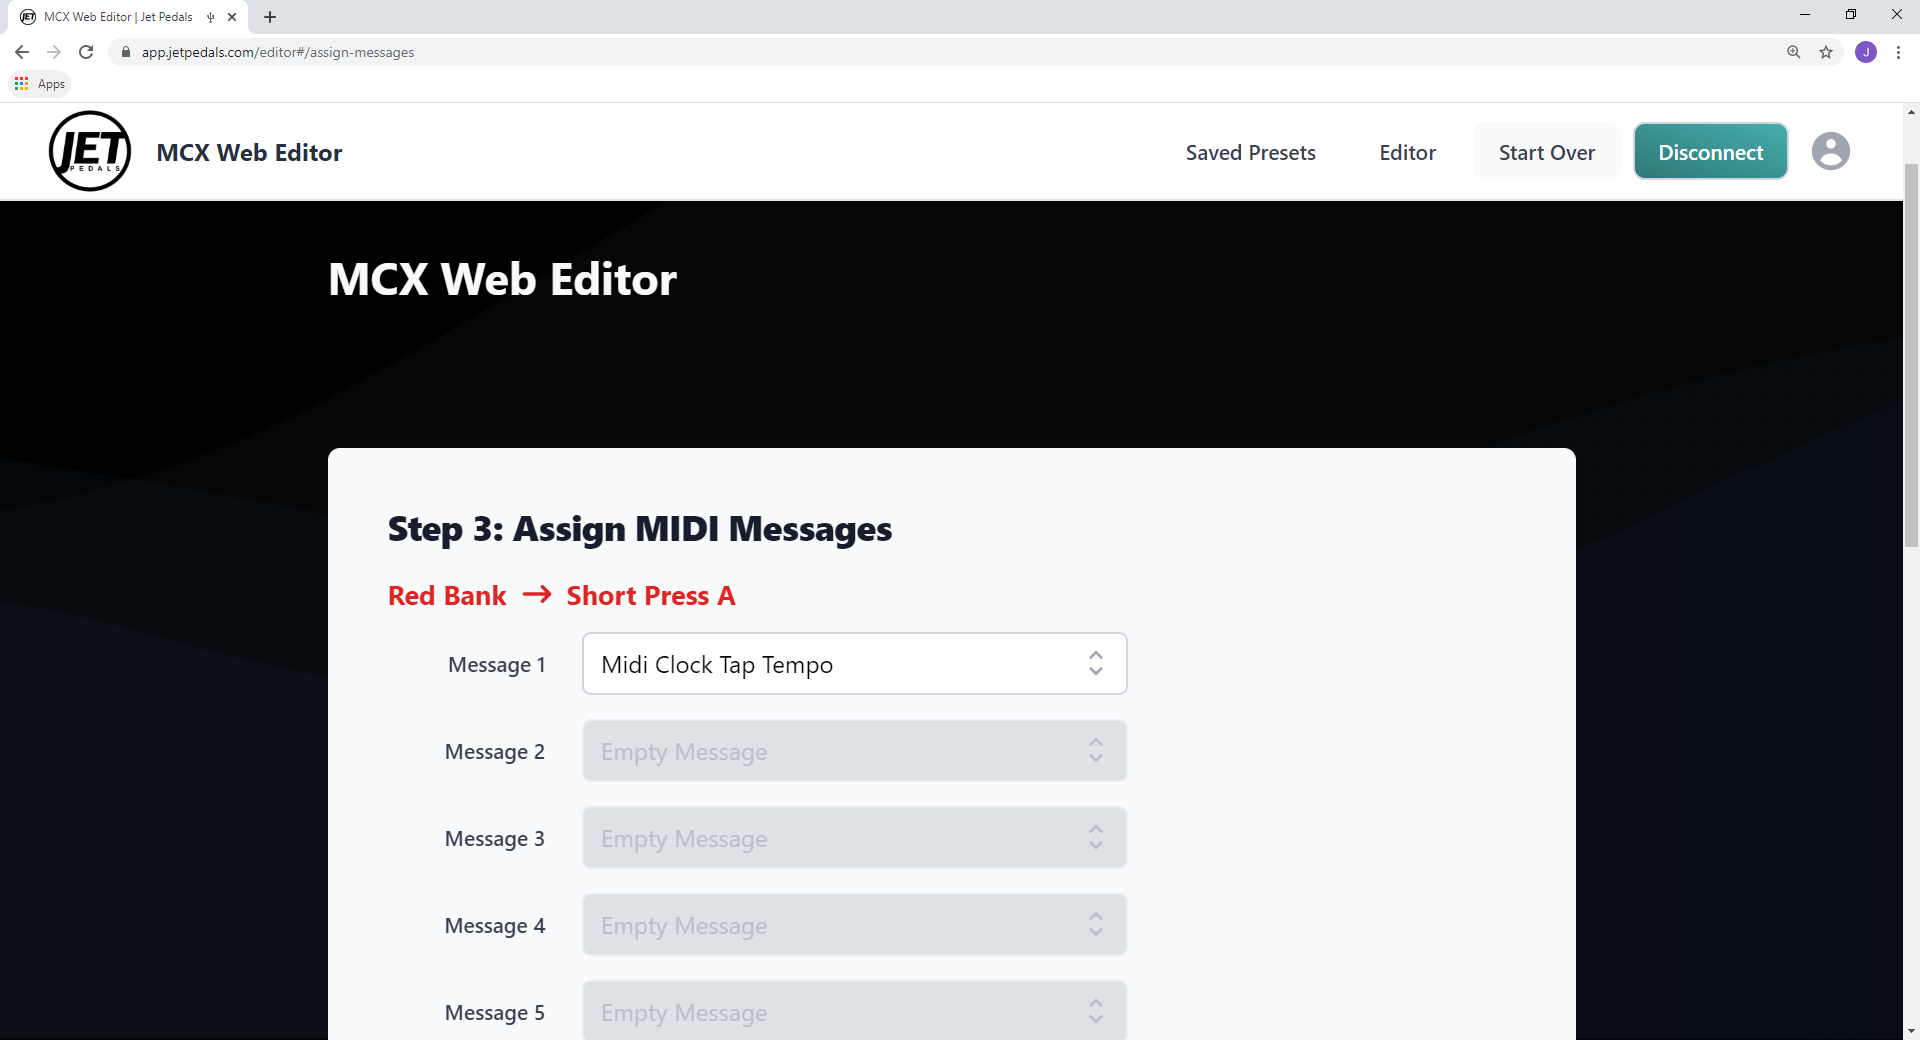
MIDI Clock Tap Tempo
Used to send tap tempo out via the midi clock
There is no data to be entered for this Midi type, once assigned to a button it will now send tap tempo information via the MIDI clock.
** MIDI Clock operates on a much higher voltage than traditional guitar signals, when sending Midi Clock you may experience a slight ticking noise in your signal chain. To reduce this noise make sure your MCX is on an isolated power supply. If you want to stop the ticking noise all together, you should assign a button to stop the Midi clock after your pedals have sync'd, or enable the "auto stop clock" feature in the global settings.
Stop MIDI Clock
Used to stop sending Midi clock information
There is no data to be entered for this Midi type, once assigned to a button it will now stop the Midi clock when pressed.

MIDI Clock BPM
Used to send a specific BPM
Sending a specific BPM via the Midi clock is easy, just enter values for Num1 and Num2. You can send BPM’s as whole numbers or fractions (see example below).
Example 1 (whole numbers): to send 72 BPM, enter 72 in the slot for Num1 and either leave Num2 empty or enter 0.
Example 2 (fractions): to send 72.8 BPM, enter 72 in the slot for Num1 and 8 in the slot for Num2
* MIDI Clock operates on a much higher voltage than traditional guitar signals, when sending Midi Clock you may experience a slight ticking noise in your signal chain. To reduce this noise make sure your MCX is on an isolated power supply. If you want to stop the ticking noise all together, you should assign a button to stop the Midi clock after your pedals have sync'd, or enable the "auto stop clock" feature in the global settings.
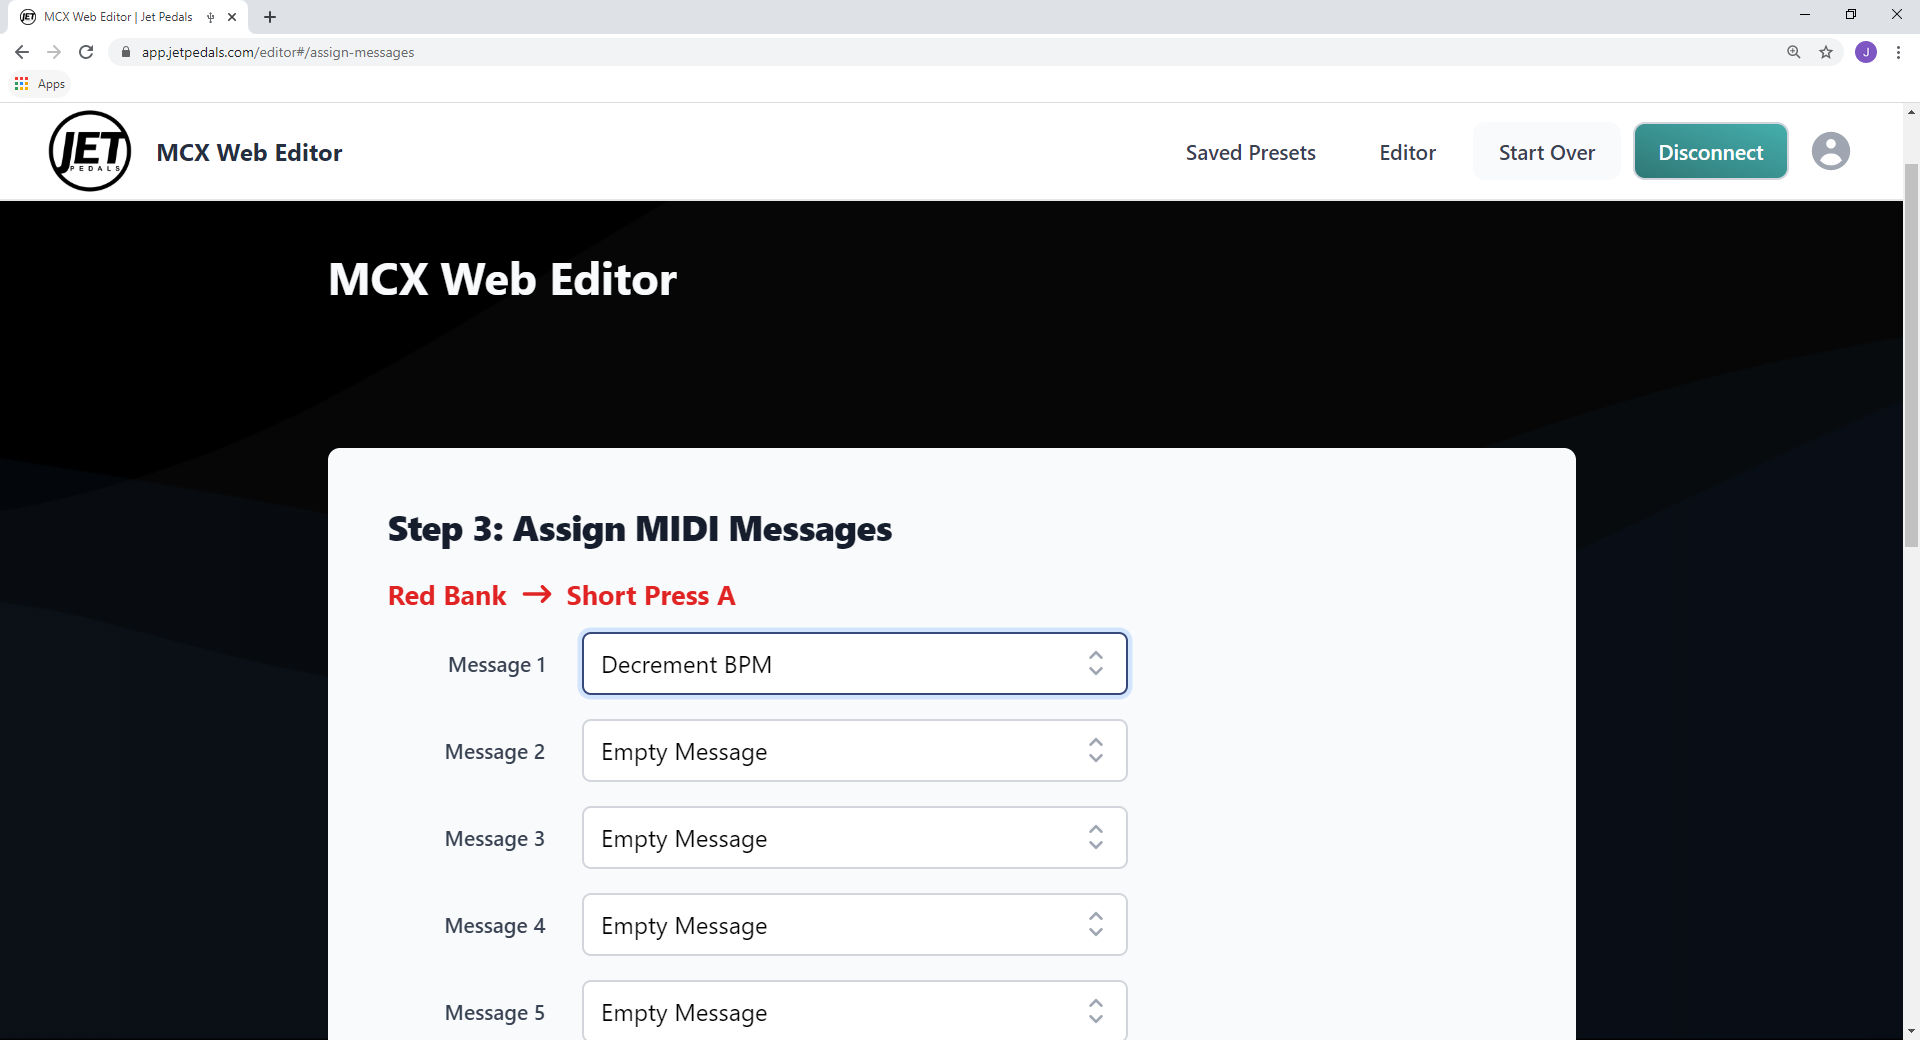
Decrement BPM
Decrement 1 BPM vial Midi clock
When this Midi type is assigned to a button it will decrement the Midi clock by one BPM each time it is pressed, you can also hold the button down to fast scroll.
* Please note that this feature will require the use of another pedals screen in order to see the BPM scrolling. Also each pedal manufacturer updates their Midi clock differently and the responsiveness/reporting of their screen will vary from manufacturer to manufacturer.
** MIDI Clock operates on a much higher voltage than traditional guitar signals, when sending Midi Clock you may experience a slight ticking noise in your signal chain. To reduce this noise make sure your MCX is on an isolated power supply. If you want to stop the ticking noise all together, you should assign a button to stop the Midi clock after your pedals have sync'd, or enable the "auto stop clock" feature in the global settings.
Increment BPM
Increment 1 BPM vial Midi clock
When this Midi type is assigned to a button it will increment the Midi clock by one BPM each time it is pressed, you can also hold the button down to fast scroll.
* Please note that this feature will require the use of another pedals screen in order to see the BPM scrolling. Also each pedal manufacturer updates their Midi clock differently and the responsiveness/reporting of their screen will vary from manufacturer to manufacturer.
** MIDI Clock operates on a much higher voltage than traditional guitar signals, when sending Midi Clock you may experience a slight ticking noise in your signal chain. To reduce this noise make sure your MCX is on an isolated power supply. If you want to stop the ticking noise all together, you should assign a button to stop the Midi clock after your pedals have sync'd, or enable the "auto stop clock" feature in the global settings.

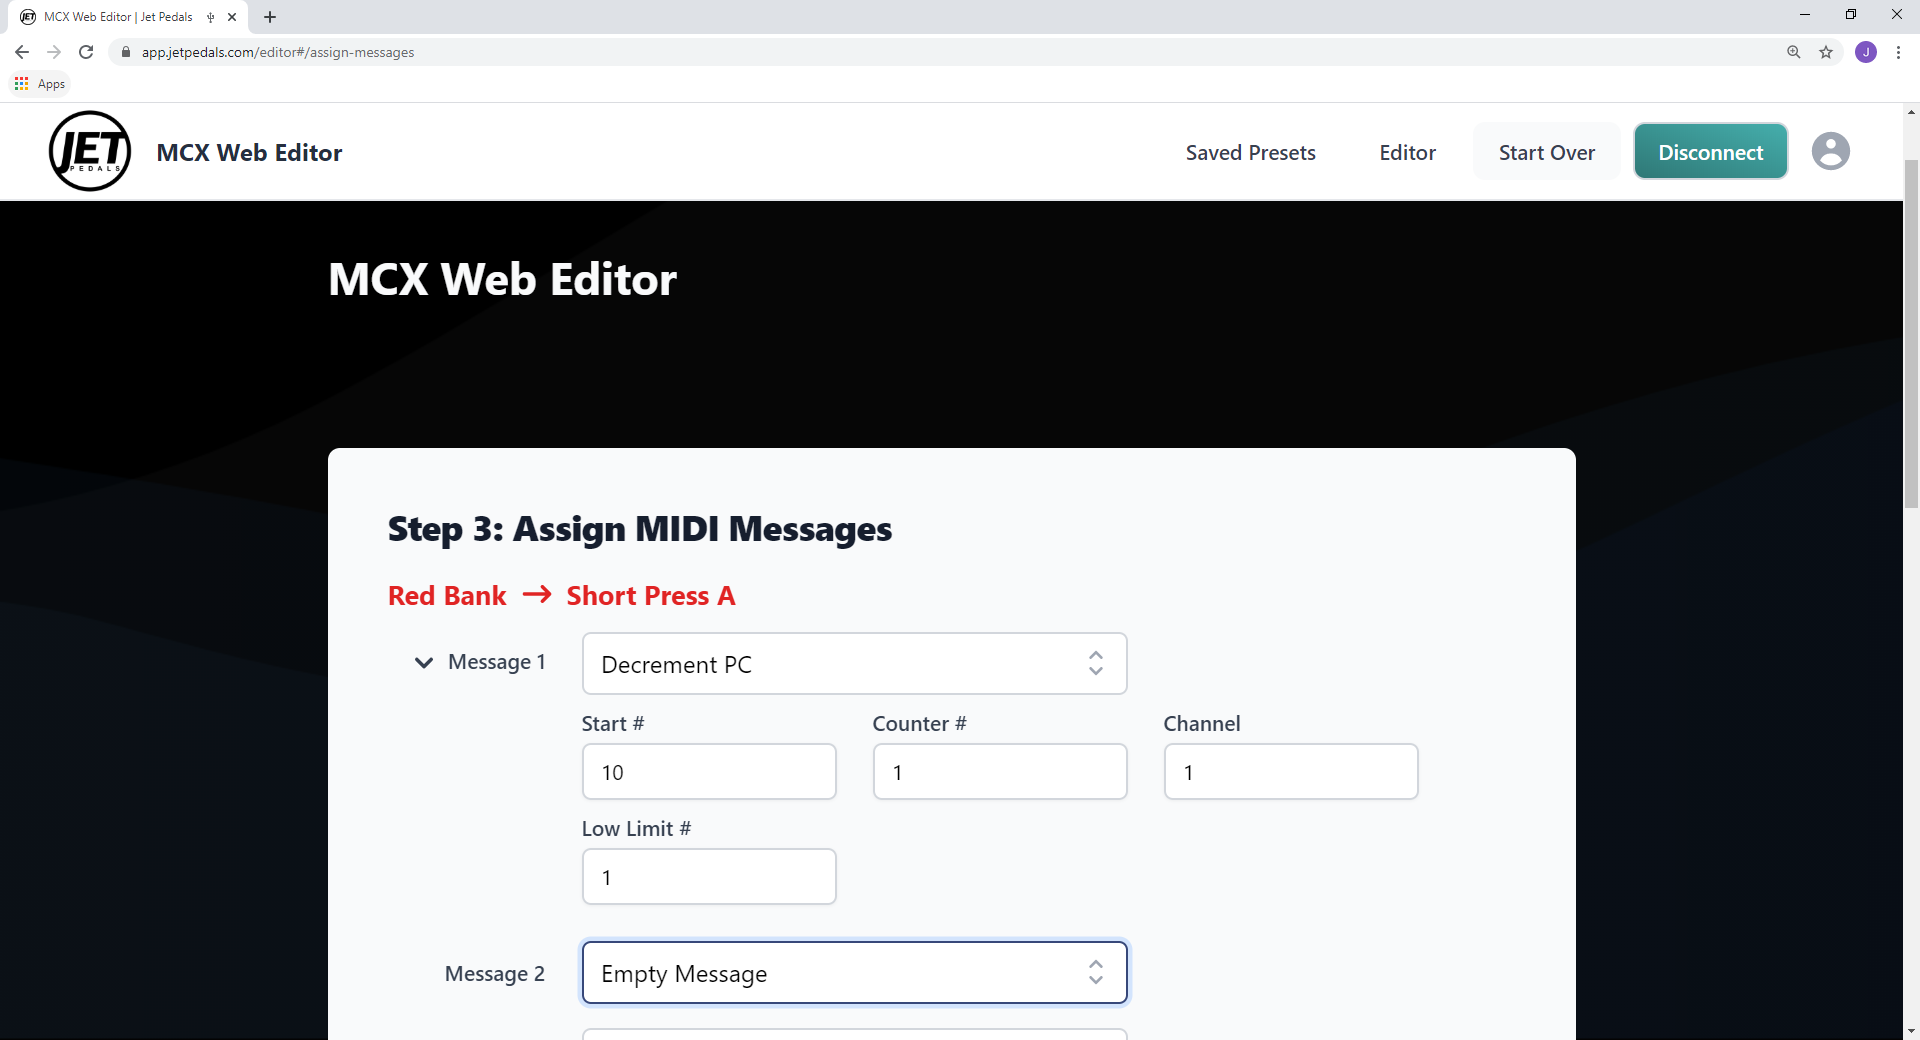
Decrement PC
Used to scroll down through a defined range of PC#’s
This message type is typically used to scroll through presets on your pedals. Simply enter the PC numbers in the slots for Start # and Low Limit #, pick a counter to be used (1 thru 4), and the channel for which to send this message to.
The Start # will be the preset called up when first pressing the button assigned to this message type. The Low Limit # is the bottom range of what you want to scroll to, once you've reached the Low Limit # the next press of the button will cycle back up to the Start # and start the process over again.
The MCX has four unique counters on board, each counter is used to keep track of where you are at in the scrolling cycle. If you need to scroll presets on different pedals, make sure to assign each pedal a unique counter number.
* Often you may want to use two different press actions to scroll up and down presets, this can be done by assigning decrement PC to one switch and Increment PC to another switch, however make sure to assign both press actions to the same counter number so the scrolling functions as desired.
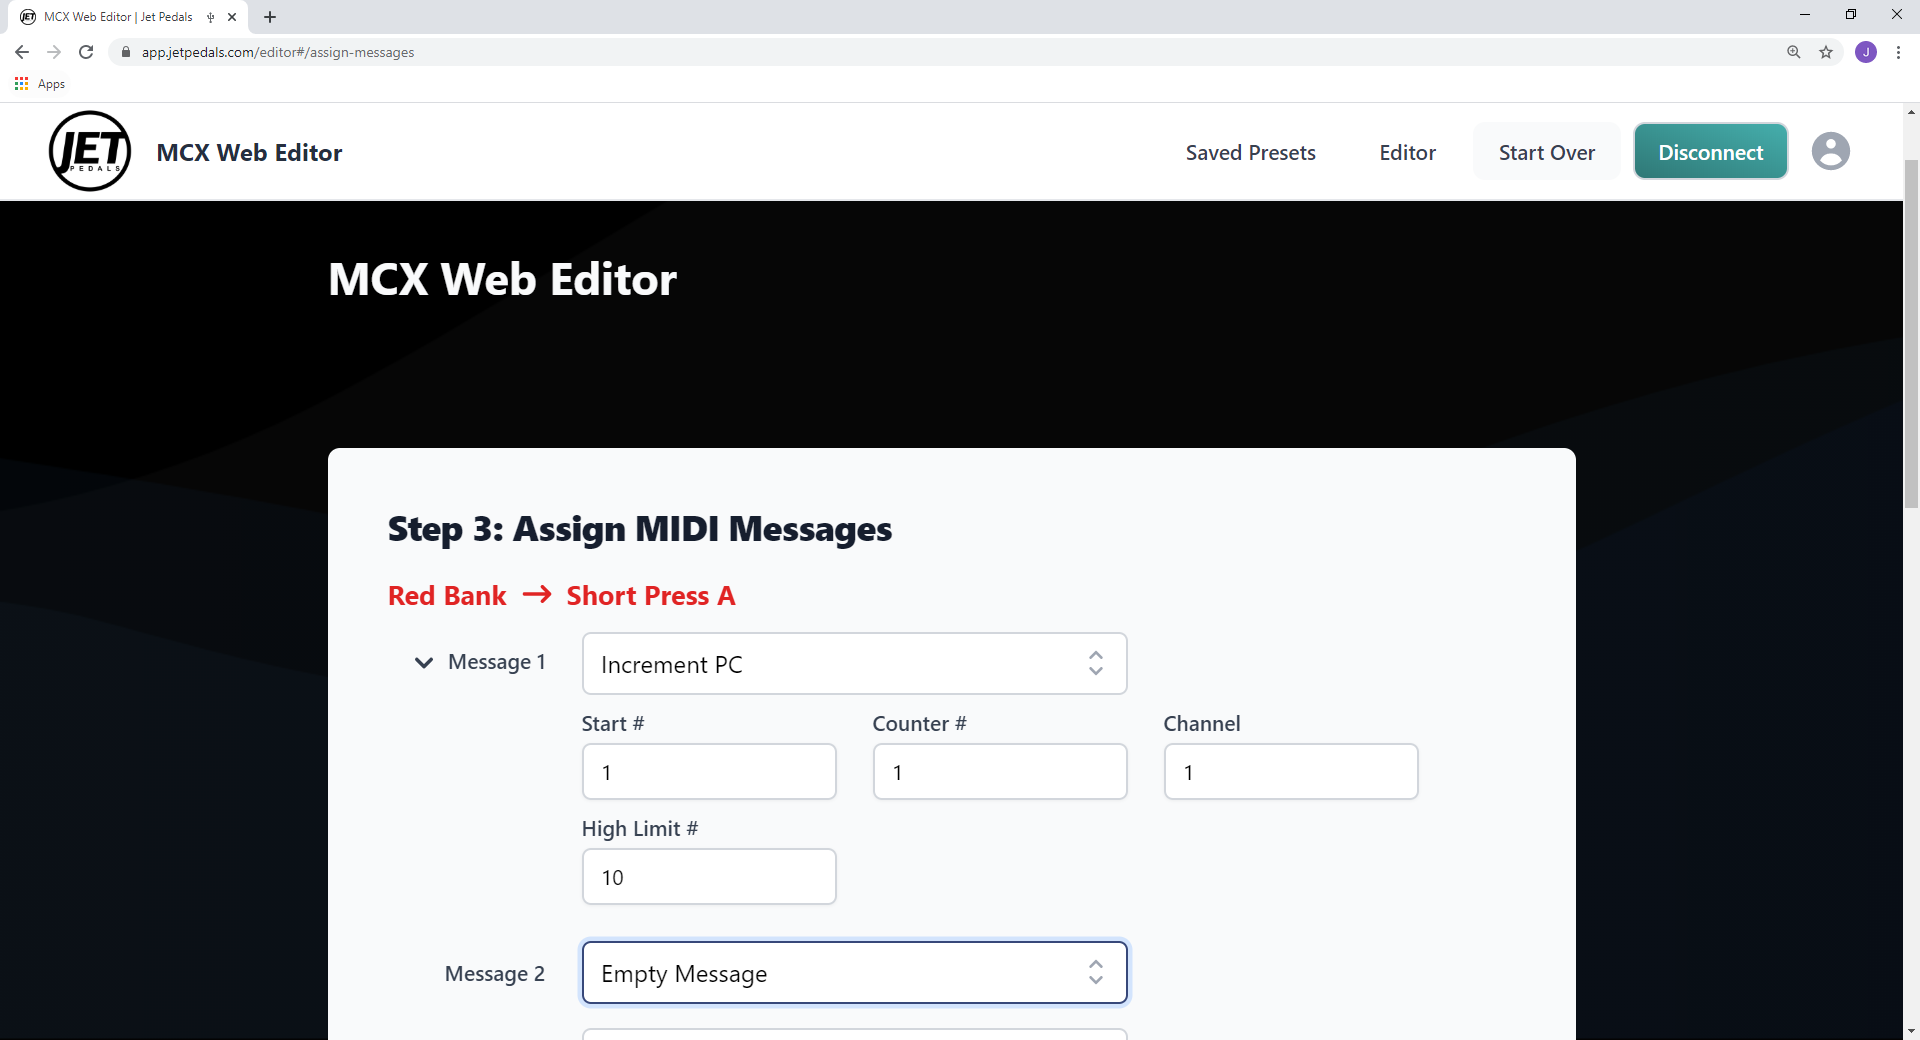
Increment PC
Used to scroll up through a defined range of PC#’s
This message type is typically used to scroll through presets on your pedals. Simply enter the PC numbers in the slots for Start # and High Limit #, pick a counter to be used (1 thru 4), and the channel for which to send this message to.
The Start # will be the preset called up when first pressing the button assigned to this message type. The High Limit # is the top range of what you want to scroll to, once you've reached the High Limit # the next press of the button will cycle back down to the Start # and start the process over again.
The MCX has four unique counters on board, each counter is used to keep track of where you are at in the scrolling cycle. If you need to scroll presets on different pedals, make sure to assign each pedal a unique counter number.
* Often you may want to use two different press actions to scroll up and down presets, this can be done by assigning decrement PC to one switch and Increment PC to another switch, however make sure to assign both press actions to the same counter number so the scrolling functions as desired.
Decrement MCX Bank Number
Used to scroll down to the previous MCX bank / color.
There is no user input required for this message type. Simply select this type from the drop down window and press the Send All to Pedal button.
*Once reaching the first bank / color on the MCX, the next press of the button assigned to the message type will cycle up to the top of the MCX and start the process all over again.

Increment MCX Bank Number
Used to scroll up to the next MCX bank / color.
There is no user input required for this message type. Simply select this type from the drop down window and press the Send All to Pedal button.
*Once reaching the last bank / color on the MCX, the next press of the button assigned to the message type will cycle down to the bottom of the MCX and start the process all over again.

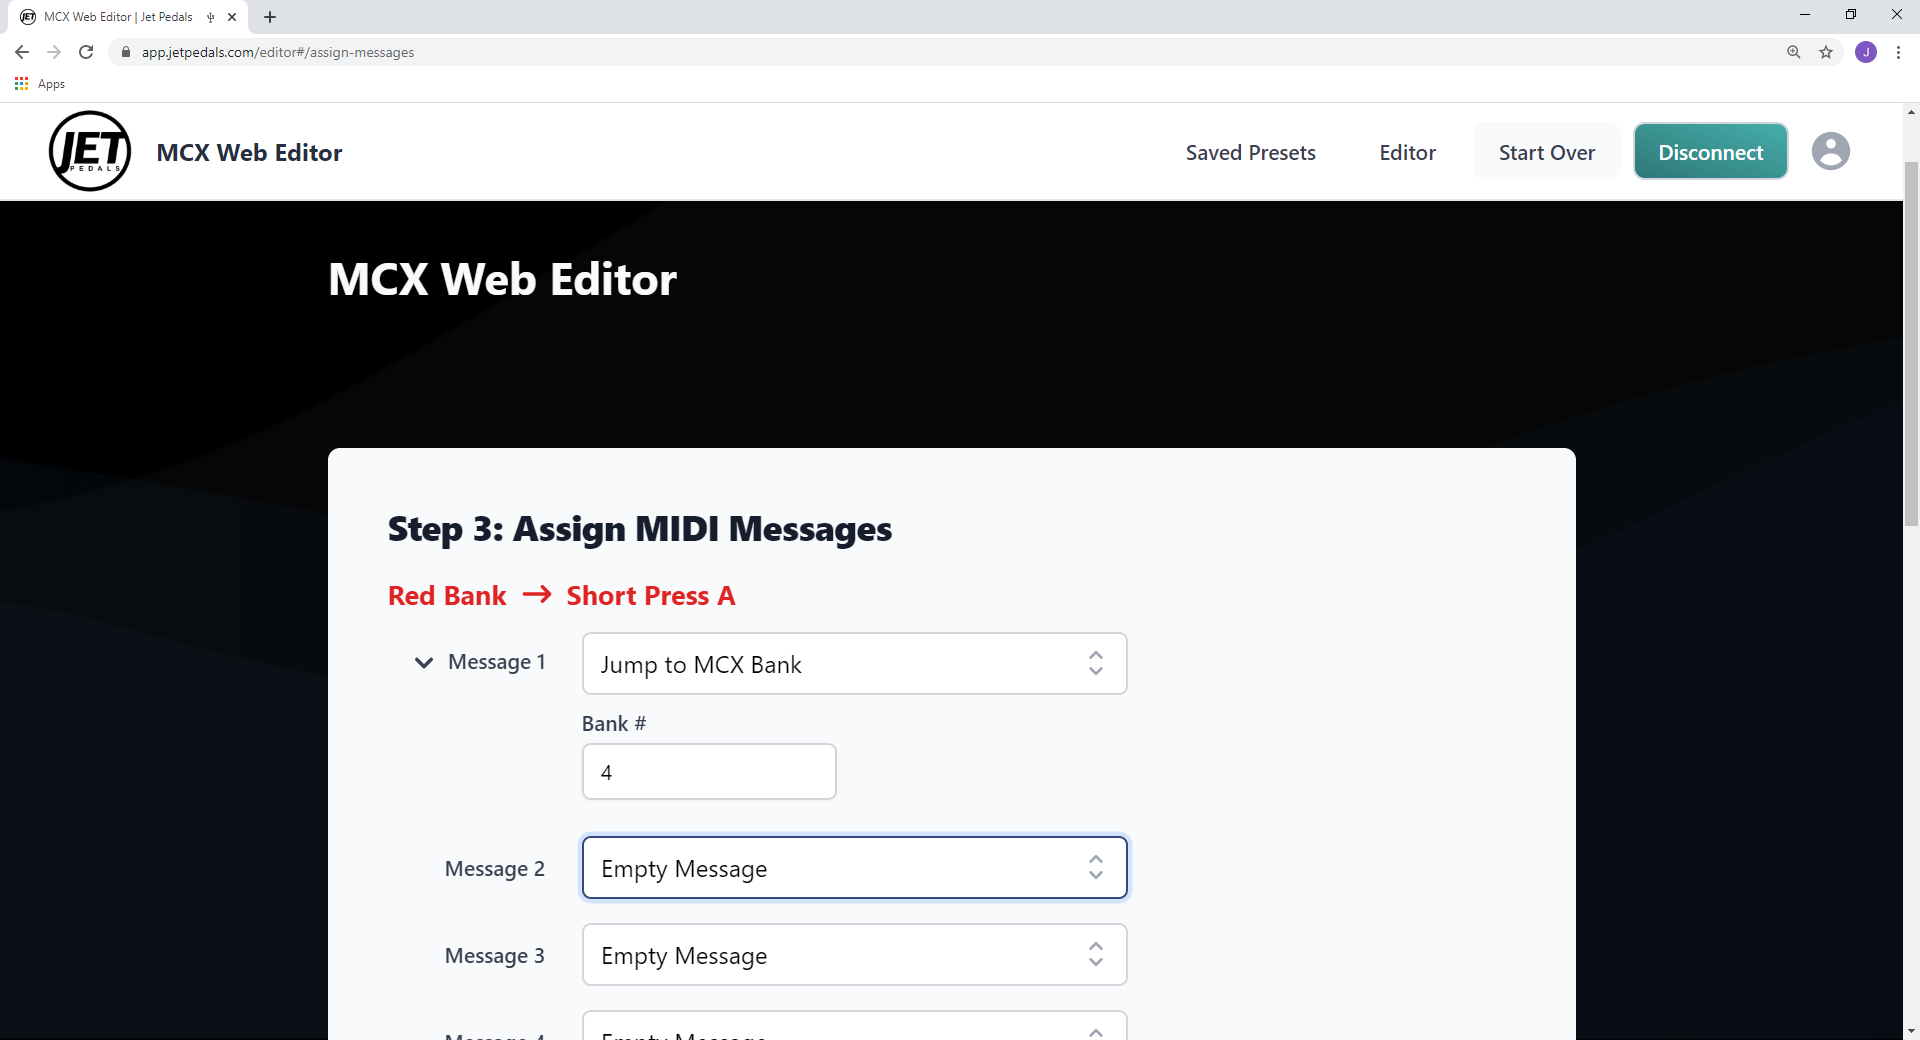
Jump to MCX Bank
This message type is similar to the Decrement and Increment MCX Bank Number, however you can jump to any bank you wish, even if you've setup less than 8 banks to scroll thru in the global settings.
Simply select the bank number and press the Send All to Pedal button to assign this type to any press action. See the list of bank numbers and their associated LED color below:
-
- Red
- Green
- Blue
- Yellow
- Purple (UV)
- Cyan (Sky Blue)
- White
- Orange
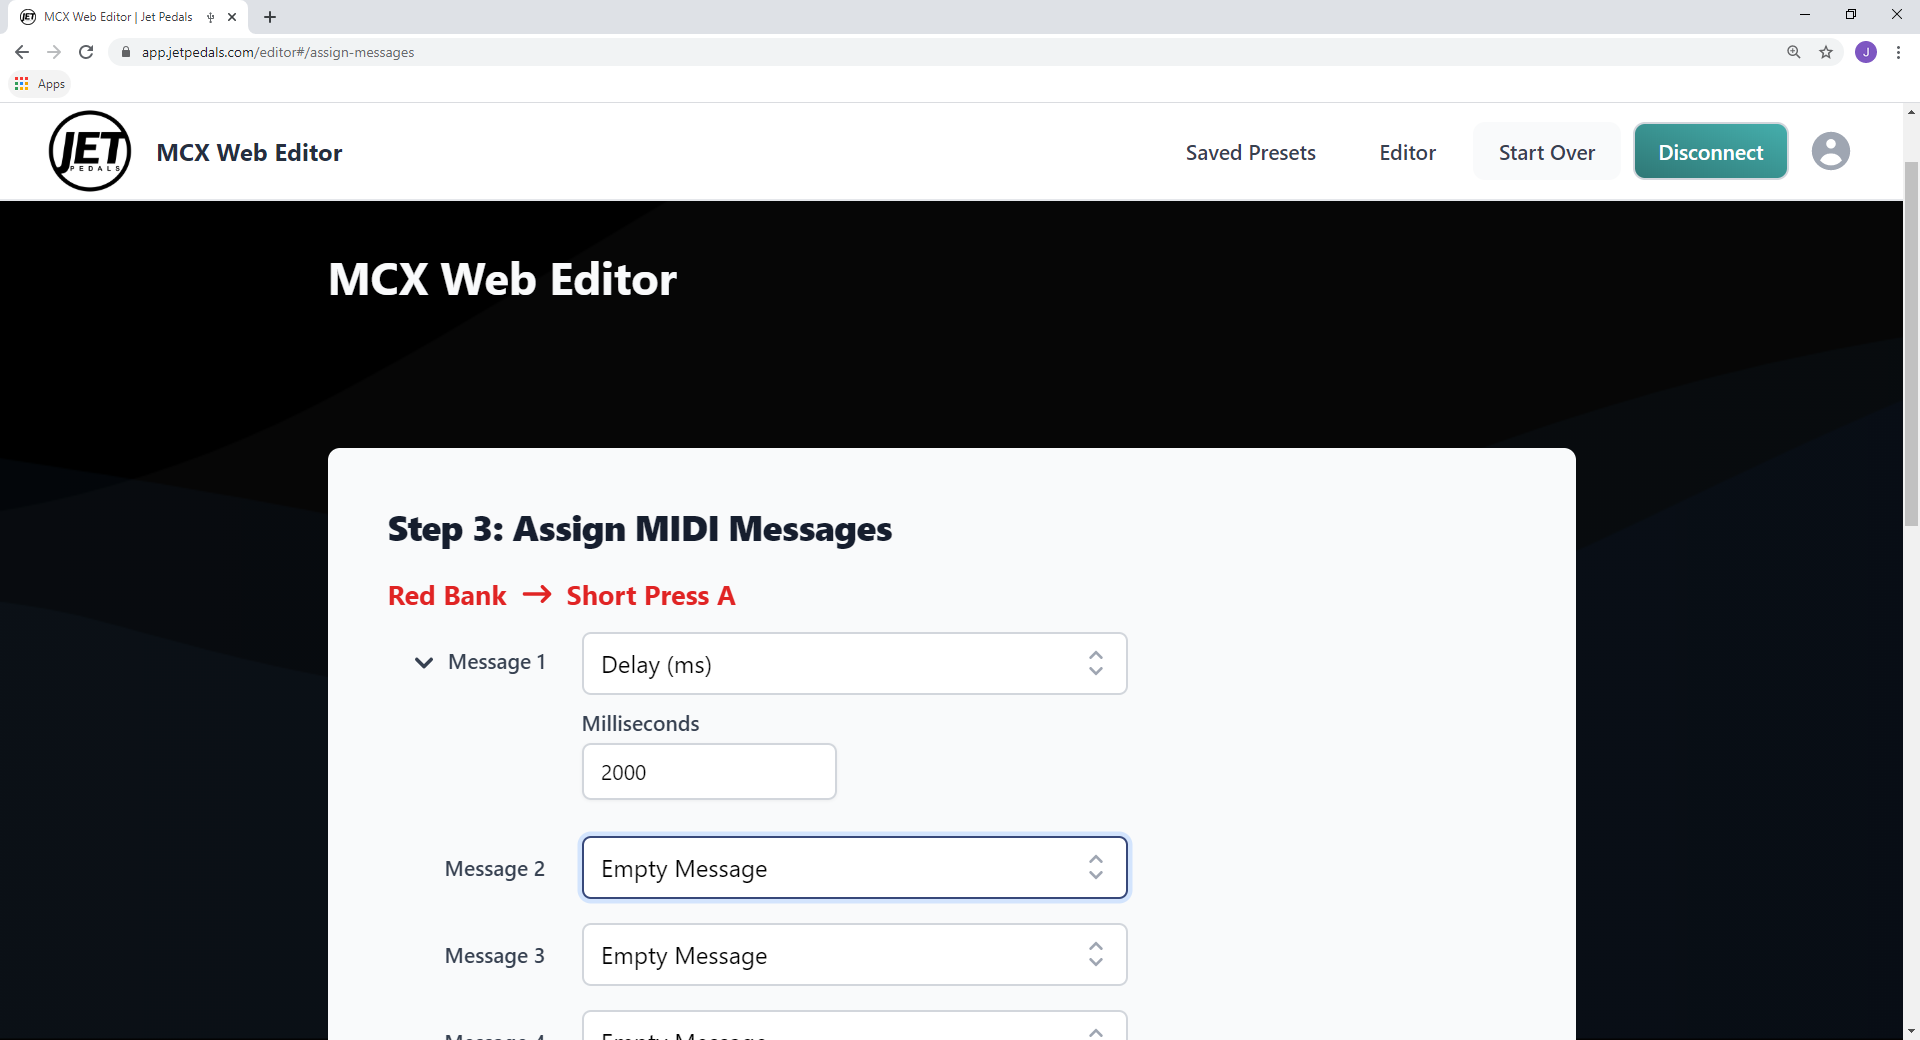
Delay (ms)
Adds a simple delay between messages, delay ranges from 1 millisecond to 10 seconds
This message is useful when trying to control several parameters for one pedal and the manufacturer may need you to slow down the time between messages in order accurately process each message.
* 1000 milliseconds equals 1 second
FAQ
Frequently Asked Questions
Why Can't I Connect My MCX to the Web Editor?
In order to connect and use the MCX you must be using the Google Chrome browser (version 80 or above) on a Mac, Windows, or Android device.
We use the Serial API to communicate with the MCX, since this is brand new technology, you must first engage the Experimental Web Features flag within your browser. Paste this link into your URL and enable the flag, chrome://flags/#enable-experimental-web-platform-features once you restart the browser you should be able to connect and program the MCX.