MIDI Type Glossary
The JET Pedals MCX has 18 different MIDI types to choose from. Select from the individual pages below for detailed information on each type as well as the data required for each type.
- Empty Message
- Control Change
- Control Change Toggle
- Program Change
- Program Change Toggle
- Control Change Press-N-Release
- Program Change Press-N-Release
- Strymon Bank Change
- MIDI Clock Tap Tempo
- Stop MIDI Clock
- MIDI Clock BPM
- Decrement BPM
- Increment BPM
- Decrement PC
- Increment PC
- Decrement MCX Bank Number
- Increment MCX Bank Number
- Jump to MCX Bank
- Delay (ms)
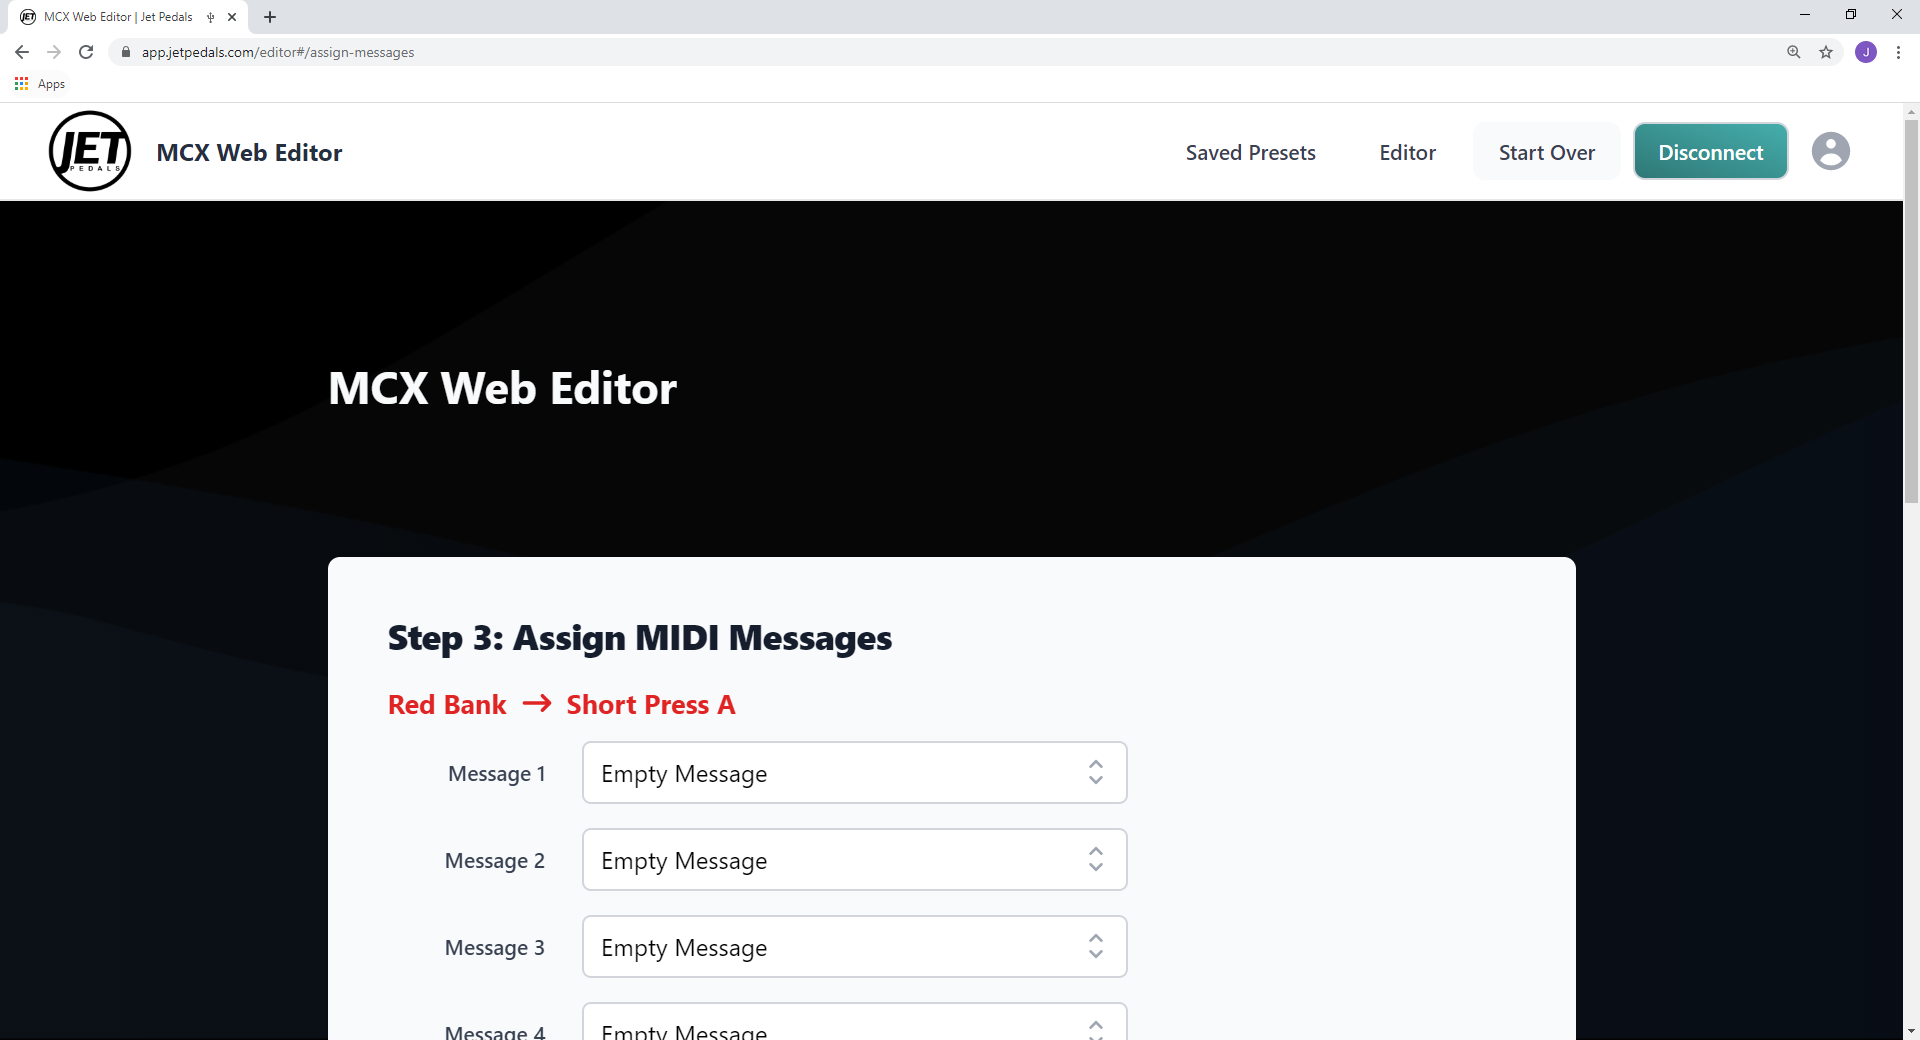
Empty Message
When selected no MIDI information will be sent within this message slot
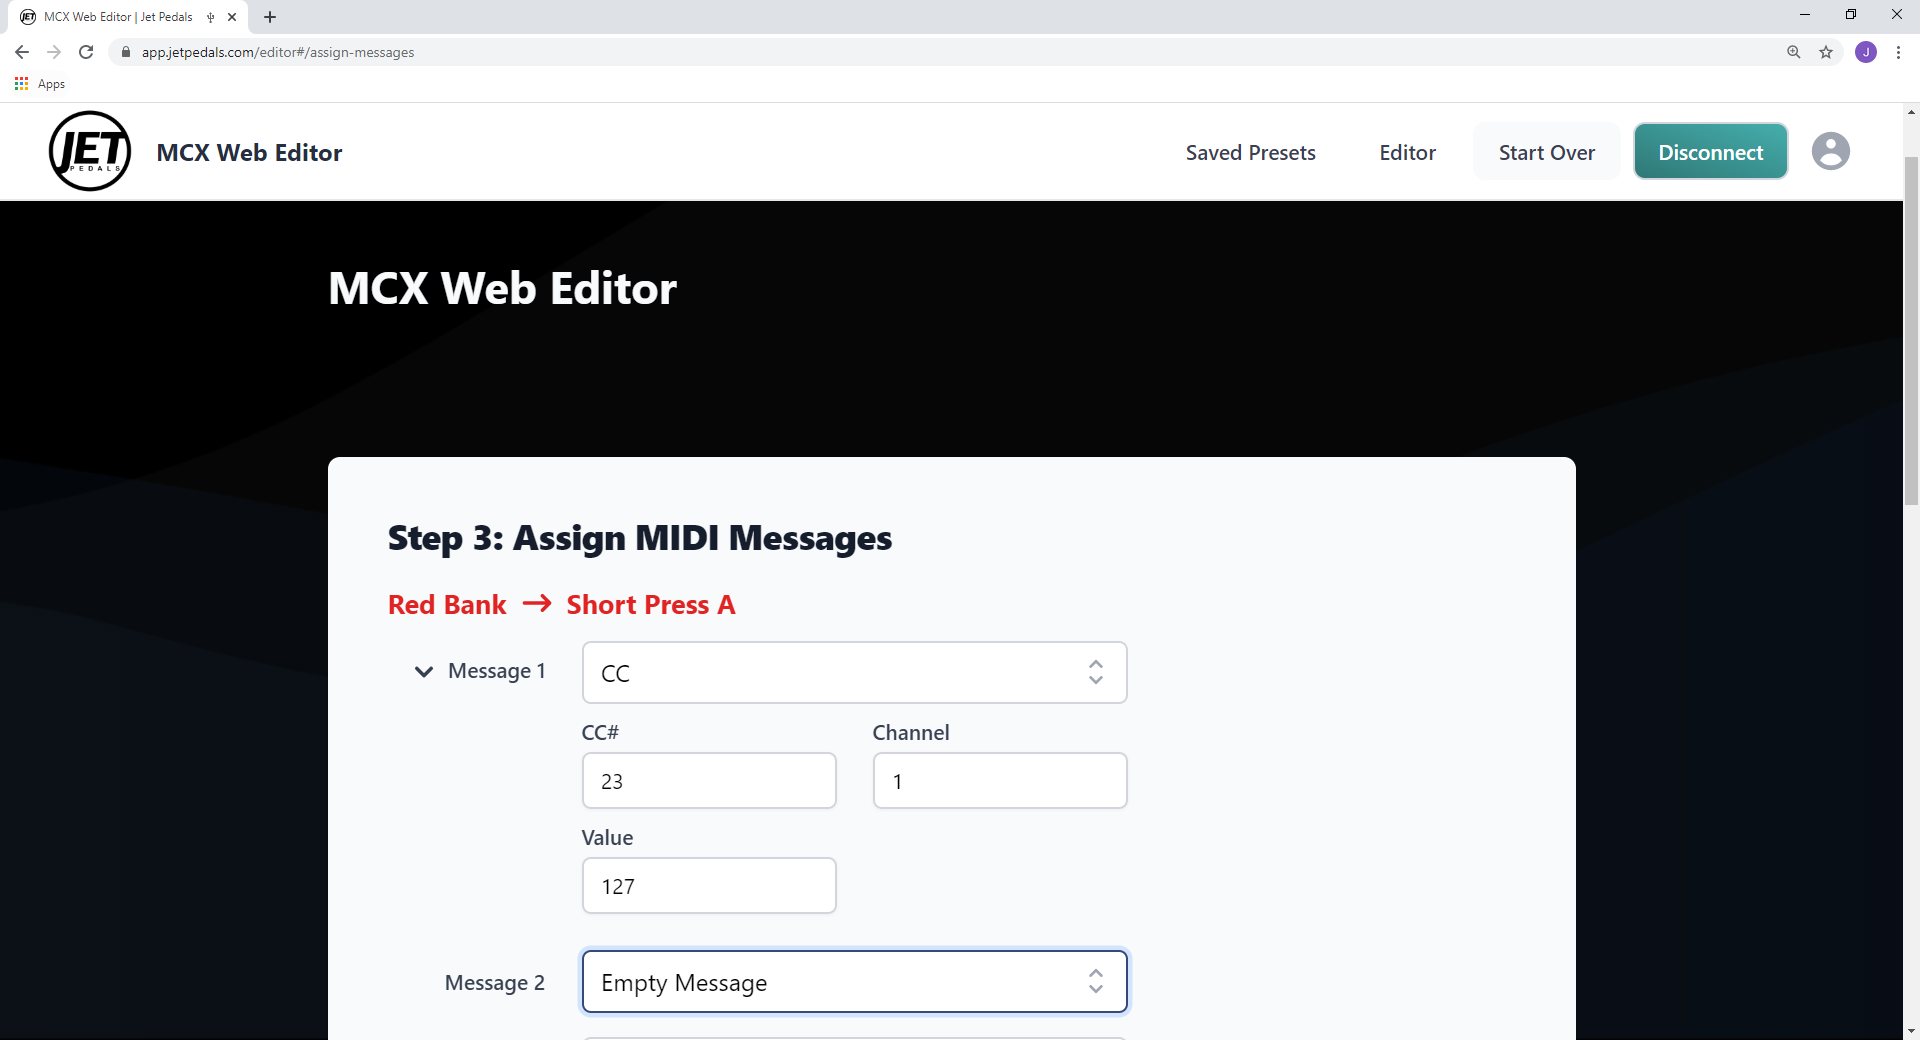
Control Change
Generally used to control individual functions within your Midi device
Enter the CC#, Value, and Channel for which to send your message
Control Change Toggle
Used to toggle between two separate CC values
Enter the CC#'s, Values, and Channel for which to send your message.
When pressing the button associated with this Midi type, the CC# and Value above Max/On will be sent fist then the CC# and value above Min/Off will be sent on the second press, this process will repeat each time the button is pressed. Switching banks will reset the counter and Max/On will be sent with the first button press.

Program Change
Generally used to recall presets on your Midi device
Enter the PC# and Channel for which to send your message

Program Change Toggle
Used to toggle between two separate PC numbers
Enter the PC#'s and Channel for which to send your message.
When pressing the button associated with this Midi type, the PC# above Max/On will be sent fist then the PC# above Min/Off will be sent on the second press, this process will repeat each time the button is pressed. Switching banks will reset the counter and the PC# above Max/On will be sent with the first button press.

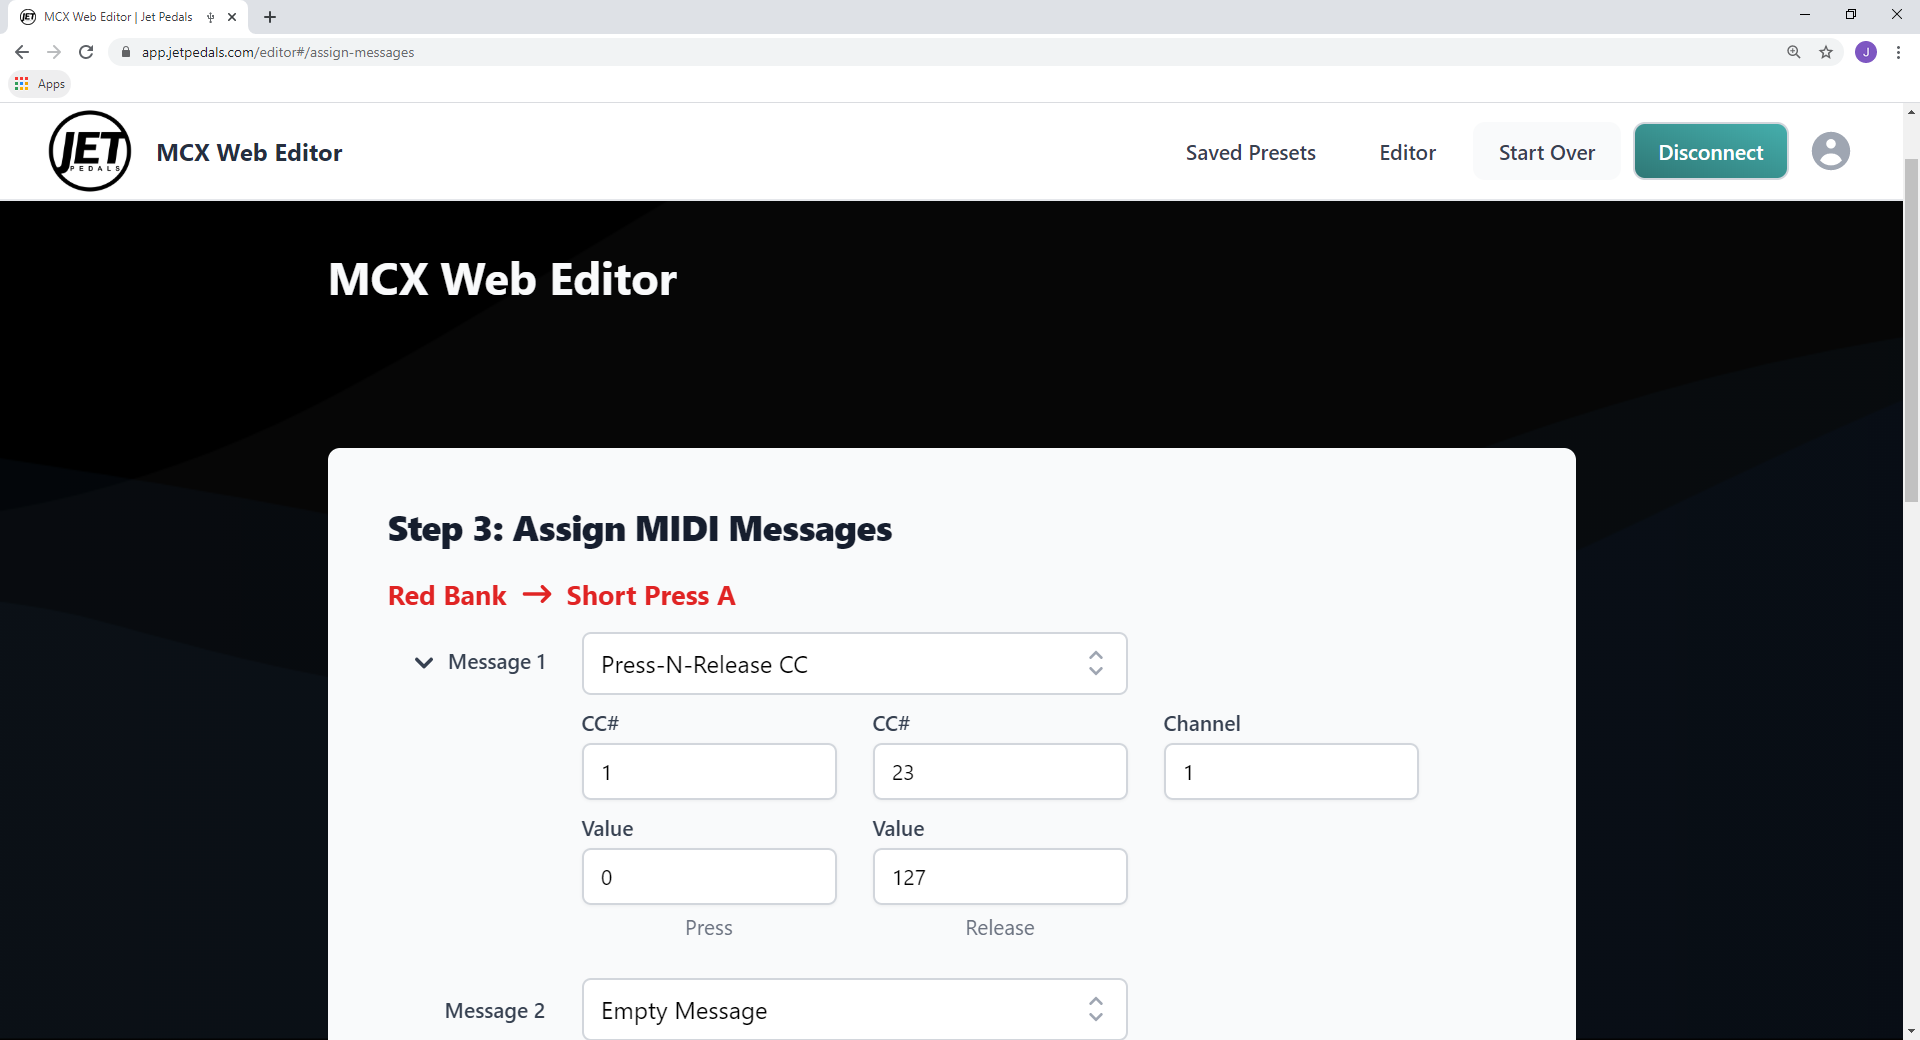
Control Change Press-N-Release
Similar to CC Toggle but operates in a momentary fashion
Enter the CC#'s, Values, and Channel for which to send your message.
This feature works in a momentary fashion, when pressing (and holding) the button associated with this Midi type, the CC# and Value above Press will be sent. When releasing the button associated with this Midi type, the CC# and Value above Release will be sent.
This Midi type can be used to temporarily jump to one setting, such as 100% wet mix or max decay time, and then quickly return back to your desired setting. This can also be used to engage or bypass a button on a Strymon pedal as they require one CC# and Value to be sent on the press and another Value sent on the release.
* When using this Midi type and you expect to hold the button down for longer than a half of a second. Both the short press and long press of the same button must be assigned to this Midi type and must also use the same values, if not, the desired result may not be as expected.
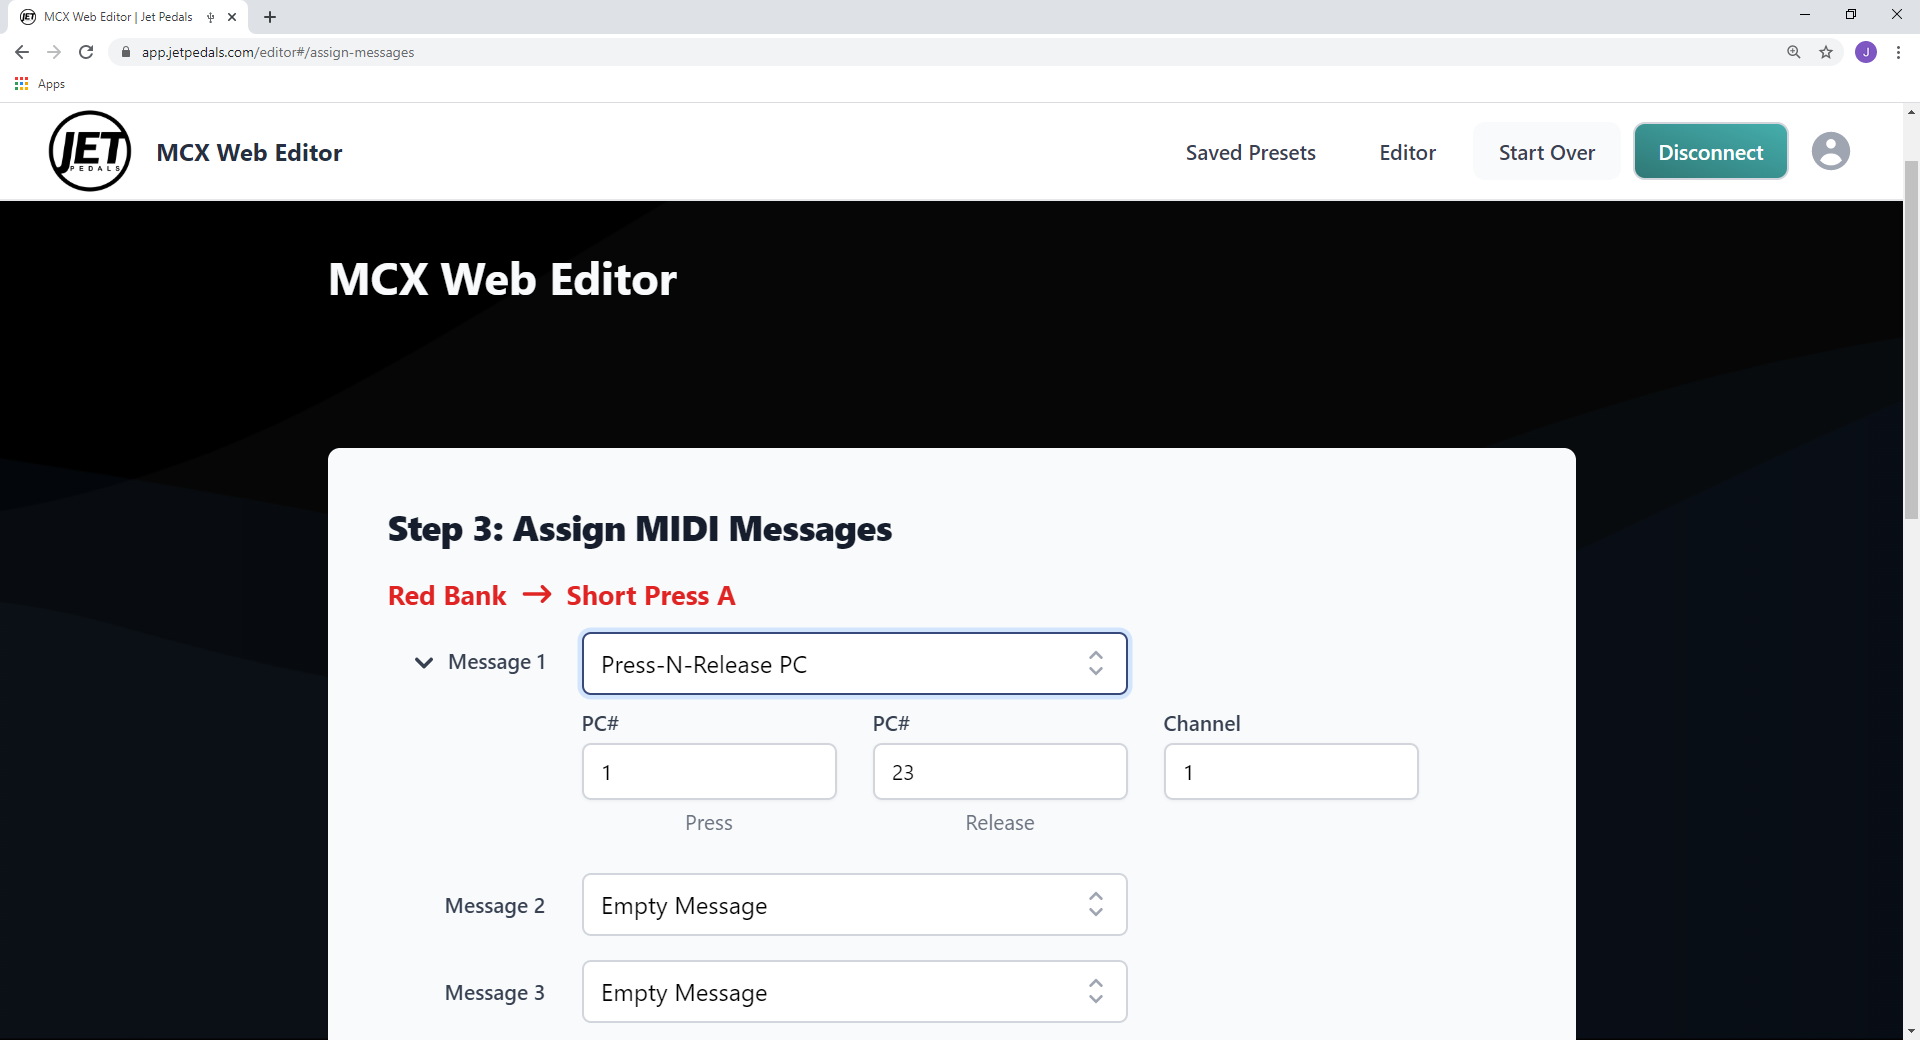
Program Change Press-N-Release
Similar to PC Toggle but operates in a momentary fashion
Enter the PC#'s and Channel for which to send your message.
This feature works in a momentary fashion, when pressing (and holding) the button associated with this Midi type, the PC# above Press will be sent. When releasing the button associated with this Midi type, the PC# above Release will be sent.
This Midi type can be used to temporarily jump to one preset, such as a preset set for large swells, and then quickly return back to your original preset.
* When using this Midi type and you expect to hold the button down for longer than a half of a second. Both the short press and long press of the same button must be assigned to this Midi type and must also use the same values, if not, the desired result may not be as expected.
Strymon Bank Change
Used to bank up or down on a Strymon pedal
This is similar to CC Press-N-Release where one value is sent on the press and another on the release of the button however to bank up or down, Strymon requires two simultaneous CC#’s to be sent when pressed and released.
To bank down, enter CC#80 and Value 0 in the slots above Press. Also enter CC#82 and Value 127 in the slot above Release.
To bank up, enter CC#81 and Value 0 in the slot above Press. Also enter CC#82 and Value 127 in the slot above Release.
* When using this Midi type and you expect to hold the button down for longer than a half of a second. Both the short press and long press of the same button must be assigned to this Midi type and must also use the same values, if not, the desired result may not be as expected.

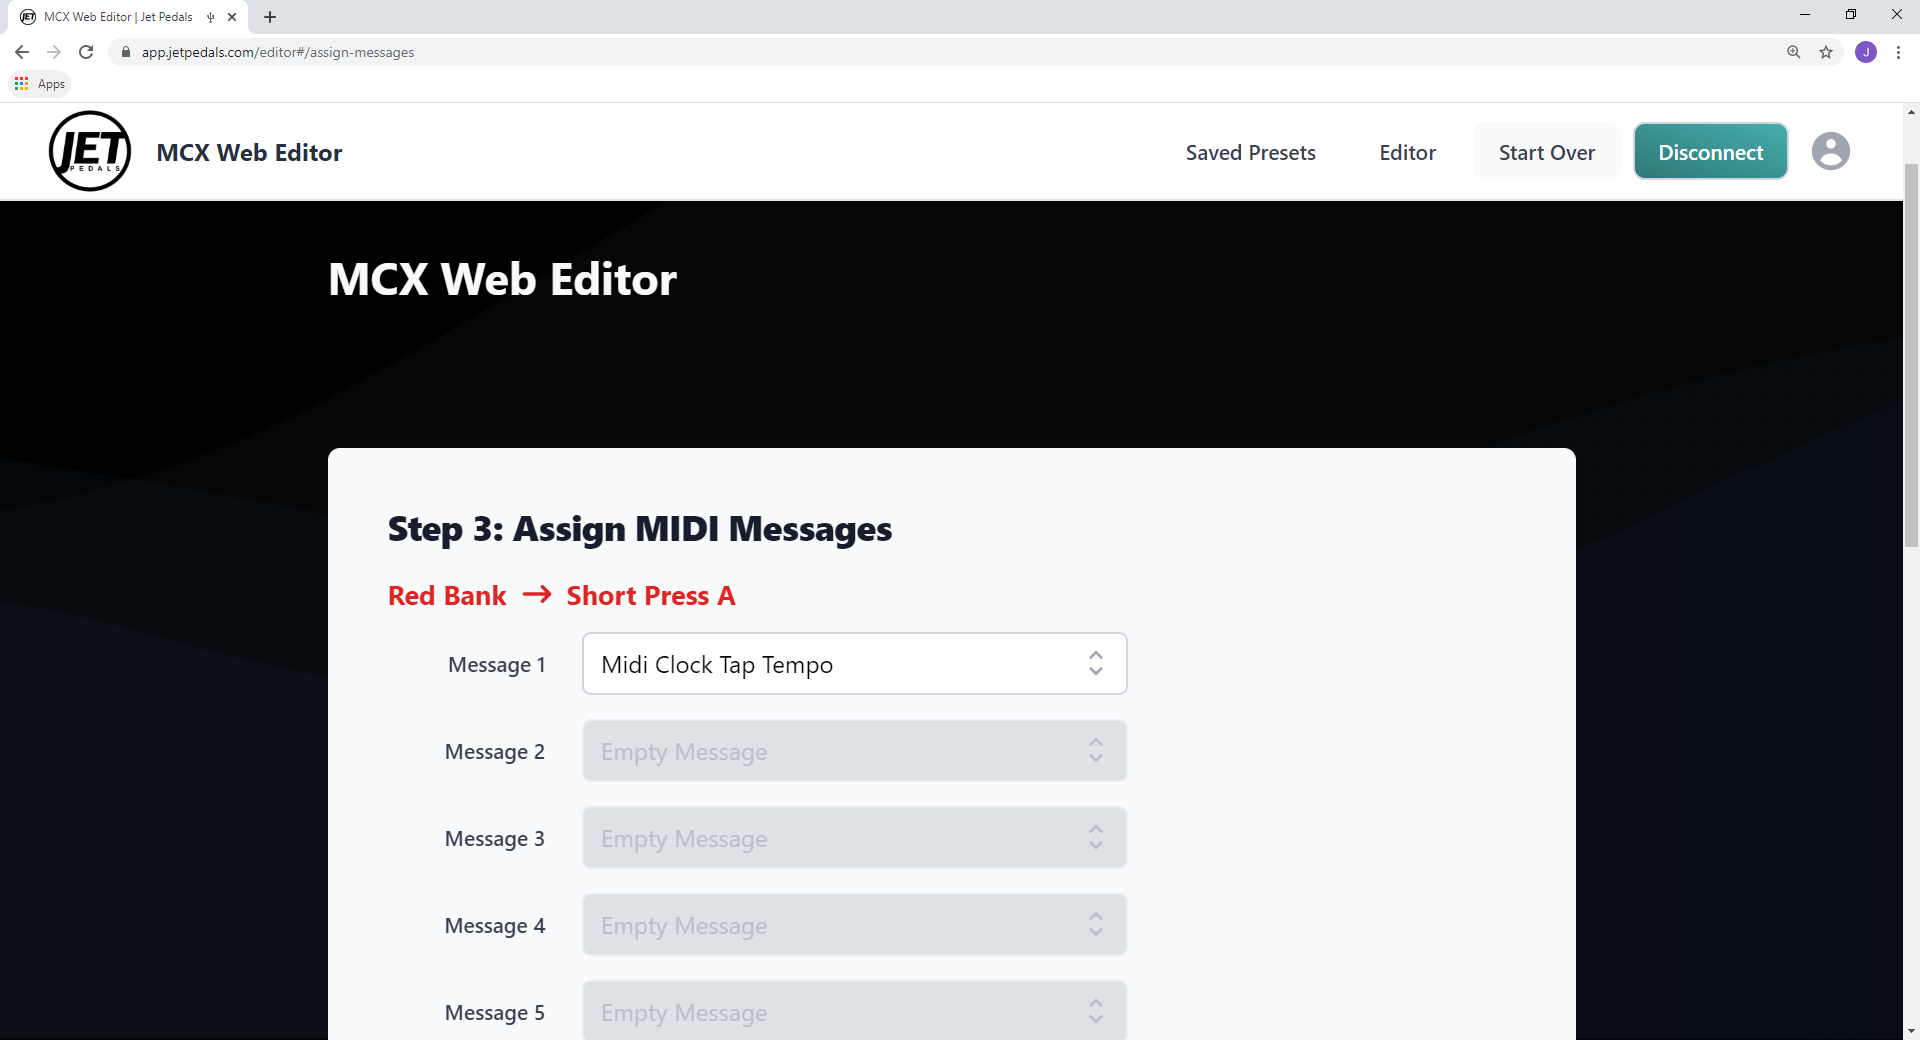
MIDI Clock Tap Tempo
Used to send tap tempo out via the midi clock
There is no data to be entered for this Midi type, once assigned to a button it will now send tap tempo information via the MIDI clock.
** MIDI Clock operates on a much higher voltage than traditional guitar signals, when sending Midi Clock you may experience a slight ticking noise in your signal chain. To reduce this noise make sure your MCX is on an isolated power supply. If you want to stop the ticking noise all together, you should assign a button to stop the Midi clock after your pedals have sync'd, or enable the "auto stop clock" feature in the global settings.
Stop MIDI Clock
Used to stop sending Midi clock information
There is no data to be entered for this Midi type, once assigned to a button it will now stop the Midi clock when pressed.

MIDI Clock BPM
Used to send a specific BPM
Sending a specific BPM via the Midi clock is easy, just enter values for Num1 and Num2. You can send BPM’s as whole numbers or fractions (see example below).
Example 1 (whole numbers): to send 72 BPM, enter 72 in the slot for Num1 and either leave Num2 empty or enter 0.
Example 2 (fractions): to send 72.8 BPM, enter 72 in the slot for Num1 and 8 in the slot for Num2
* MIDI Clock operates on a much higher voltage than traditional guitar signals, when sending Midi Clock you may experience a slight ticking noise in your signal chain. To reduce this noise make sure your MCX is on an isolated power supply. If you want to stop the ticking noise all together, you should assign a button to stop the Midi clock after your pedals have sync'd, or enable the "auto stop clock" feature in the global settings.
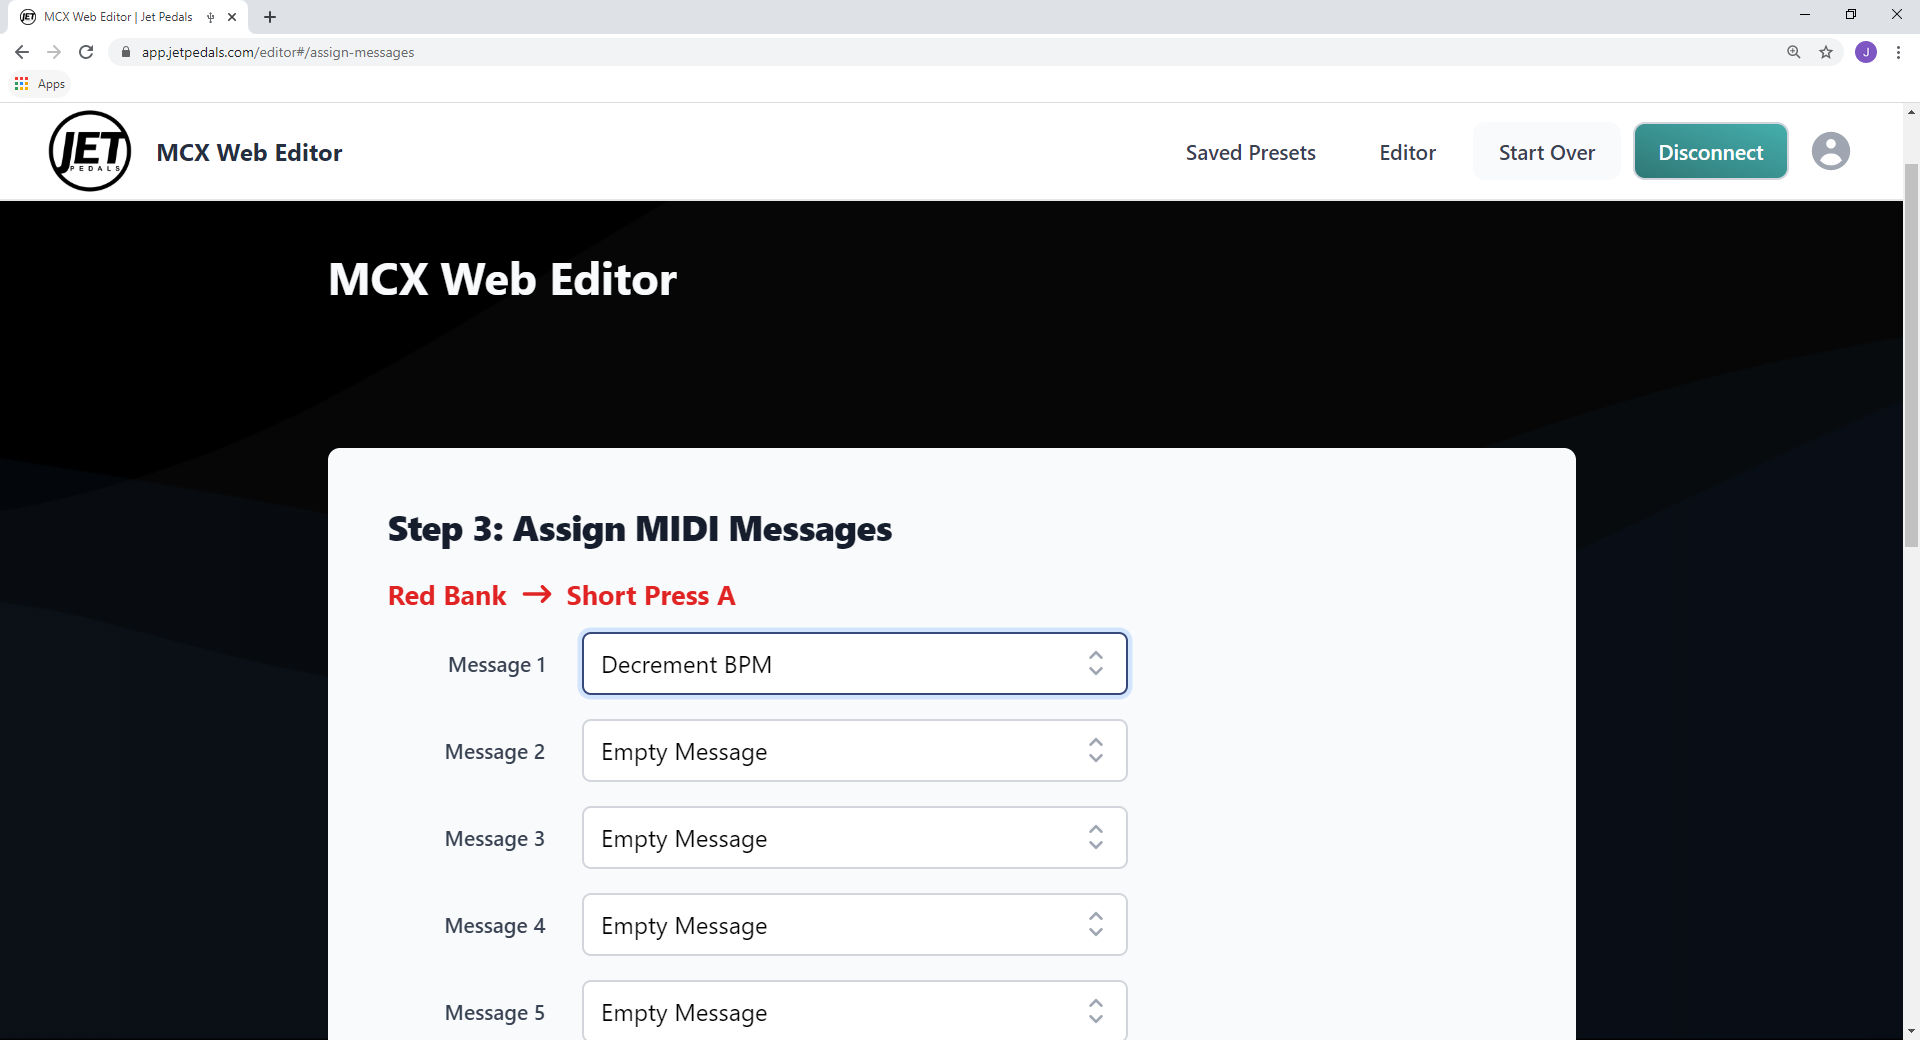
Decrement BPM
Decrement 1 BPM vial Midi clock
When this Midi type is assigned to a button it will decrement the Midi clock by one BPM each time it is pressed, you can also hold the button down to fast scroll.
* Please note that this feature will require the use of another pedals screen in order to see the BPM scrolling. Also each pedal manufacturer updates their Midi clock differently and the responsiveness/reporting of their screen will vary from manufacturer to manufacturer.
** MIDI Clock operates on a much higher voltage than traditional guitar signals, when sending Midi Clock you may experience a slight ticking noise in your signal chain. To reduce this noise make sure your MCX is on an isolated power supply. If you want to stop the ticking noise all together, you should assign a button to stop the Midi clock after your pedals have sync'd, or enable the "auto stop clock" feature in the global settings.
Increment BPM
Increment 1 BPM vial Midi clock
When this Midi type is assigned to a button it will increment the Midi clock by one BPM each time it is pressed, you can also hold the button down to fast scroll.
* Please note that this feature will require the use of another pedals screen in order to see the BPM scrolling. Also each pedal manufacturer updates their Midi clock differently and the responsiveness/reporting of their screen will vary from manufacturer to manufacturer.
** MIDI Clock operates on a much higher voltage than traditional guitar signals, when sending Midi Clock you may experience a slight ticking noise in your signal chain. To reduce this noise make sure your MCX is on an isolated power supply. If you want to stop the ticking noise all together, you should assign a button to stop the Midi clock after your pedals have sync'd, or enable the "auto stop clock" feature in the global settings.

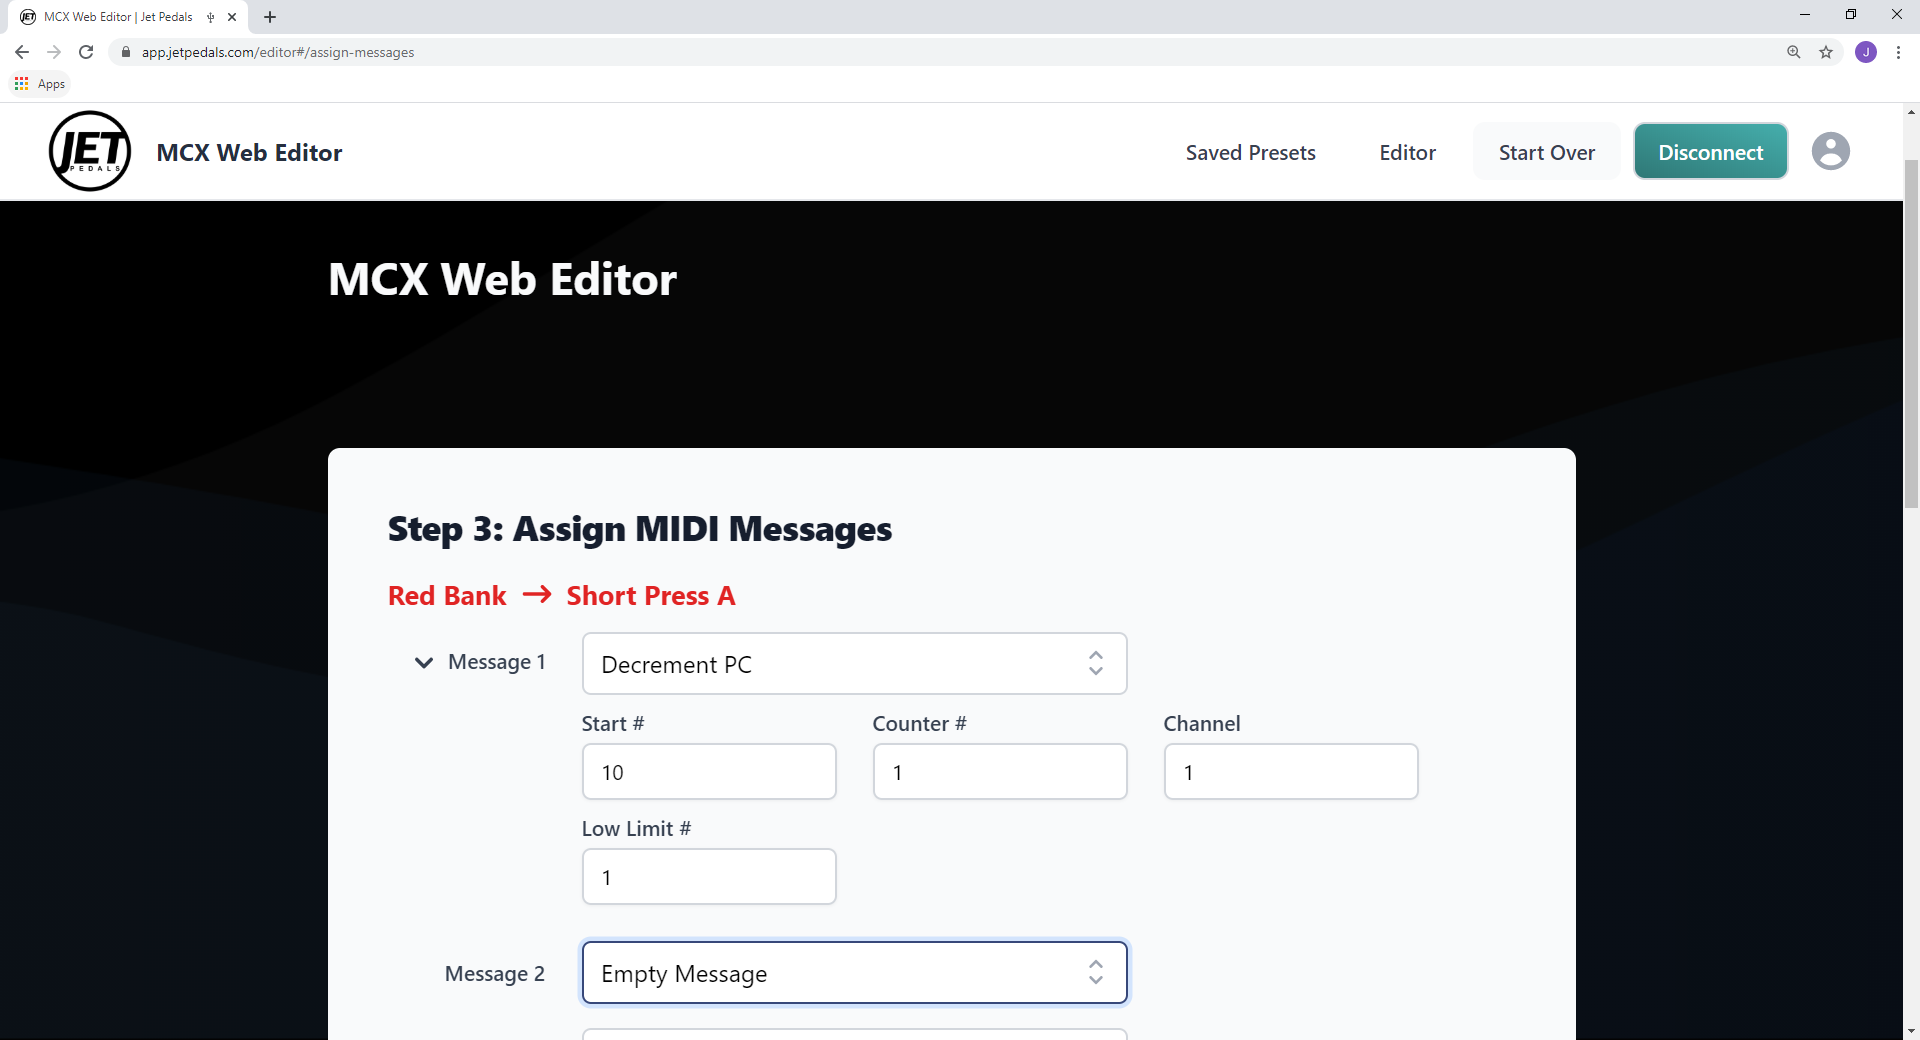
Decrement PC
Used to scroll down through a defined range of PC#’s
This message type is typically used to scroll through presets on your pedals. Simply enter the PC numbers in the slots for Start # and Low Limit #, pick a counter to be used (1 thru 4), and the channel for which to send this message to.
The Start # will be the preset called up when first pressing the button assigned to this message type. The Low Limit # is the bottom range of what you want to scroll to, once you've reached the Low Limit # the next press of the button will cycle back up to the Start # and start the process over again.
The MCX has four unique counters on board, each counter is used to keep track of where you are at in the scrolling cycle. If you need to scroll presets on different pedals, make sure to assign each pedal a unique counter number.
* Often you may want to use two different press actions to scroll up and down presets, this can be done by assigning decrement PC to one switch and Increment PC to another switch, however make sure to assign both press actions to the same counter number so the scrolling functions as desired.
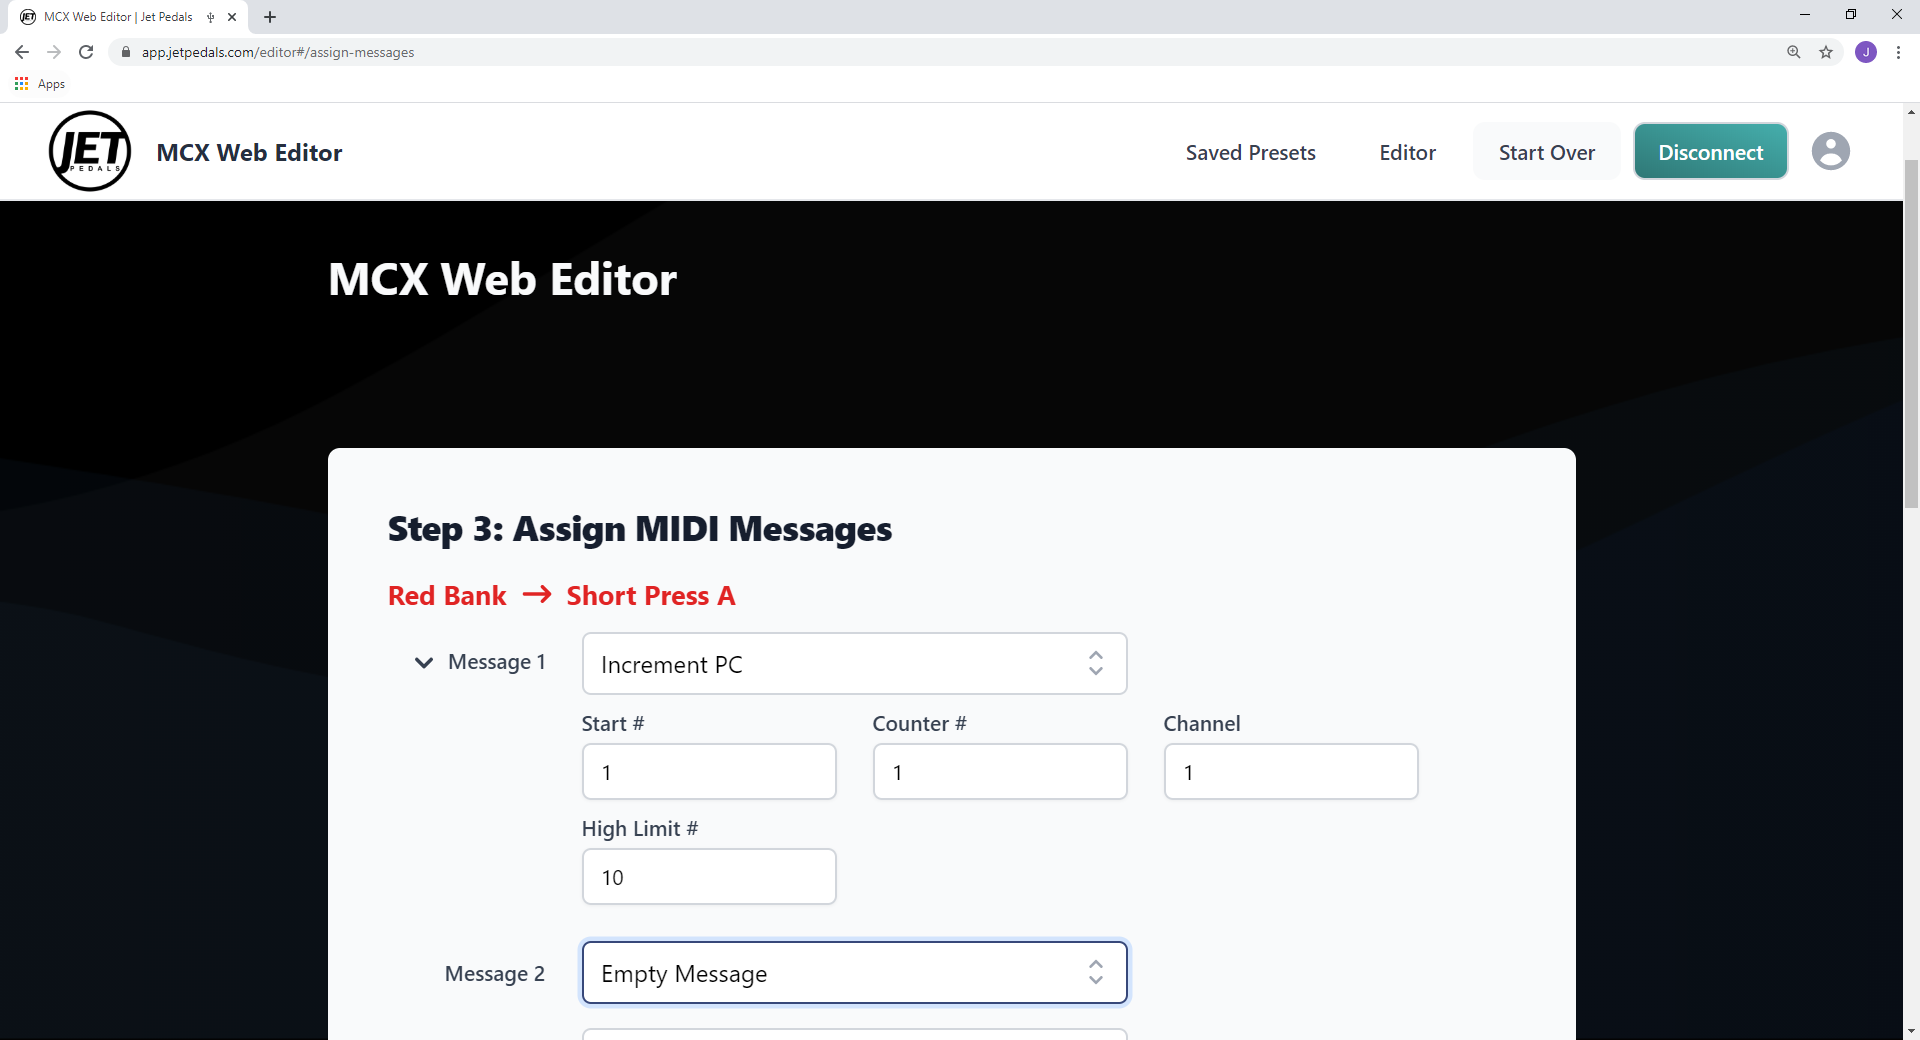
Increment PC
Used to scroll up through a defined range of PC#’s
This message type is typically used to scroll through presets on your pedals. Simply enter the PC numbers in the slots for Start # and High Limit #, pick a counter to be used (1 thru 4), and the channel for which to send this message to.
The Start # will be the preset called up when first pressing the button assigned to this message type. The High Limit # is the top range of what you want to scroll to, once you've reached the High Limit # the next press of the button will cycle back down to the Start # and start the process over again.
The MCX has four unique counters on board, each counter is used to keep track of where you are at in the scrolling cycle. If you need to scroll presets on different pedals, make sure to assign each pedal a unique counter number.
* Often you may want to use two different press actions to scroll up and down presets, this can be done by assigning decrement PC to one switch and Increment PC to another switch, however make sure to assign both press actions to the same counter number so the scrolling functions as desired.
Decrement MCX Bank Number
Used to scroll down to the previous MCX bank / color.
There is no user input required for this message type. Simply select this type from the drop down window and press the Send All to Pedal button.
*Once reaching the first bank / color on the MCX, the next press of the button assigned to the message type will cycle up to the top of the MCX and start the process all over again.

Increment MCX Bank Number
Used to scroll up to the next MCX bank / color.
There is no user input required for this message type. Simply select this type from the drop down window and press the Send All to Pedal button.
*Once reaching the last bank / color on the MCX, the next press of the button assigned to the message type will cycle down to the bottom of the MCX and start the process all over again.

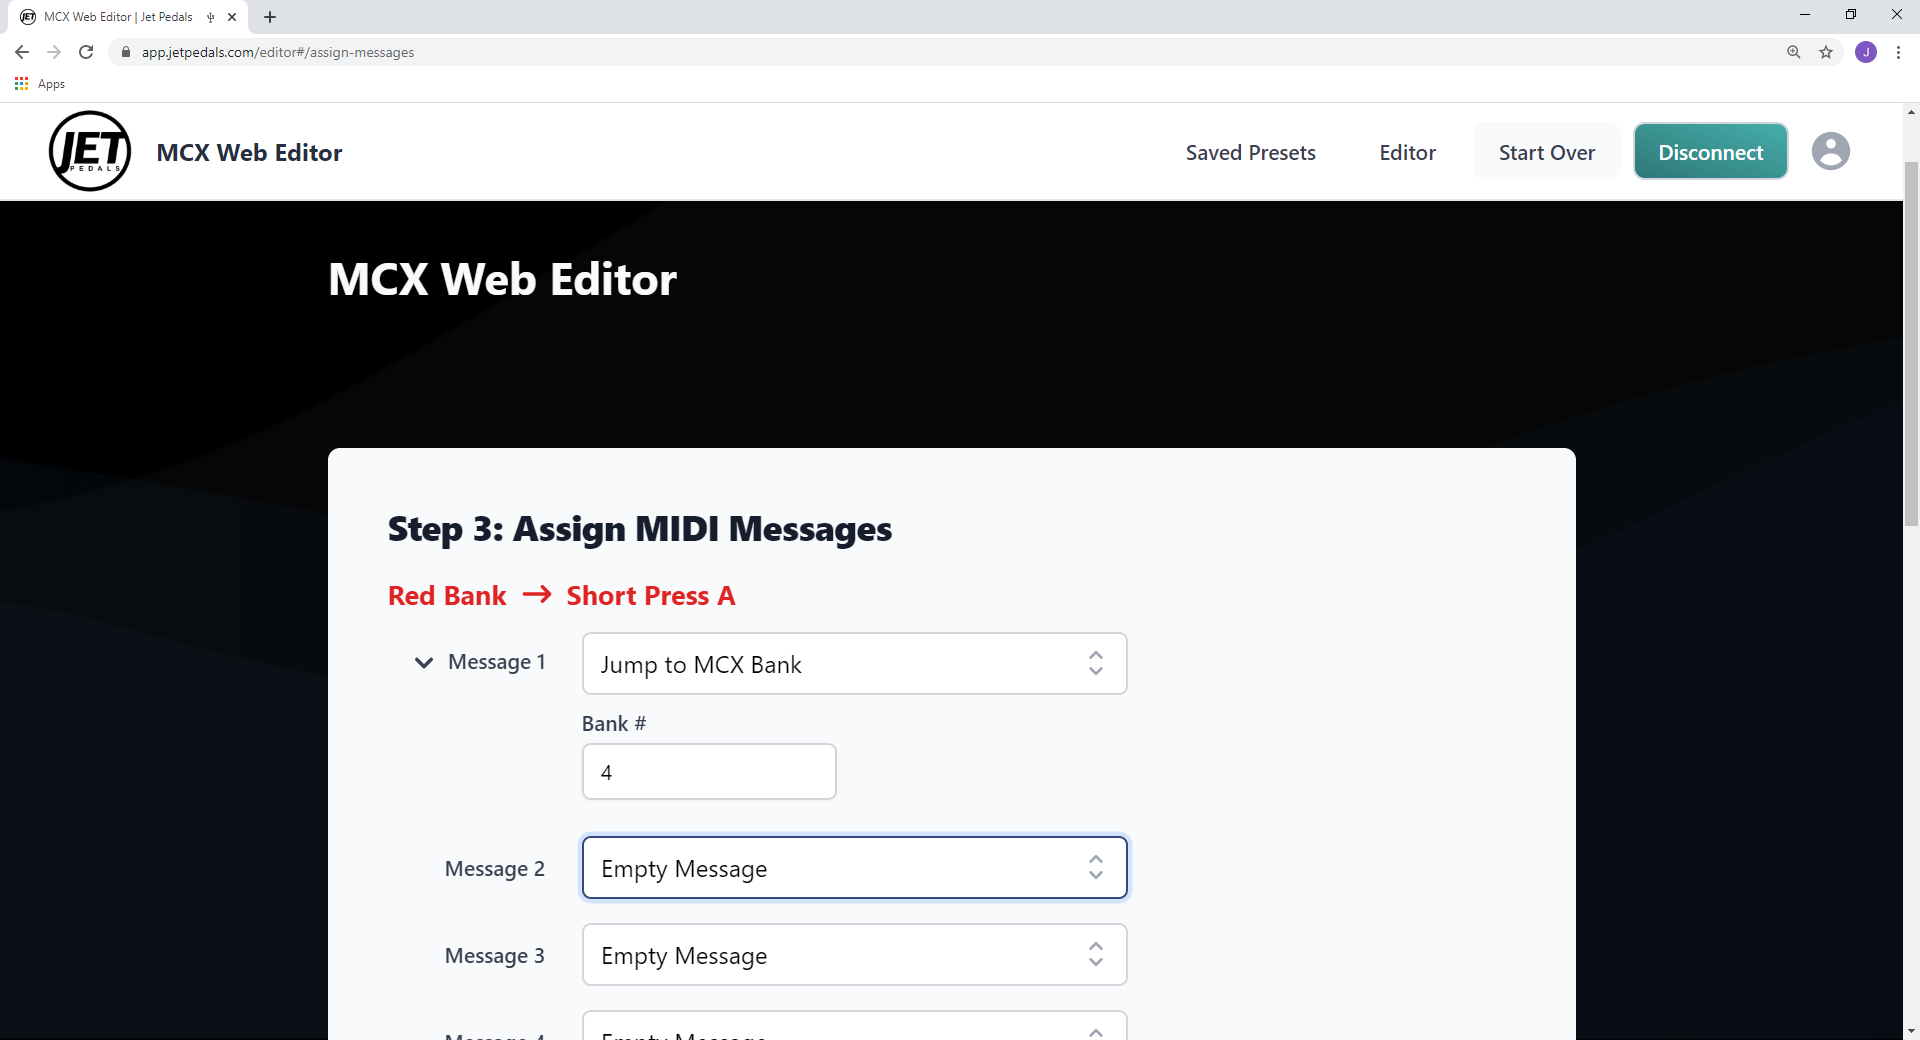
Jump to MCX Bank
This message type is similar to the Decrement and Increment MCX Bank Number, however you can jump to any bank you wish, even if you've setup less than 8 banks to scroll thru in the global settings.
Simply select the bank number and press the Send All to Pedal button to assign this type to any press action. See the list of bank numbers and their associated LED color below:
-
- Red
- Green
- Blue
- Yellow
- Purple (UV)
- Cyan (Sky Blue)
- White
- Orange
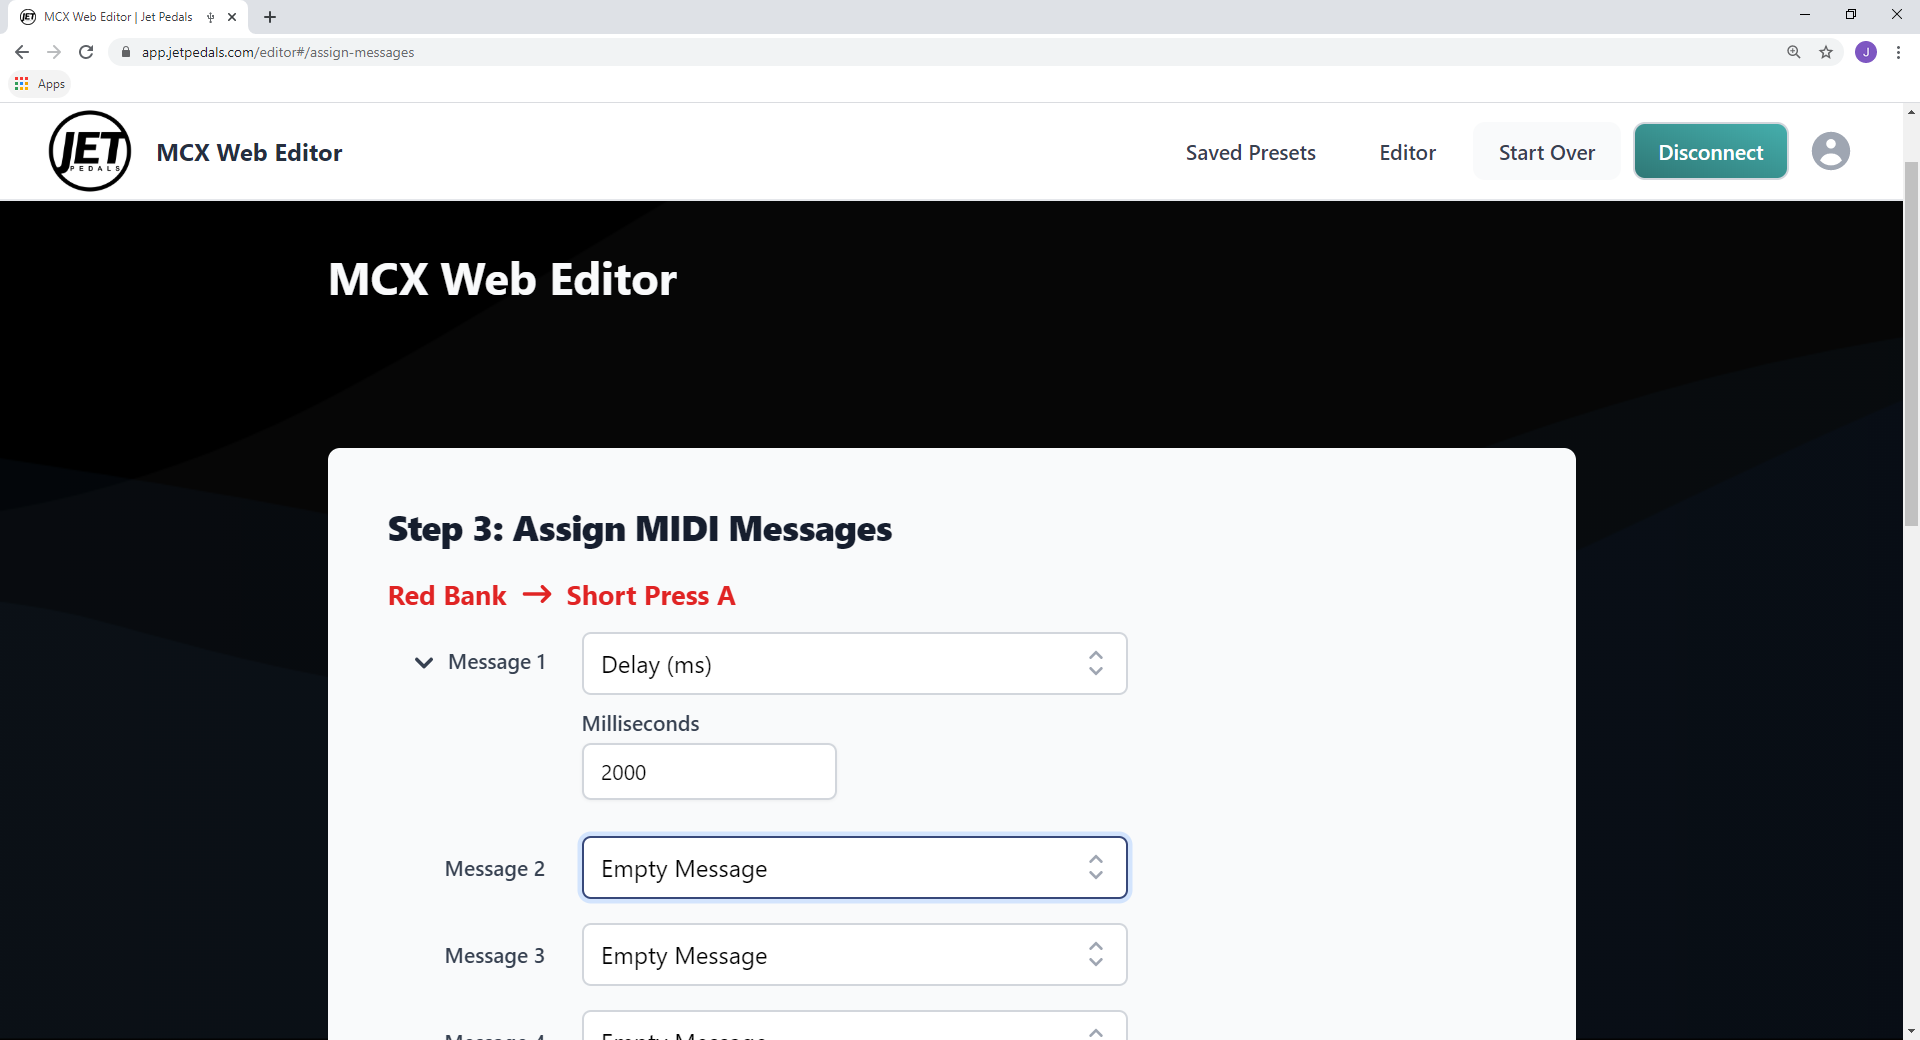
Delay (ms)
Adds a simple delay between messages, delay ranges from 1 millisecond to 10 seconds
This message is useful when trying to control several parameters for one pedal and the manufacturer may need you to slow down the time between messages in order accurately process each message.
* 1000 milliseconds equals 1 second